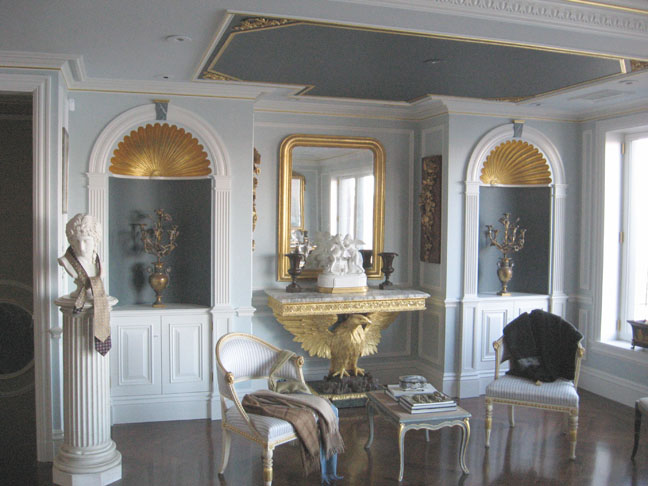
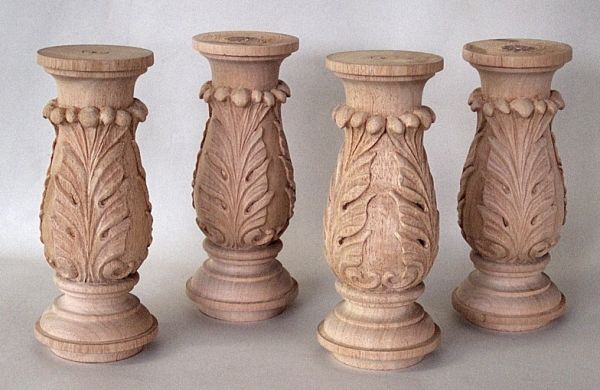
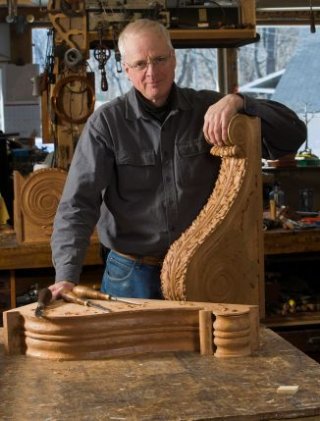
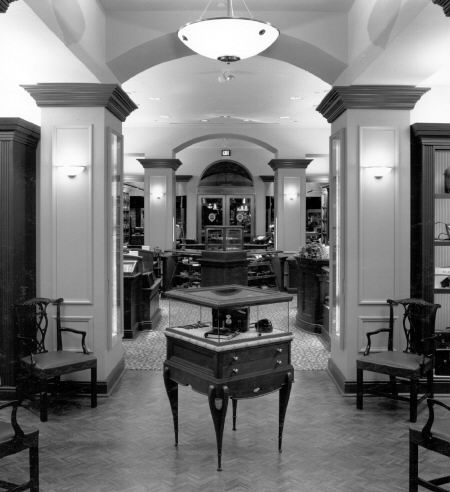
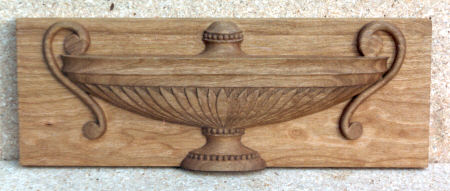
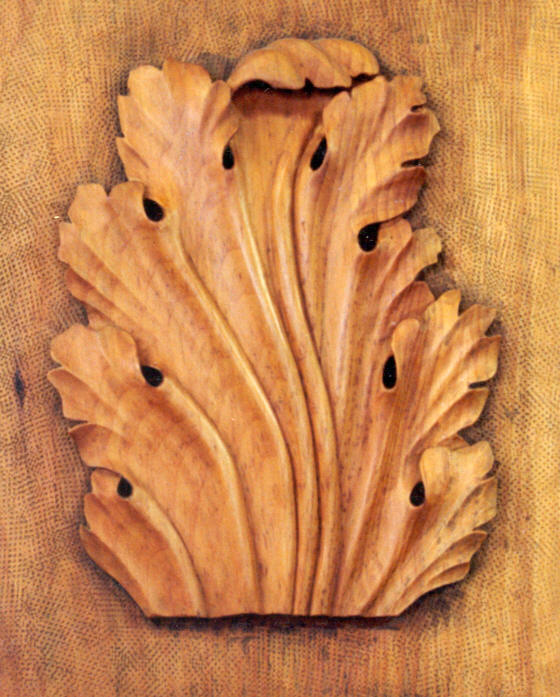
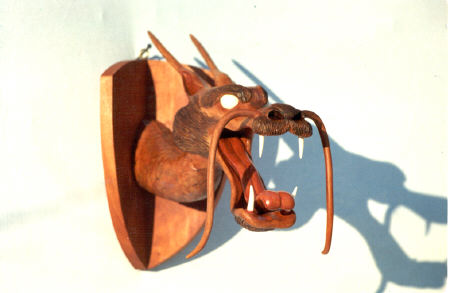
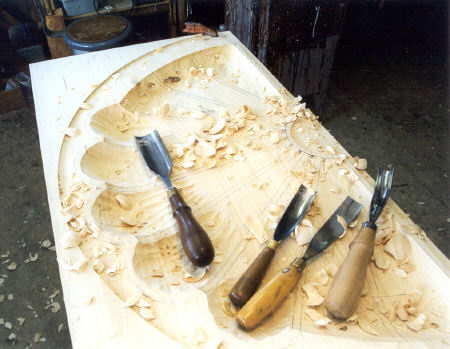
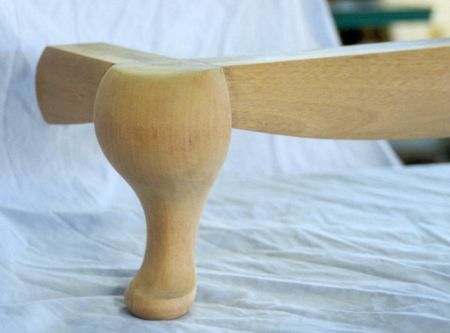
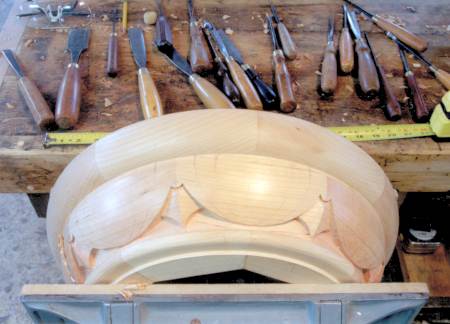
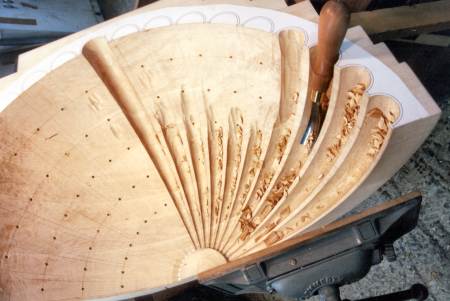
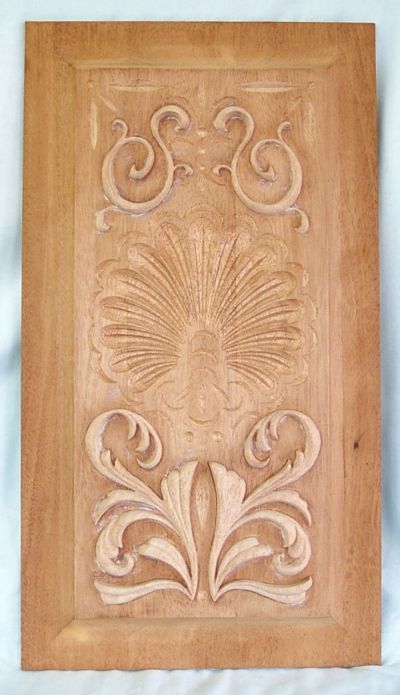
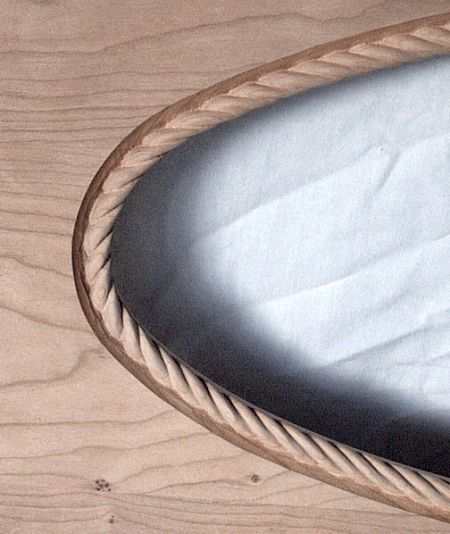
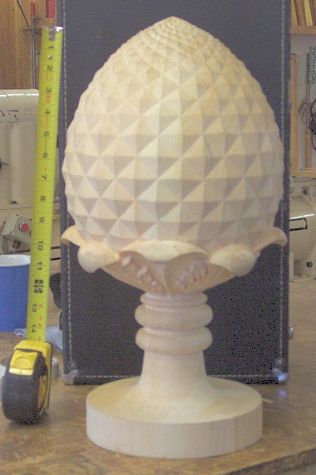
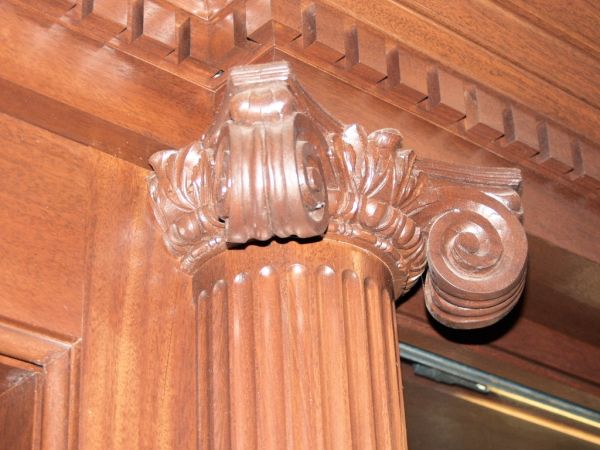
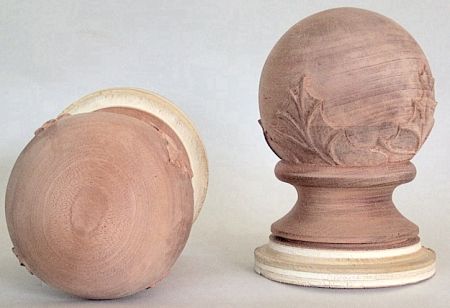
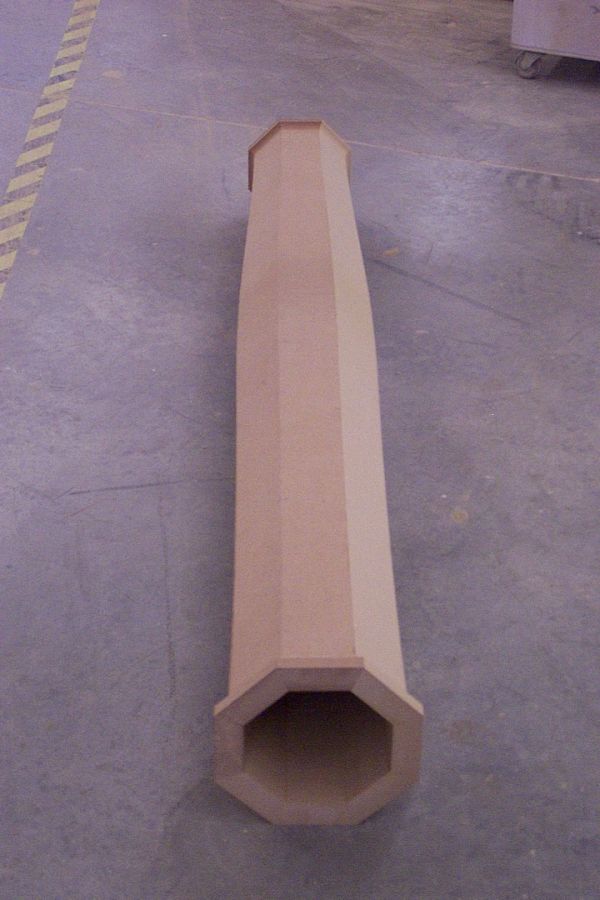
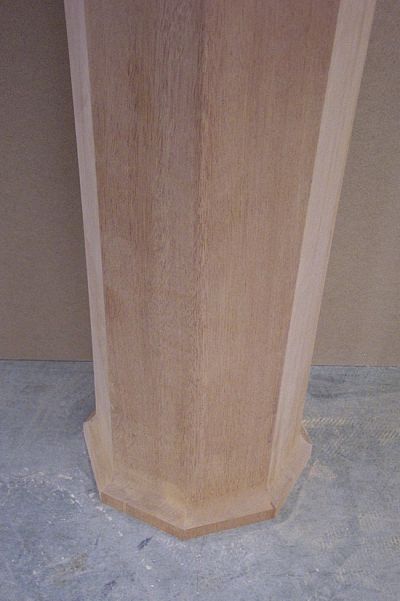
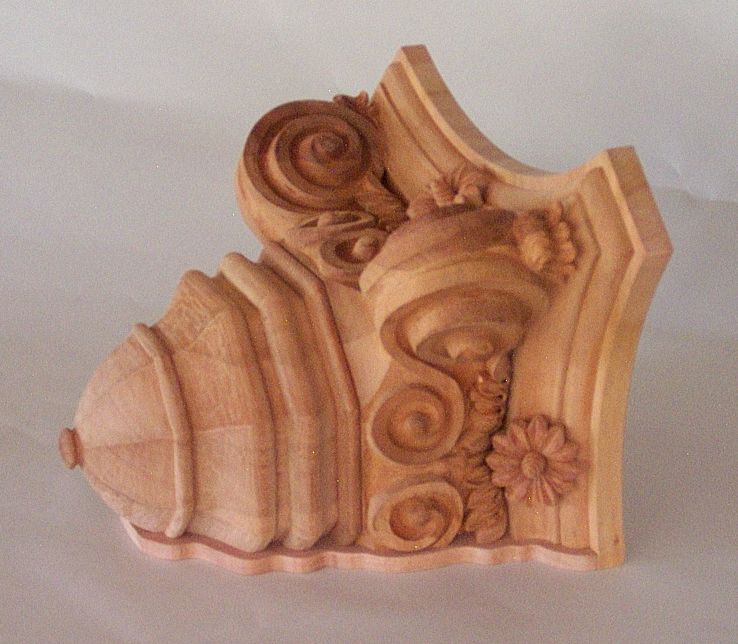
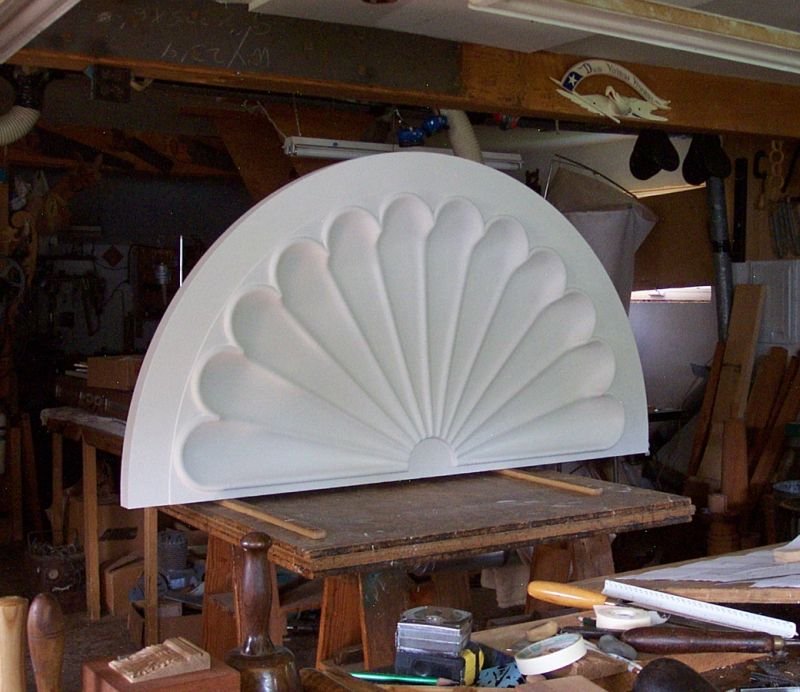
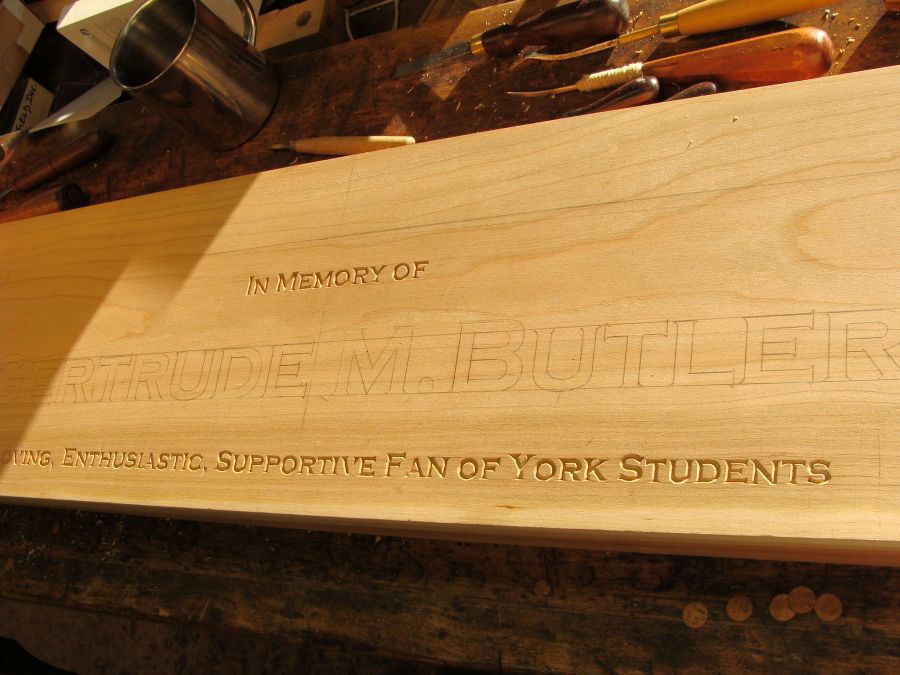
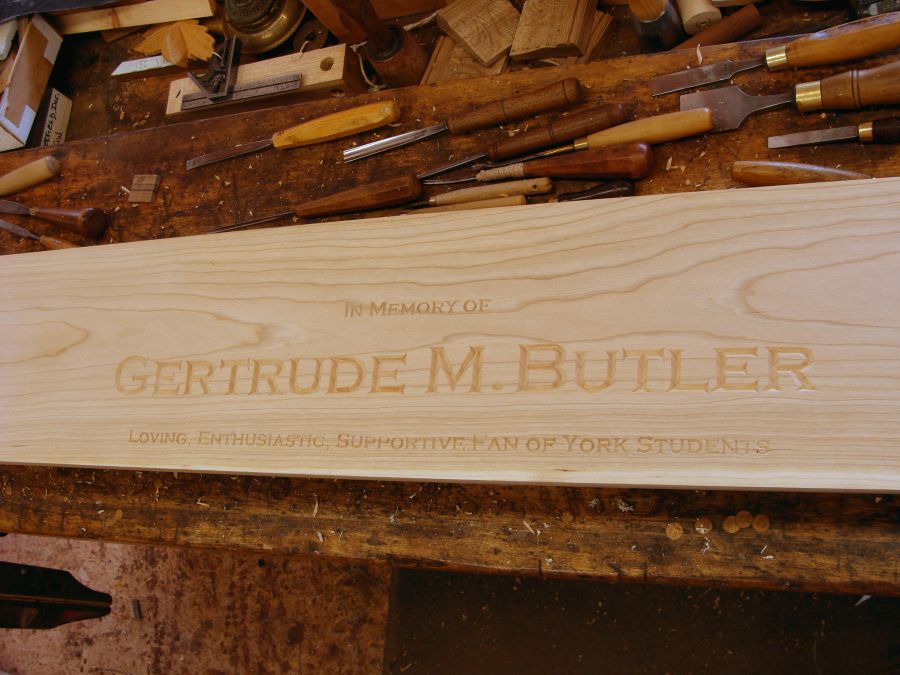
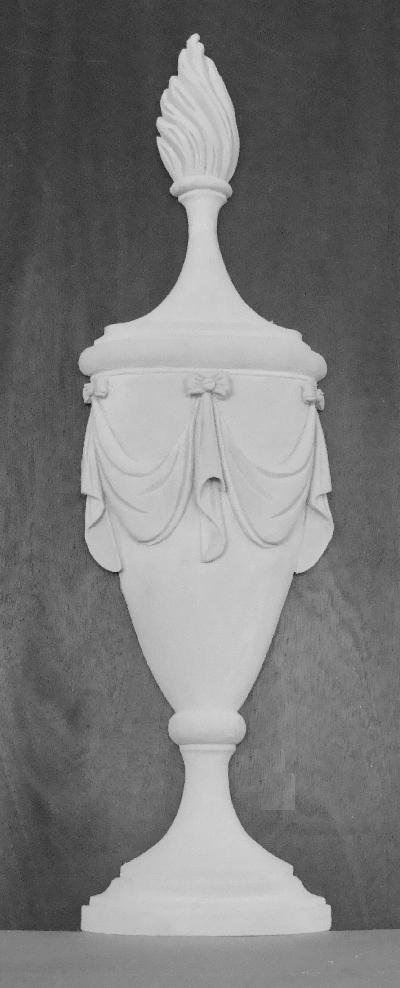
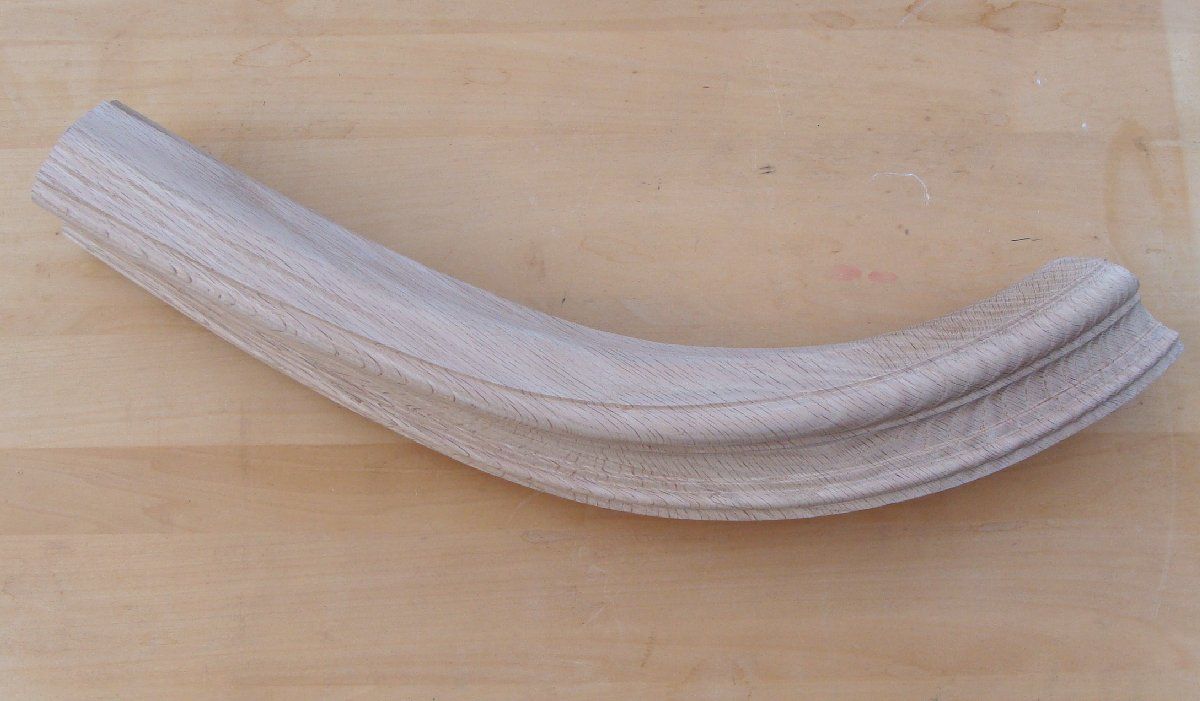
Carving
Home ] [ Carving ] Signs ] Pattern Making ] Turning ] Restoration ] National Archives ] Bagpipes & Bellows ] Sculpture ] Bellamy Eagles ]


I am a hand woodcarver who specializes in all manner of decorative elements and would be happy to entertain any carving projects you might be considering. Most all of my work comes from the drawings of architects, interior designers or the client's own ideas. These hand carvings can be simple and straightforward or as wildly complicated as the client wishes. More recent projects are at the bottom. 


Mantle brackets.jpg (37211 bytes) Mantle bracket on bench.jpg (45587 bytes) Mantle bracket, large rosette.jpg (46962 bytes) Mantle bracket, scroll.jpg (47132 bytes) Mantle bracket sm rosette 4-4.jpg (29145 bytes) Fireplace_Centerpiece.jpg (29953 bytes)
 
30 inch tall Honduras mahogany mantle brackets.
Black and white picture is part of the centerpiece for the same mantle. Please note the dime for scale.


Carey brackets 4-4.jpg (41183 bytes) Mantle.jpg (23905 bytes) Leaf festoon centerpiece.jpg (8087 bytes) Mantle bracket application.jpg (62396 bytes) Carey brackets, the end 4-4.jpg (42888 bytes)
 
The first newspaper clip tells where the mantle brackets were installed.
The first picture shows the installation of these brackets and the three carved panels on the frieze above them.
The middle picture shows the centerpiece with post horn, crossed swords, and leaf festoons. The larger side panel festoons are about the size of a 6" long, skinny  banana. 
The last picture features one of the carved brackets and a look at one of the carved leaf festoons on the panel above.
The last newspaper clip reveals the fate of these carvings.


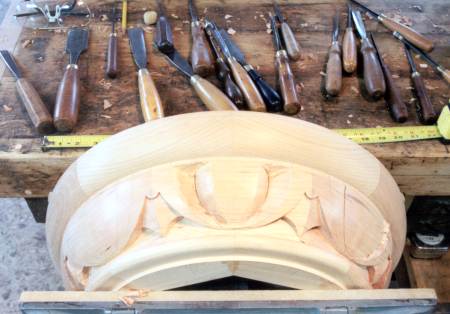
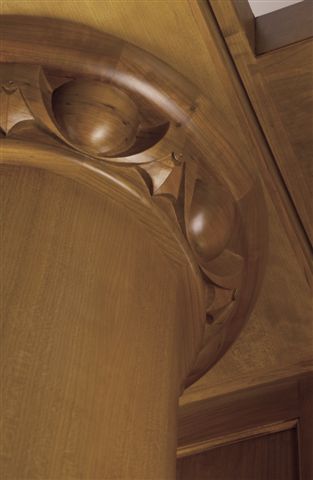
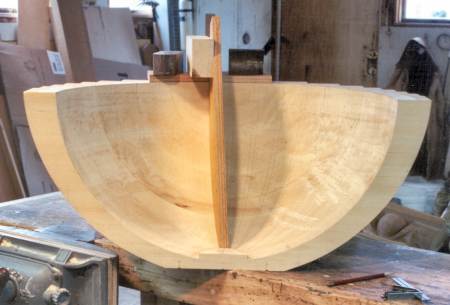
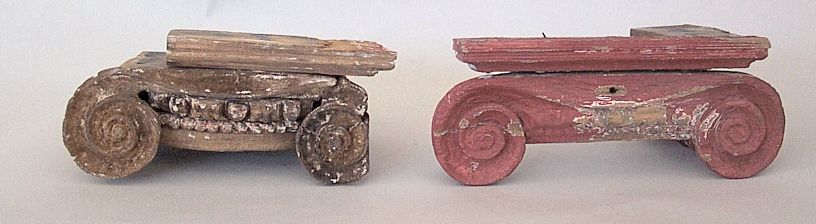
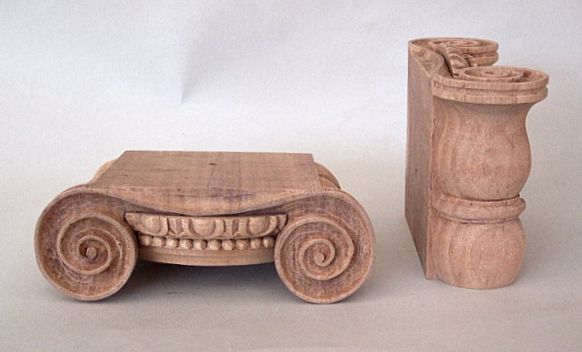
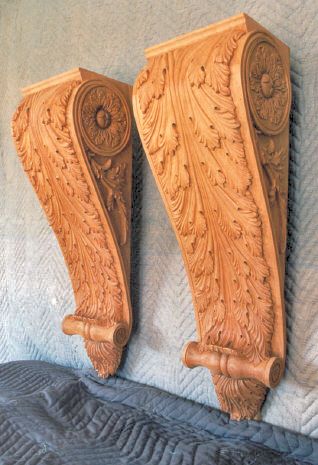
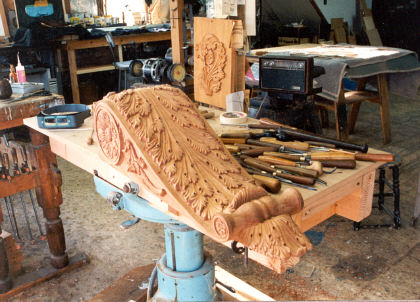
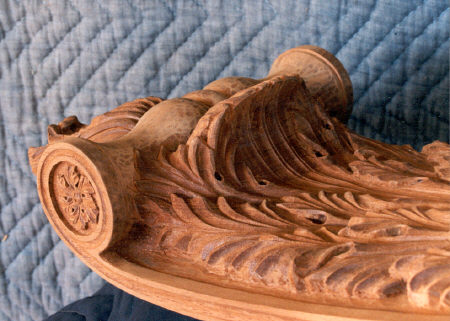
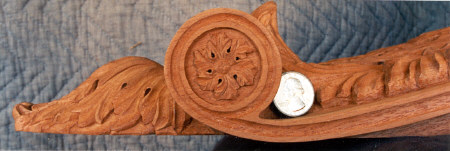
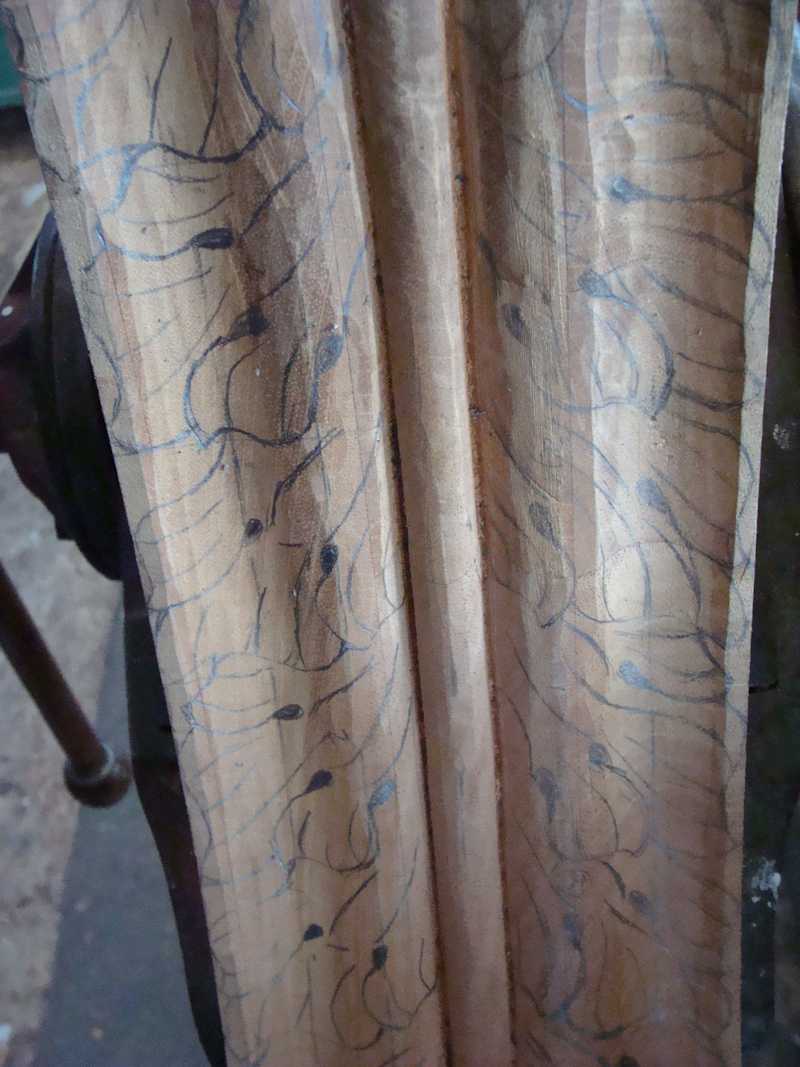
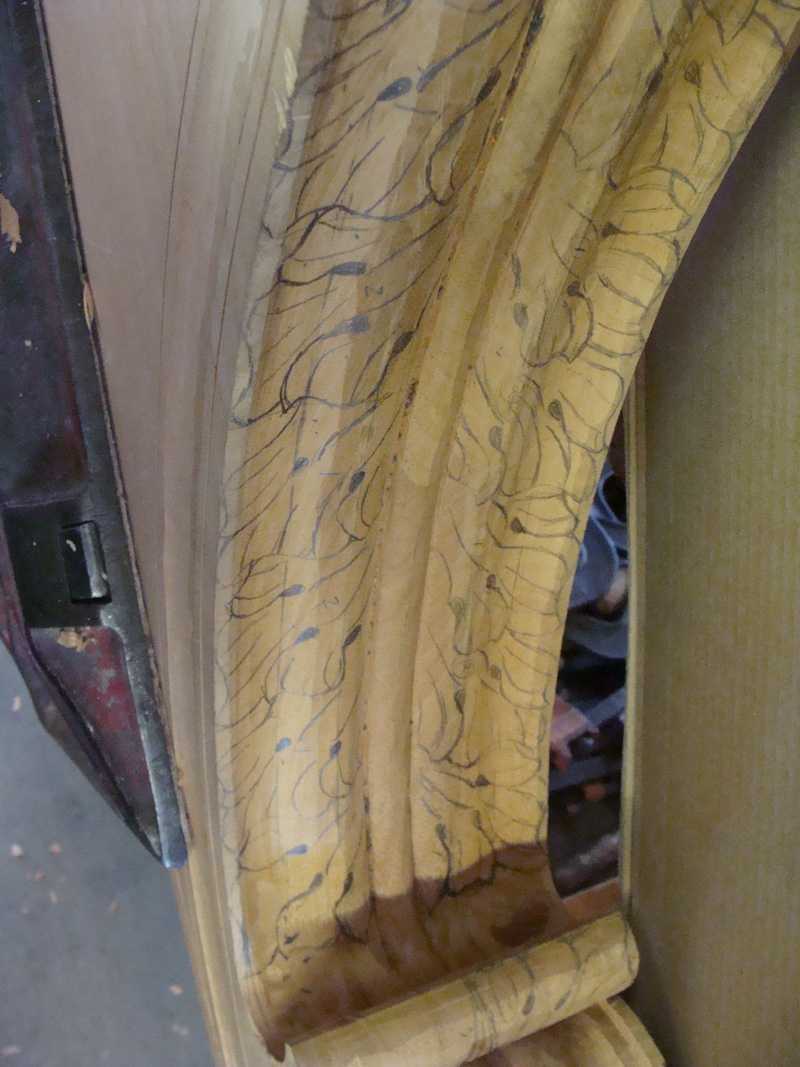
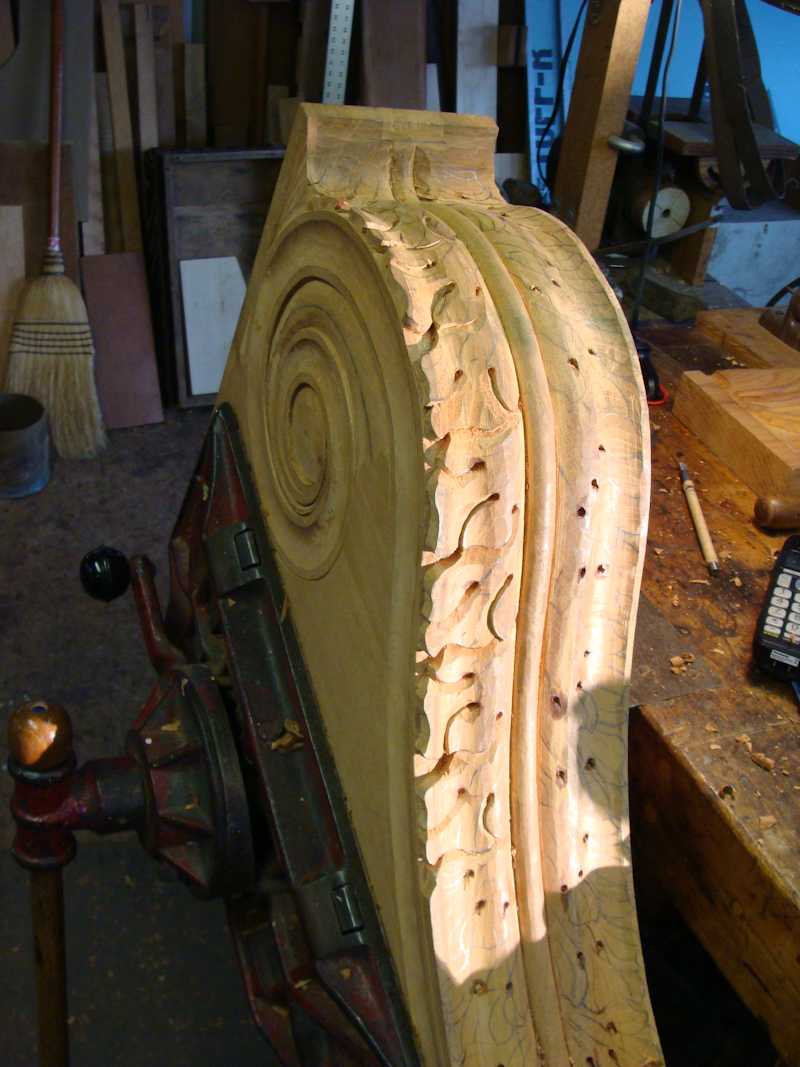
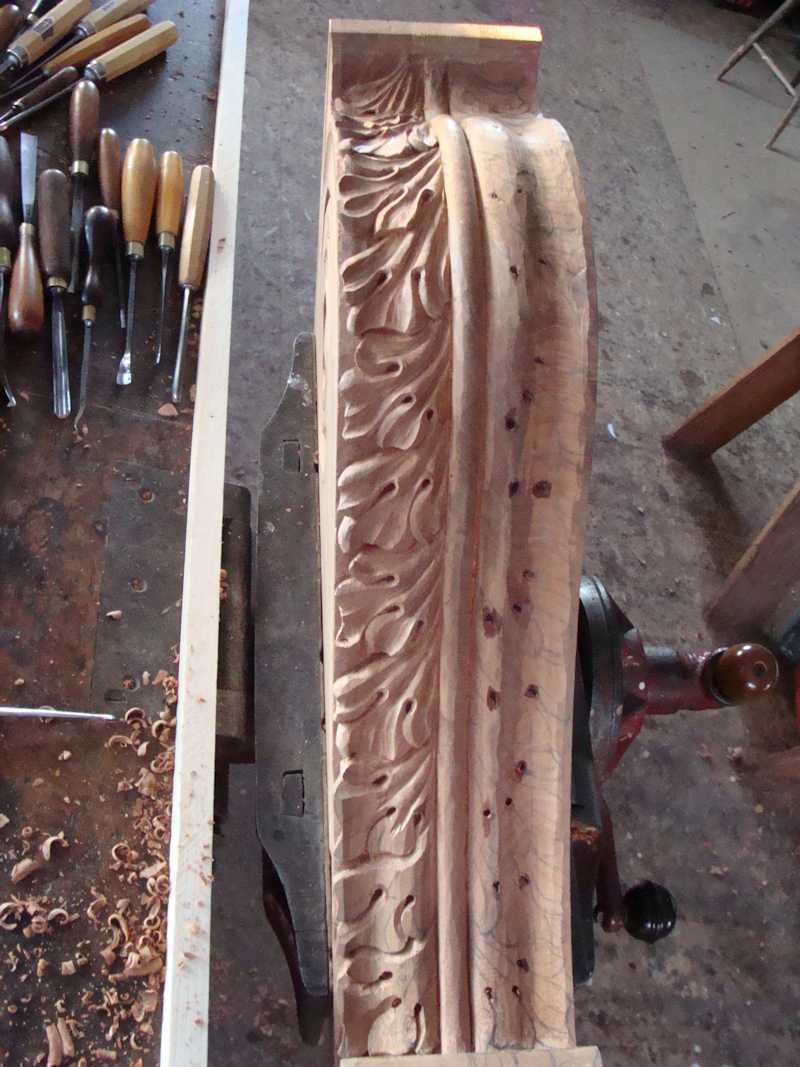
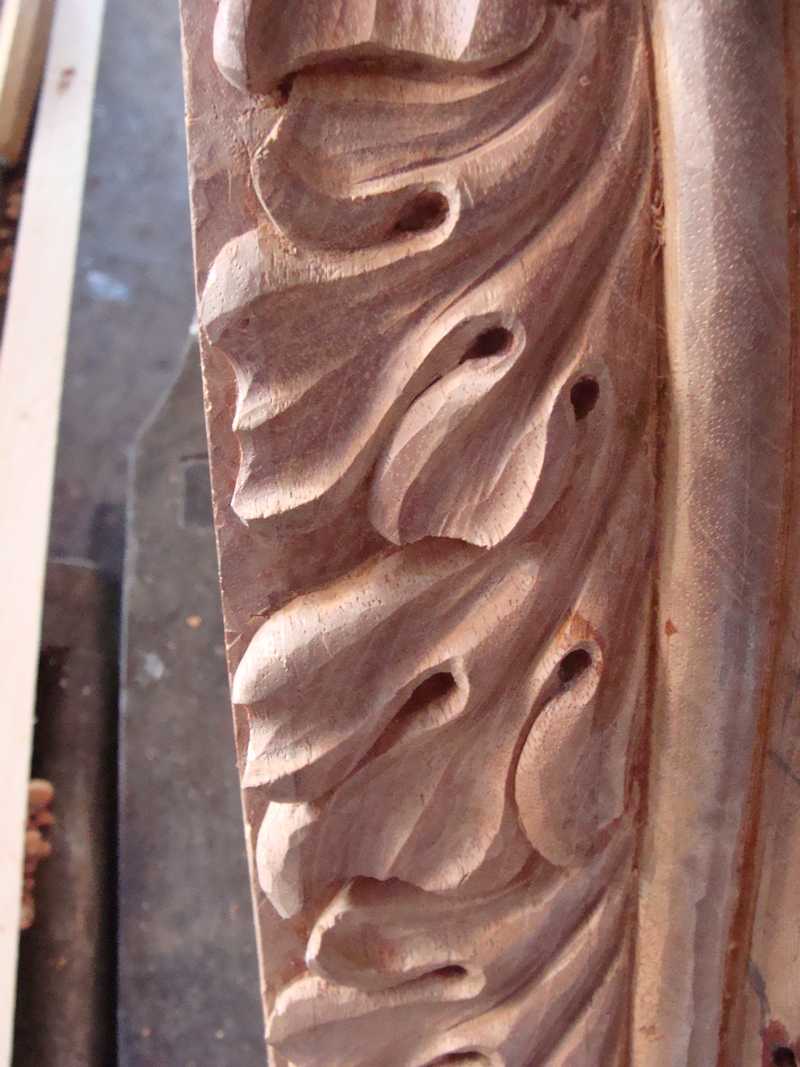
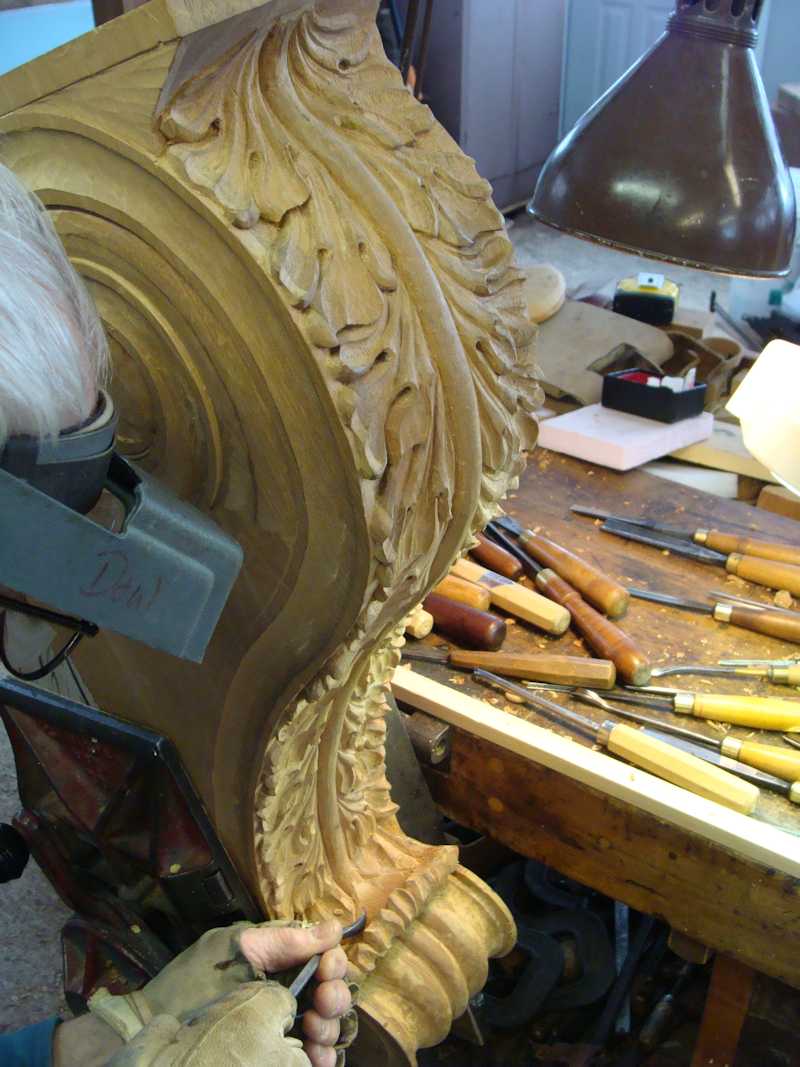
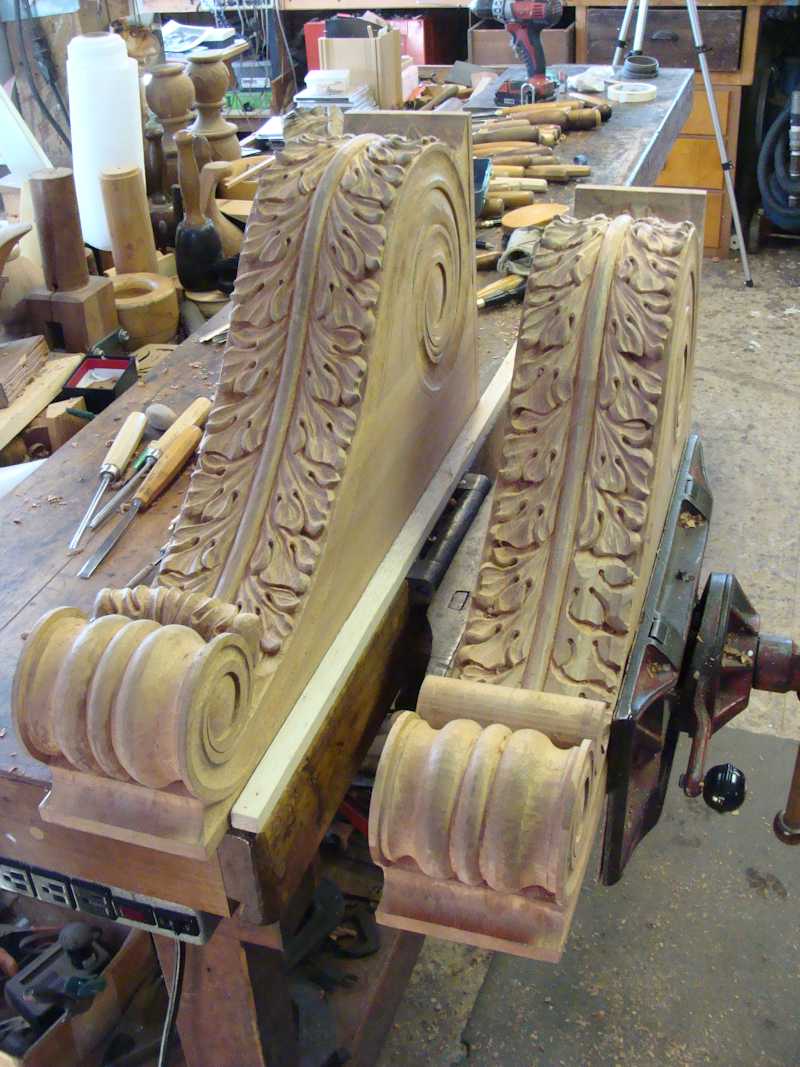
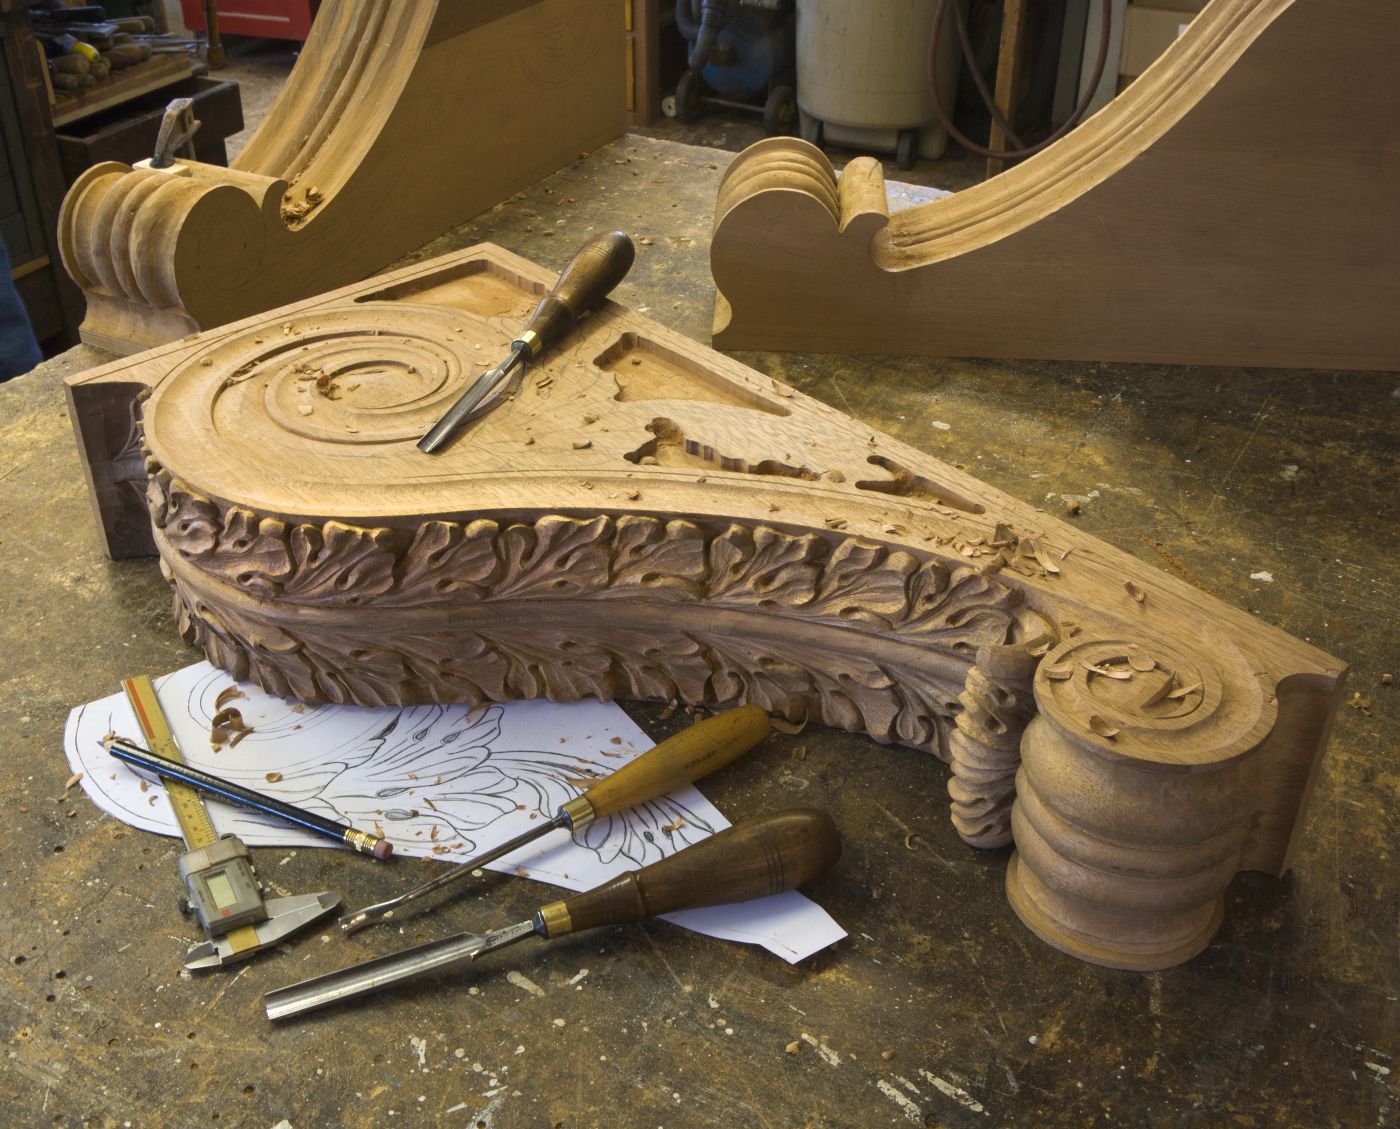
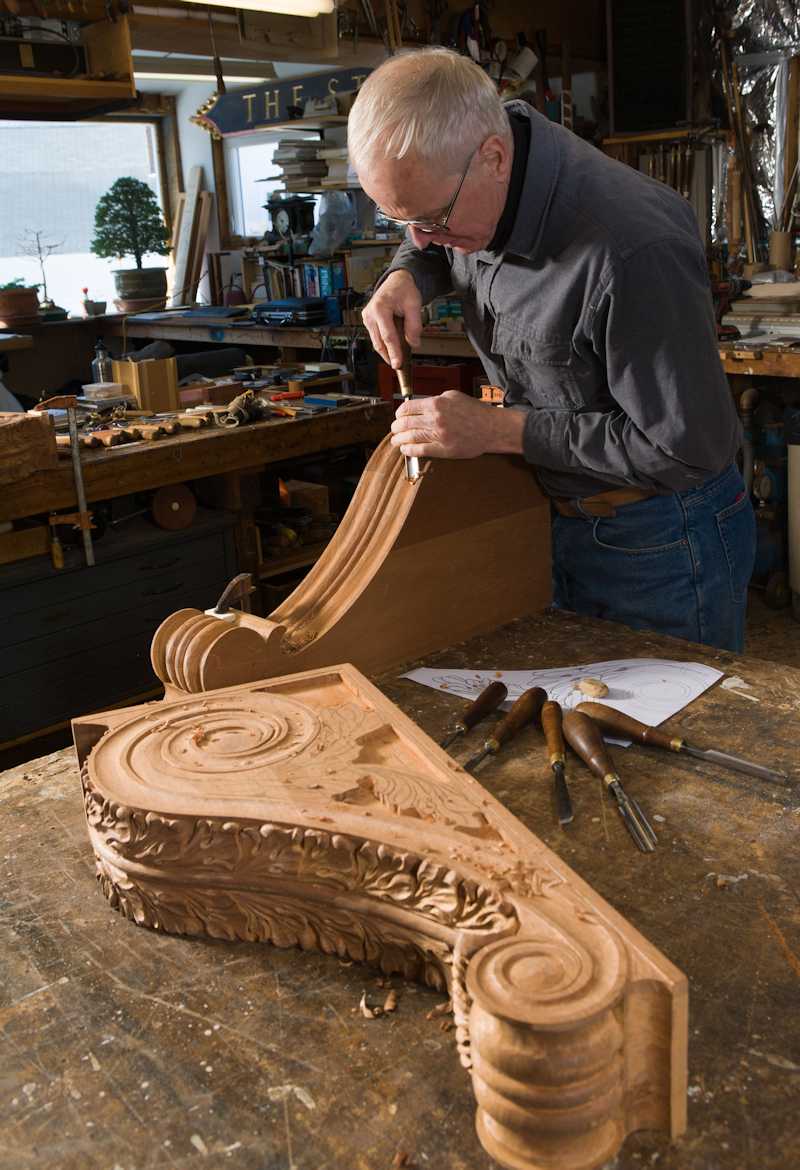
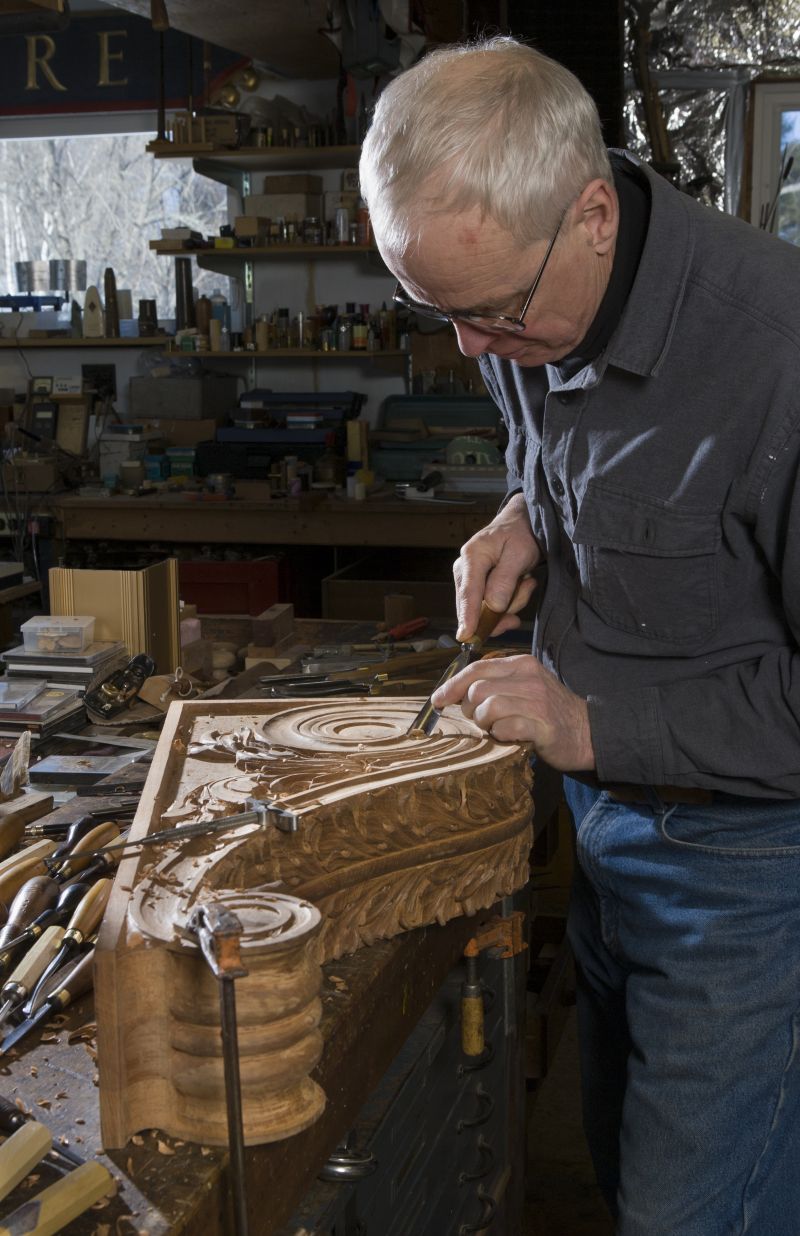
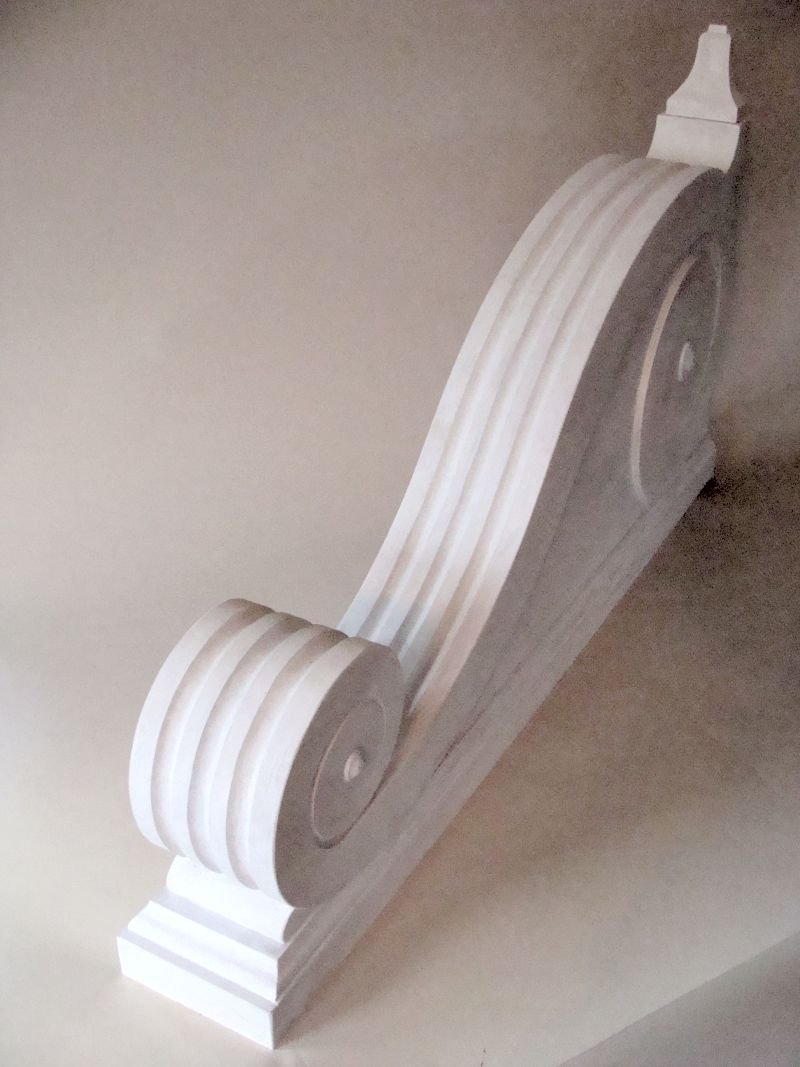
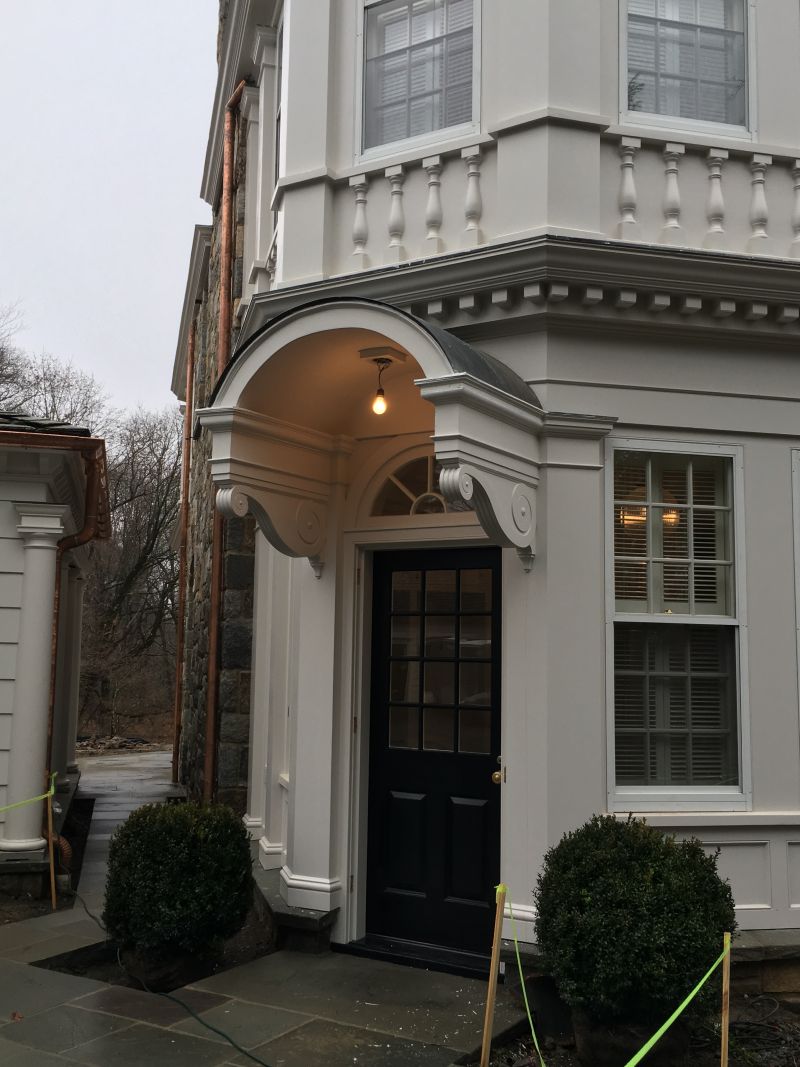
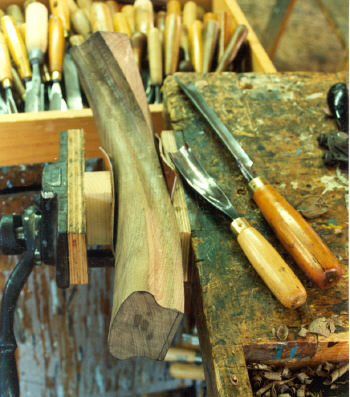
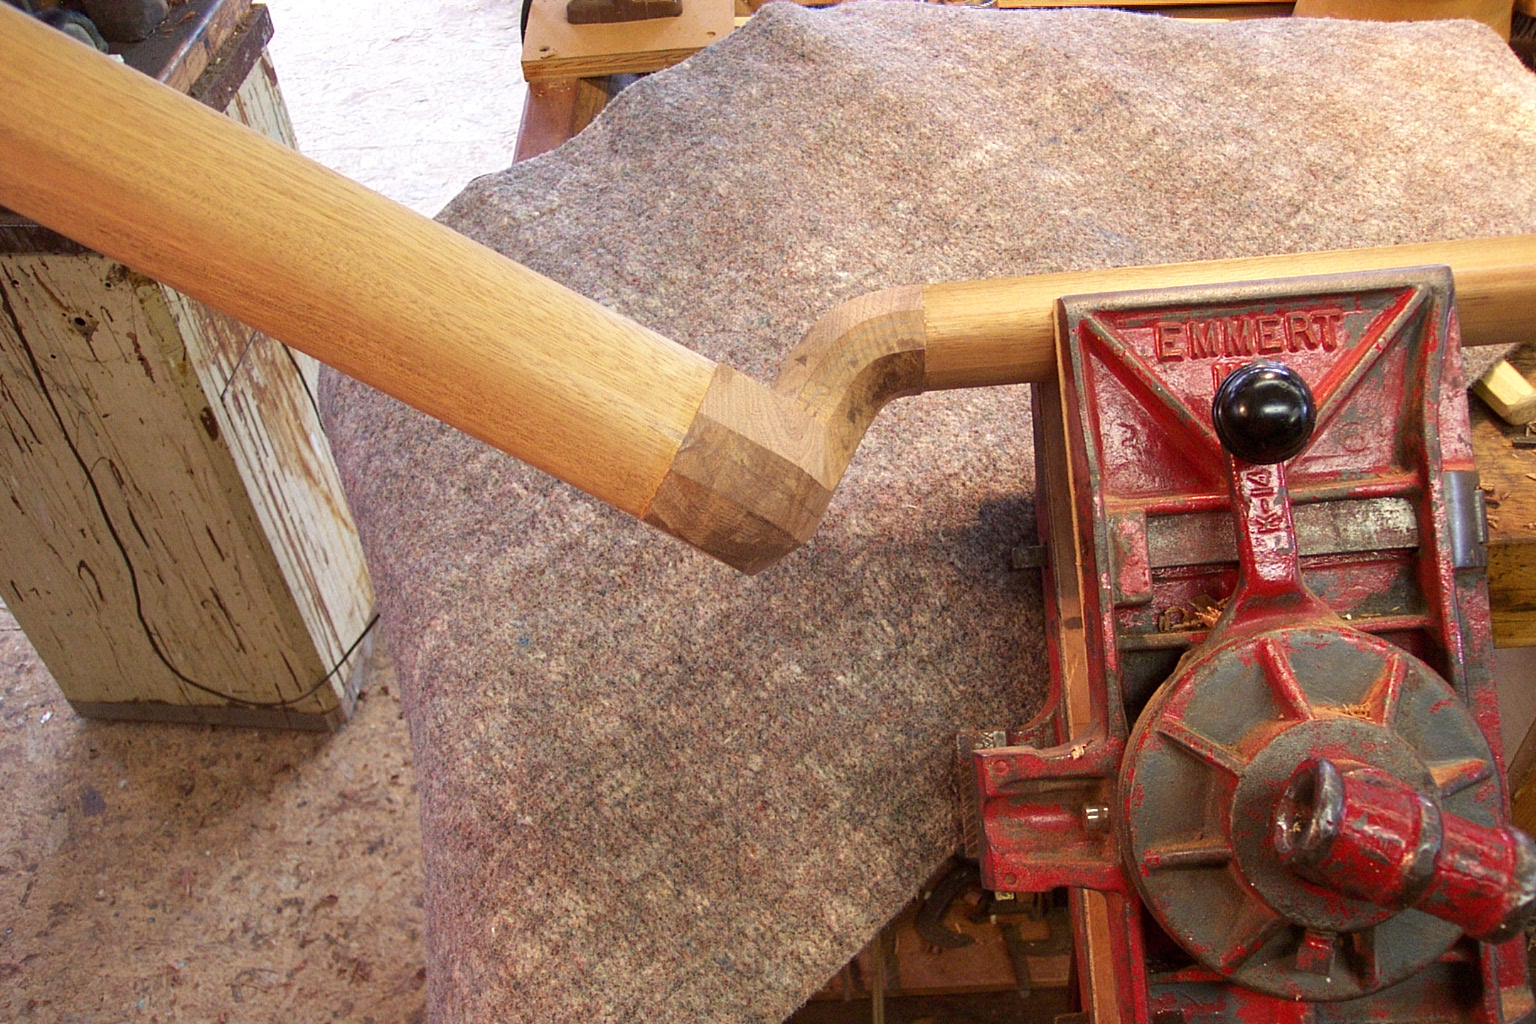
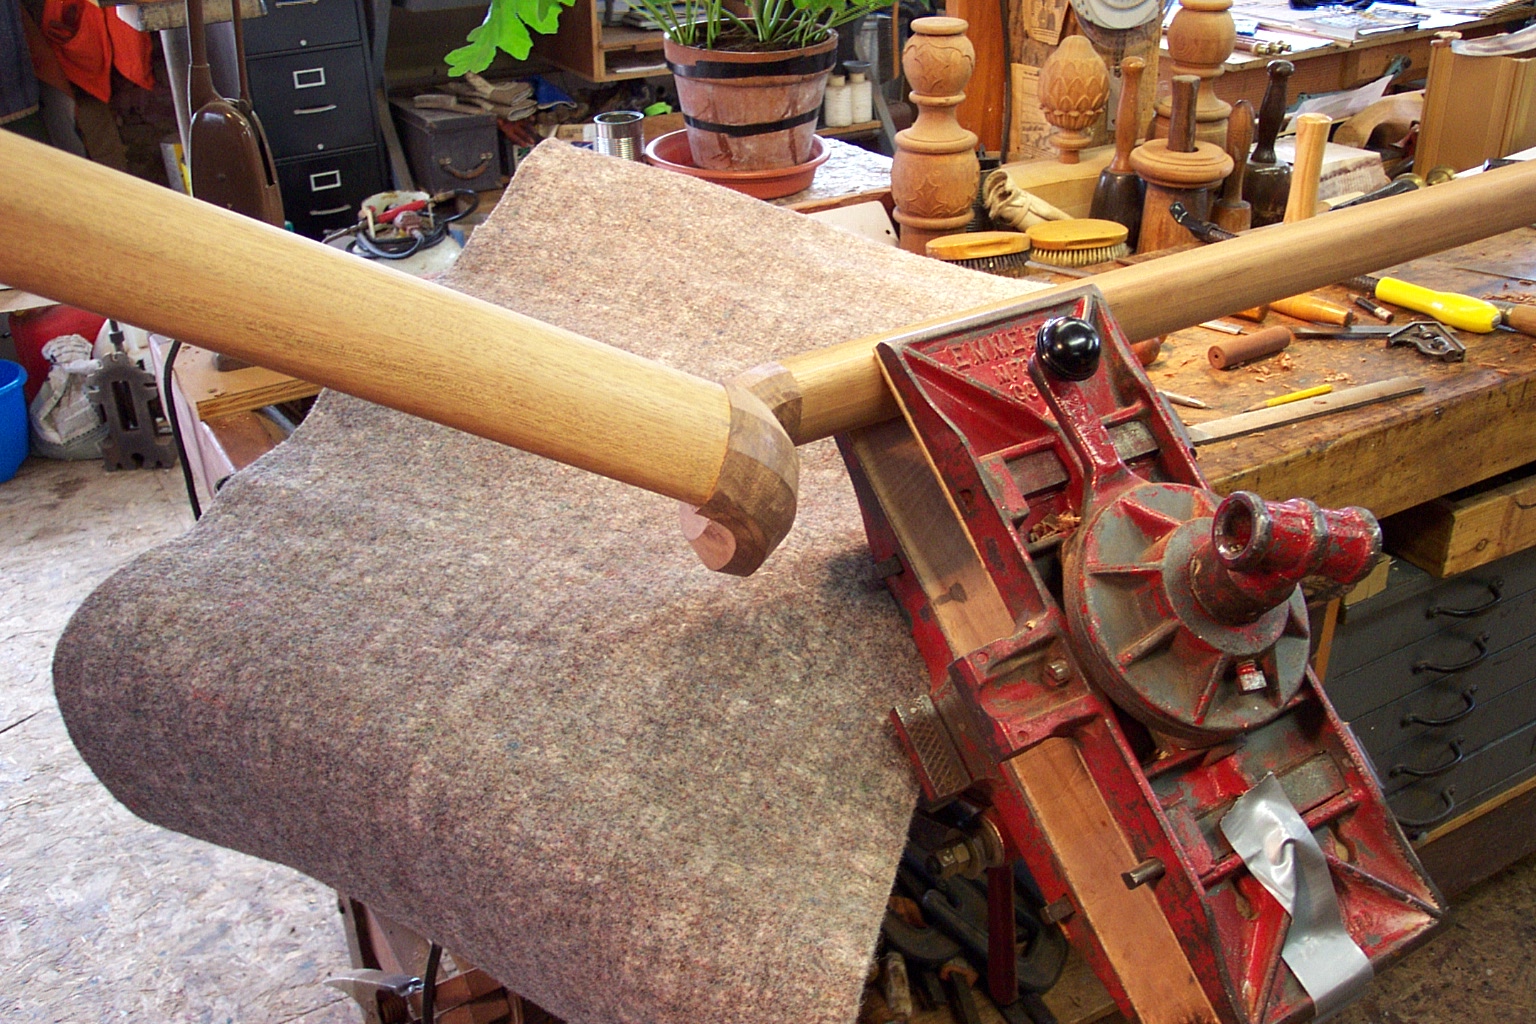
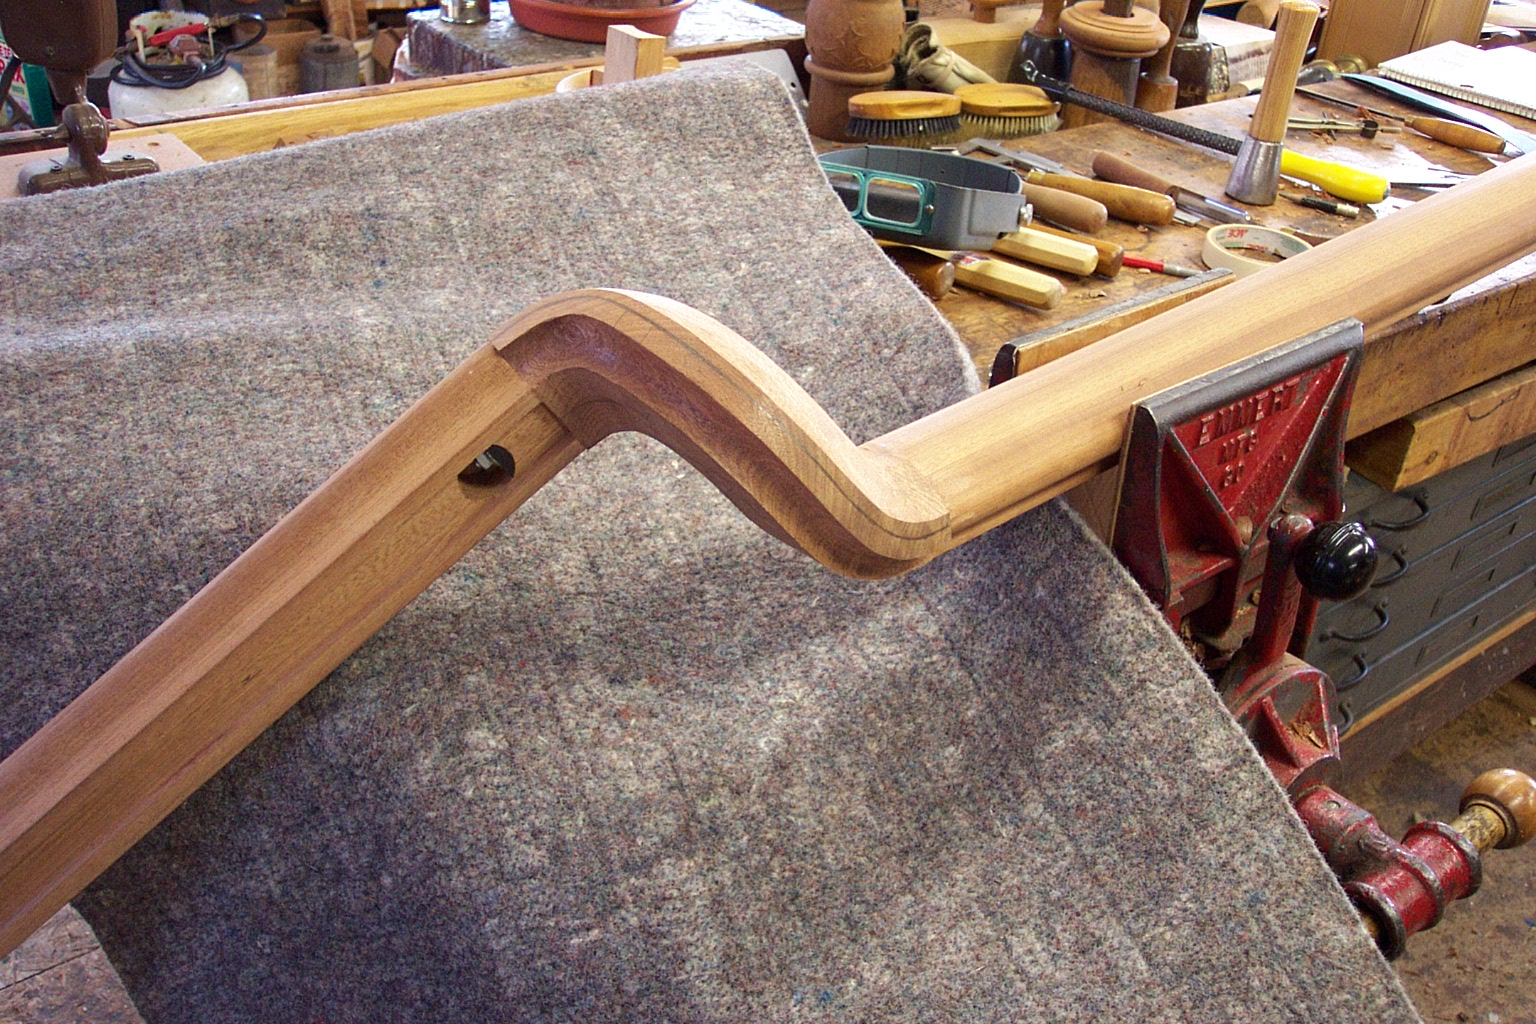
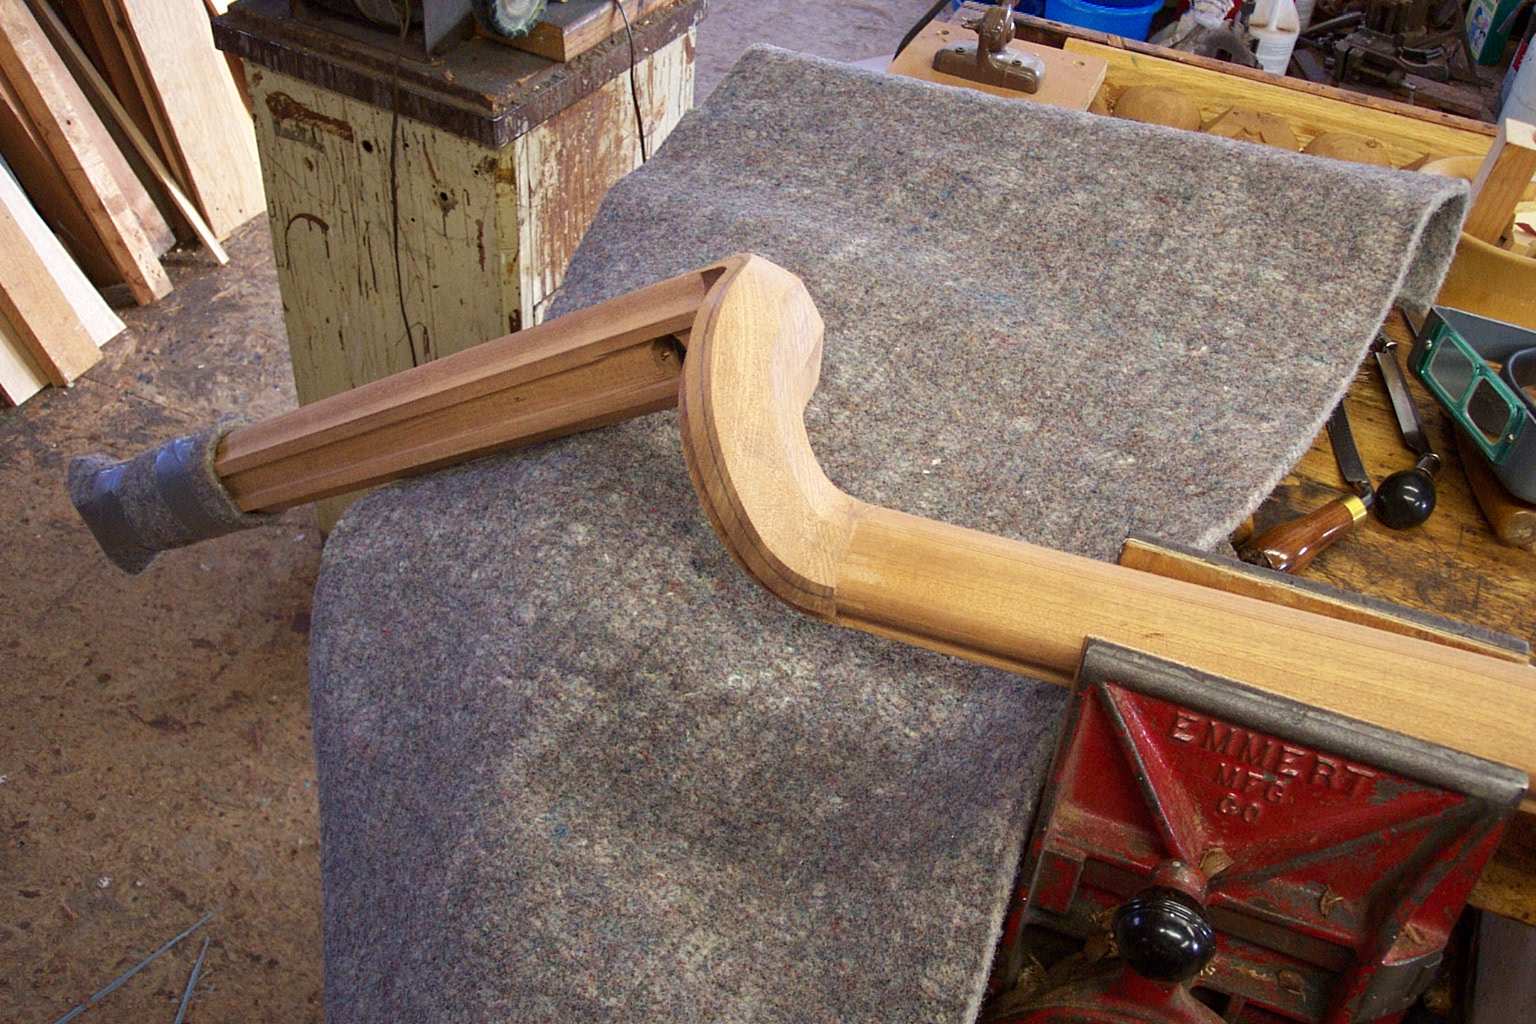
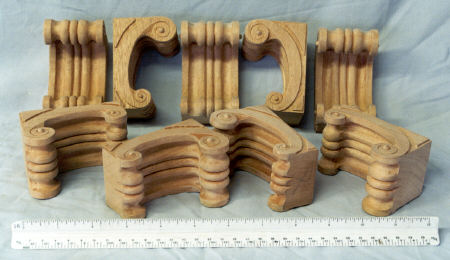
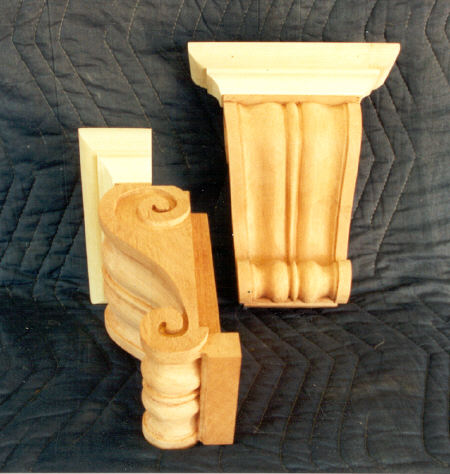
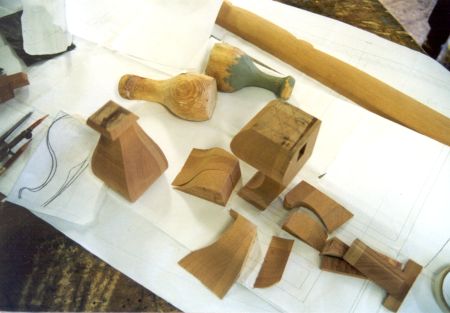
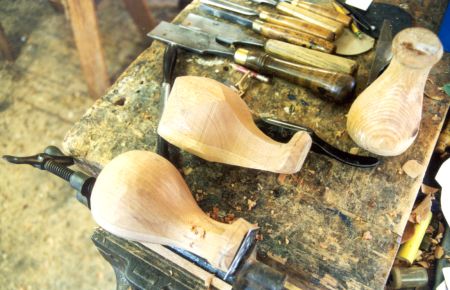
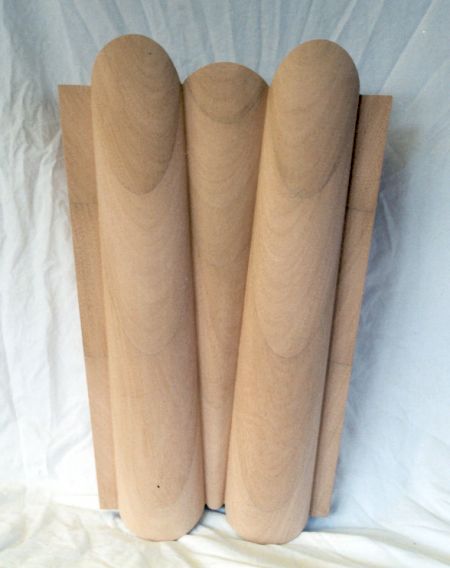
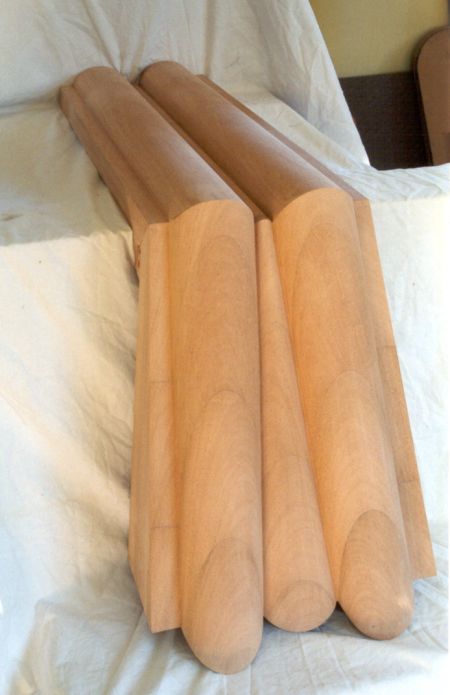
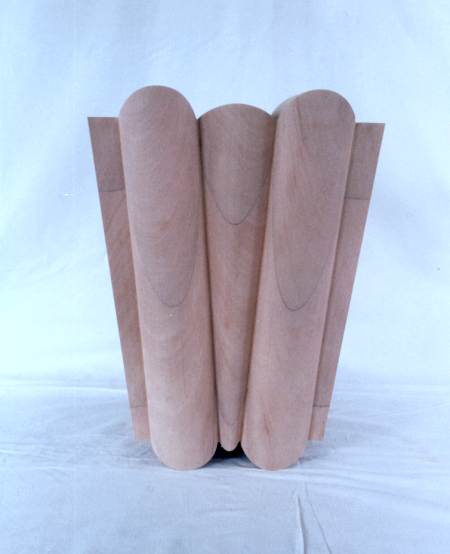
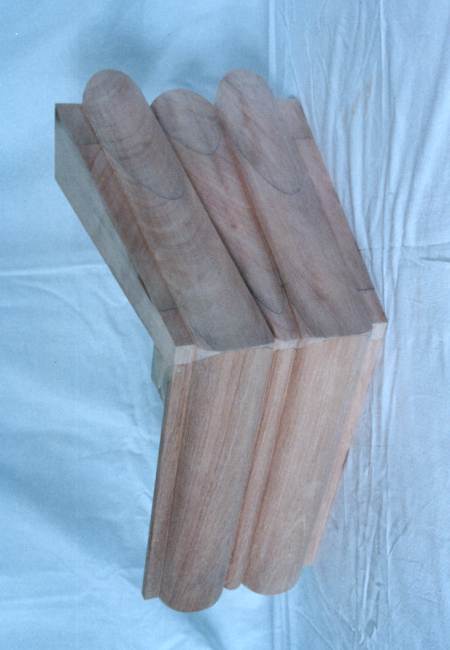
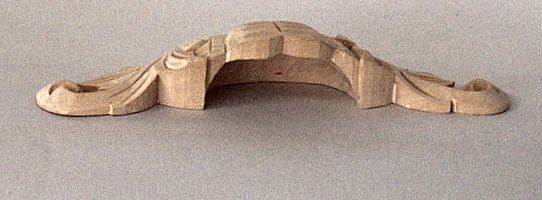
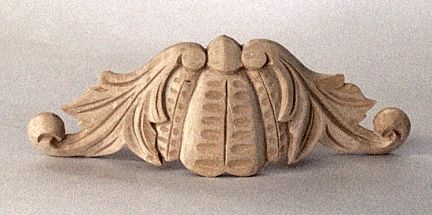
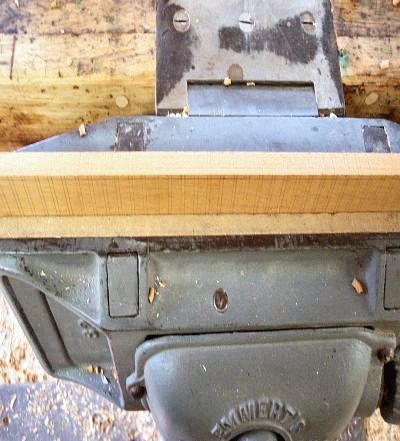
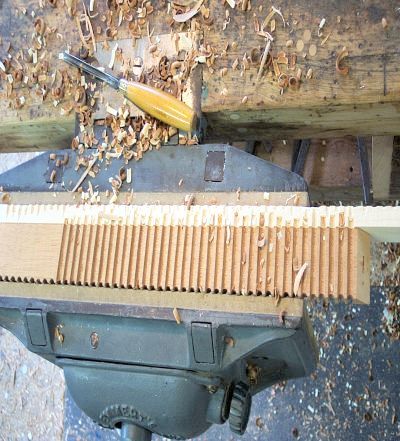
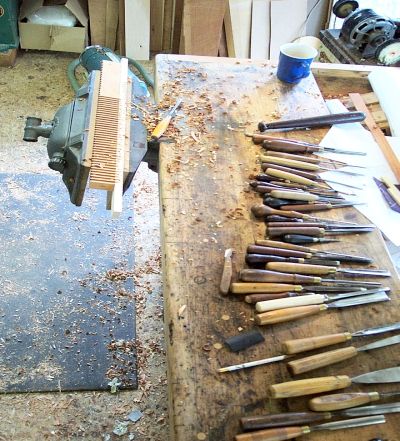
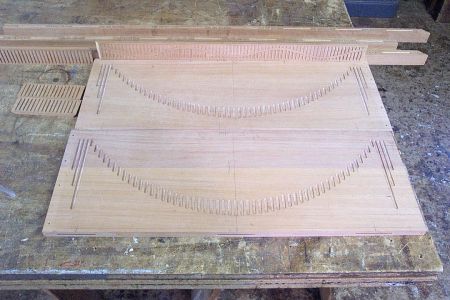
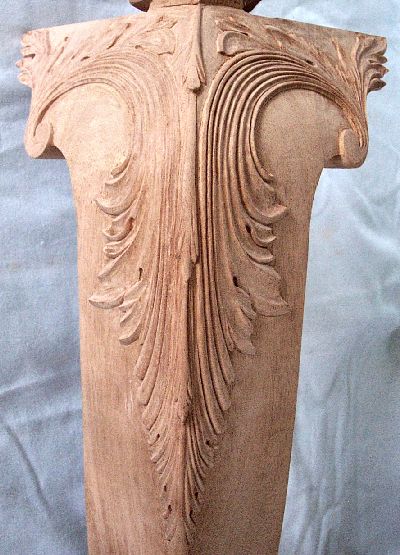
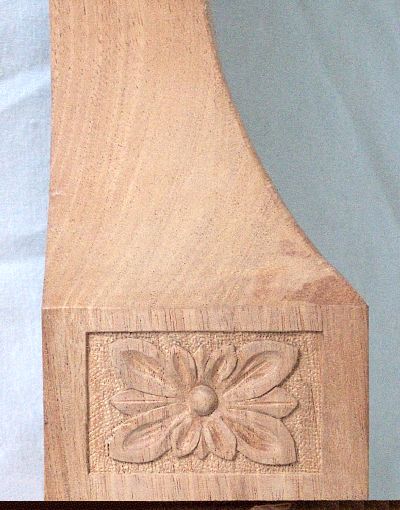
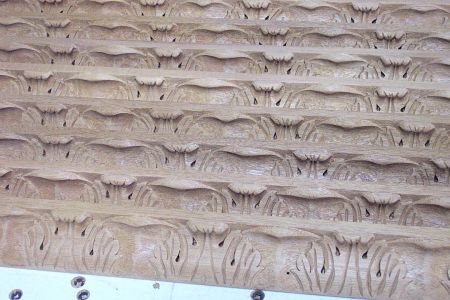
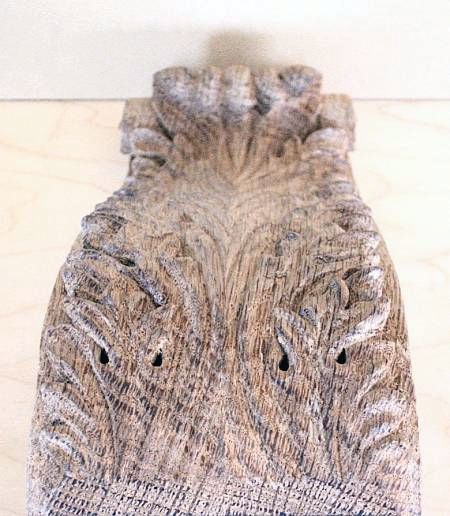
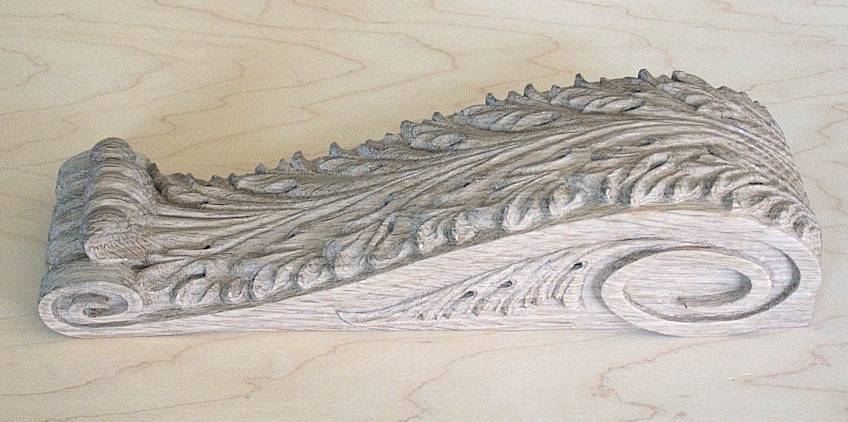
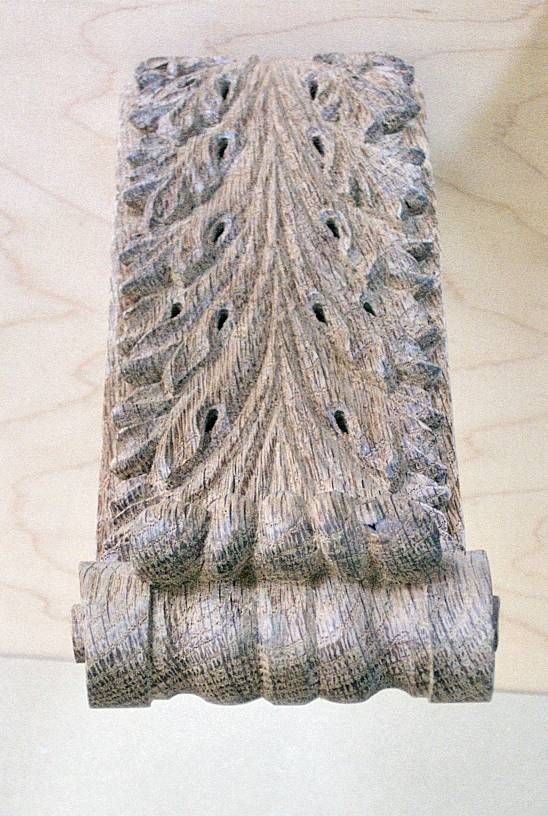
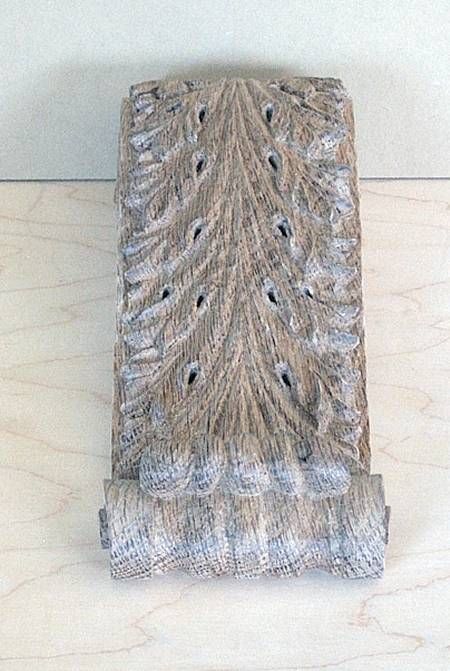
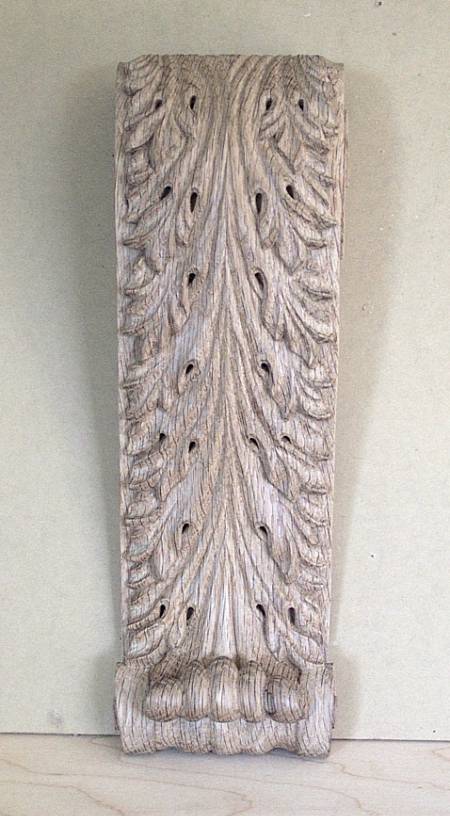
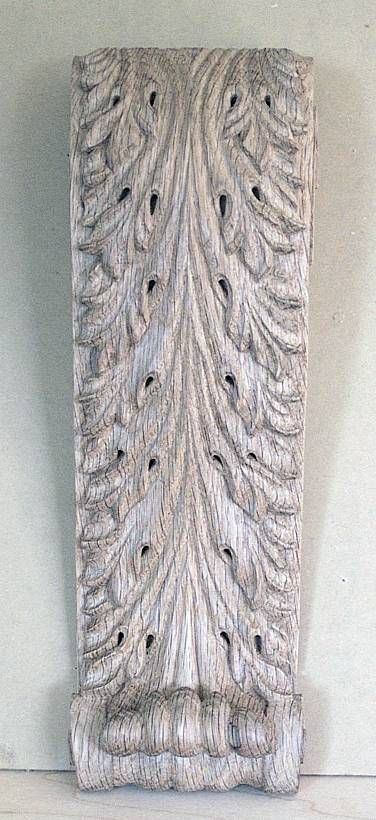
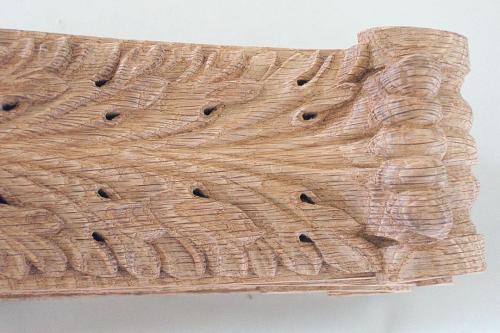
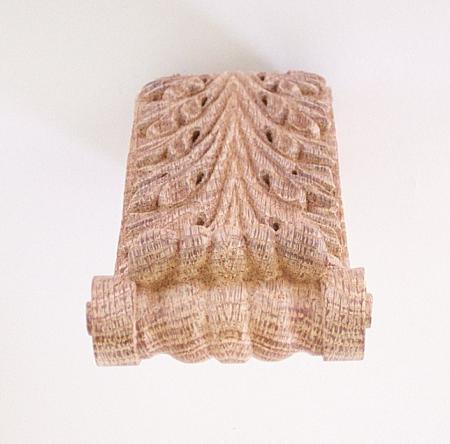
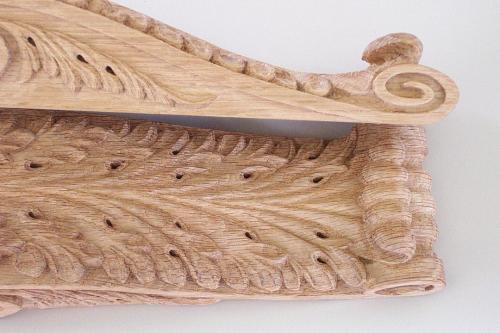
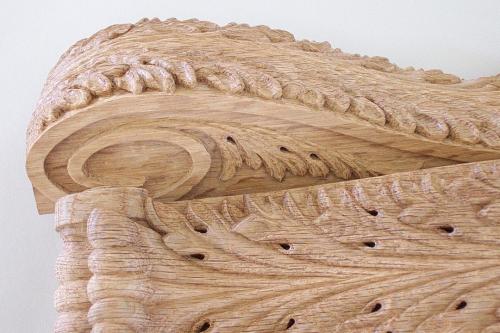
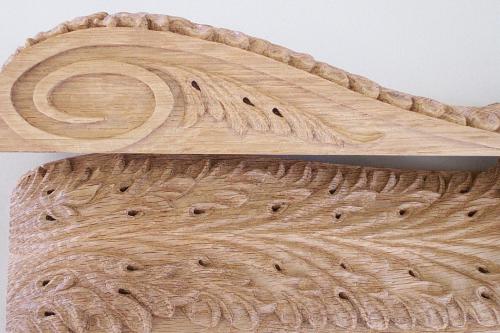
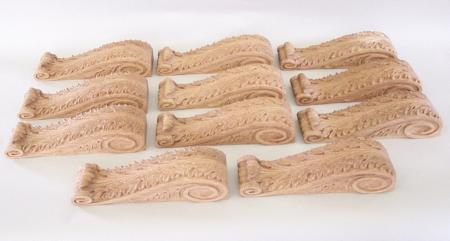
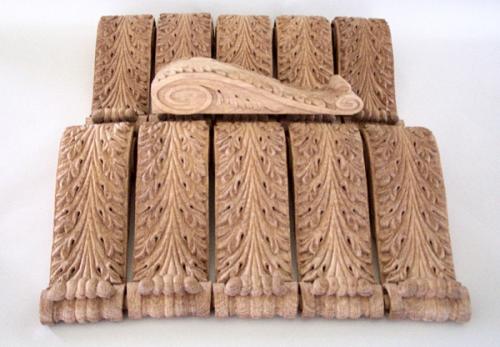
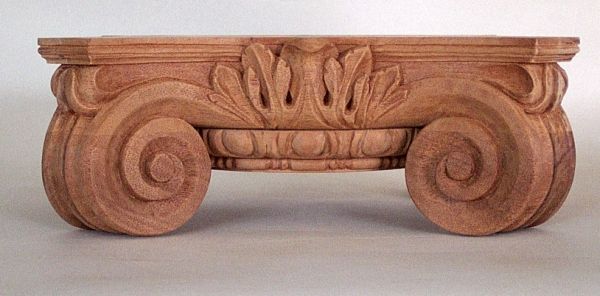
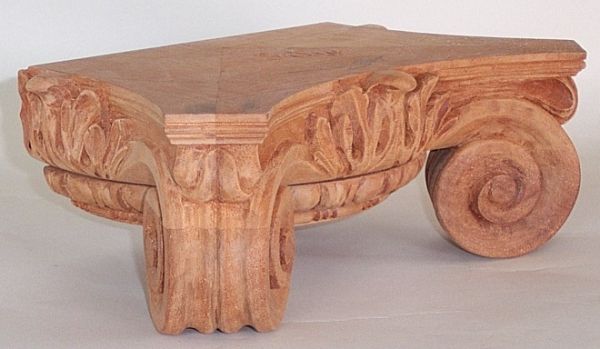
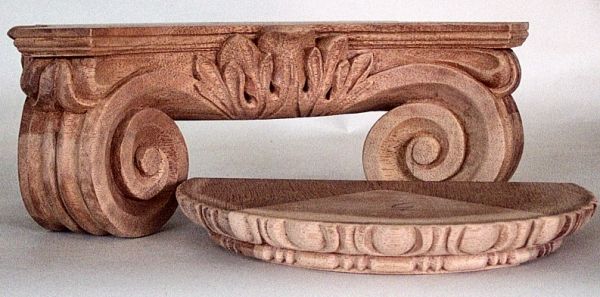
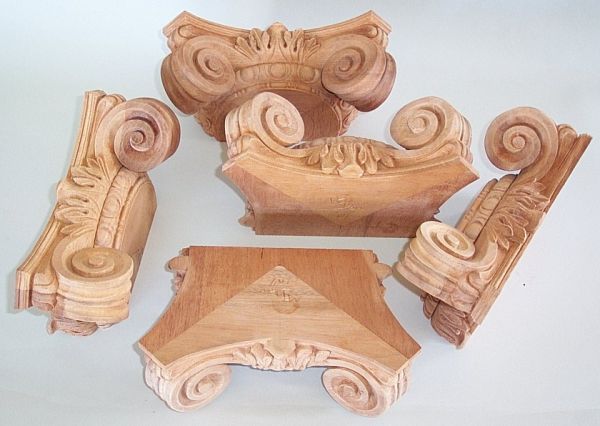
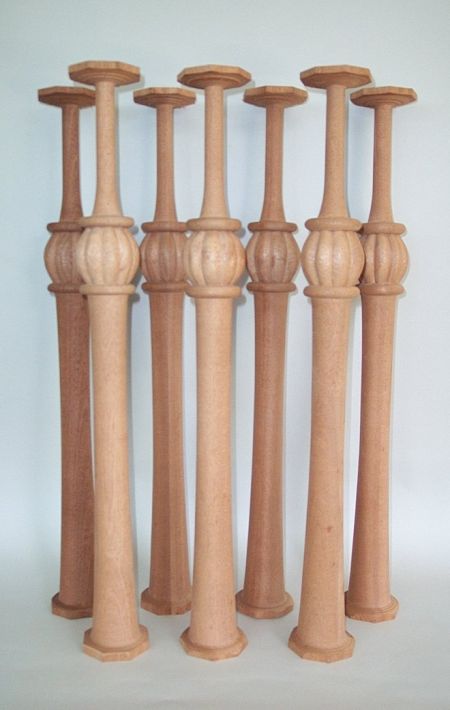
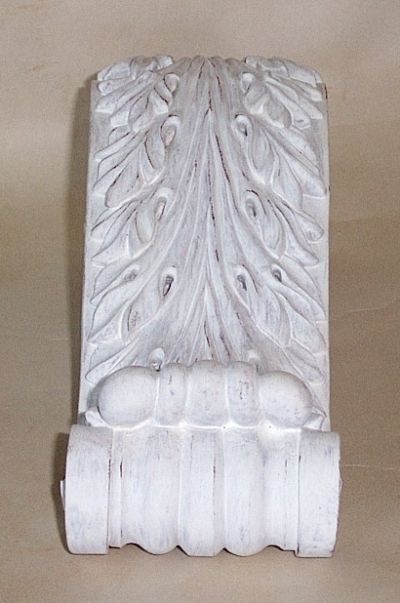
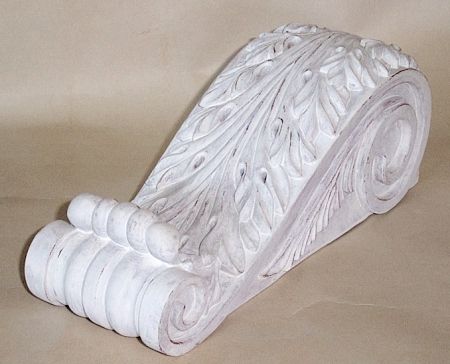
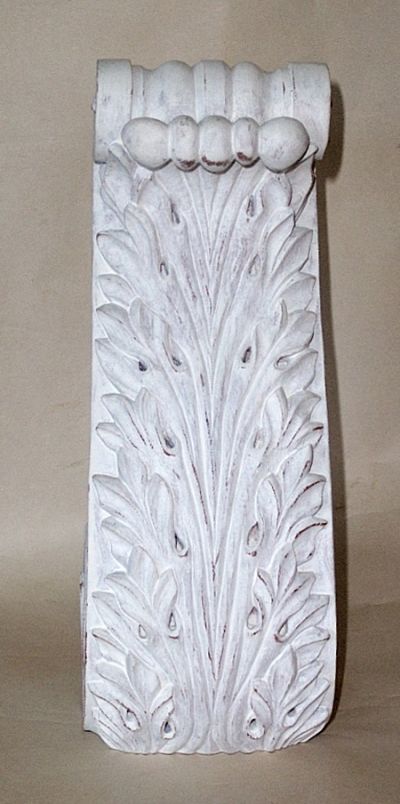
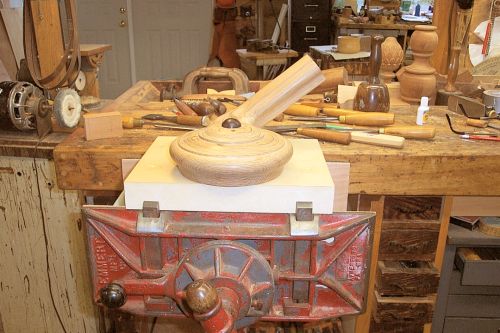
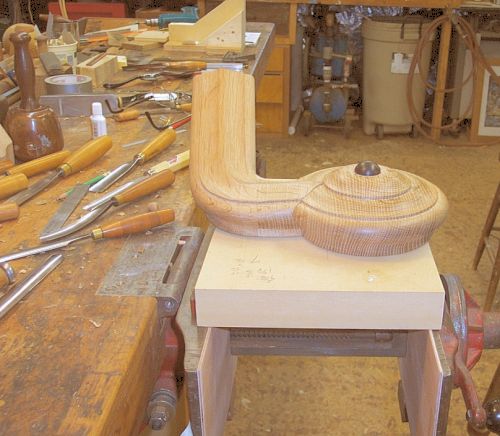
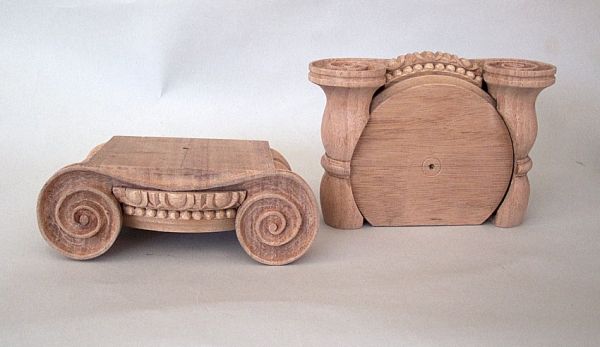
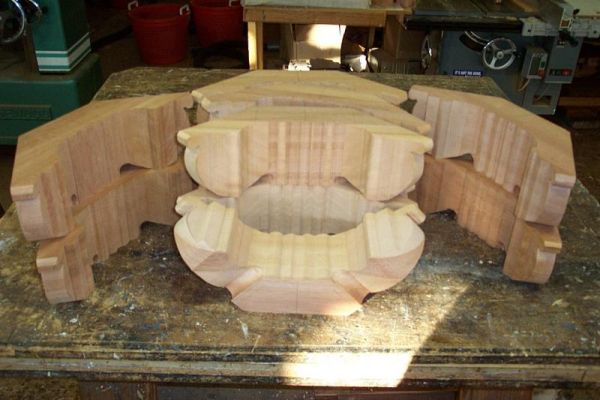
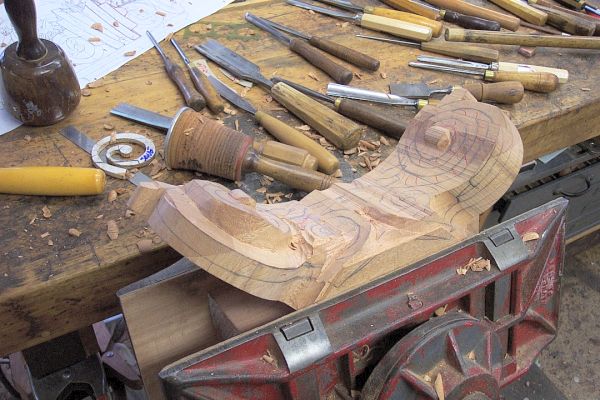
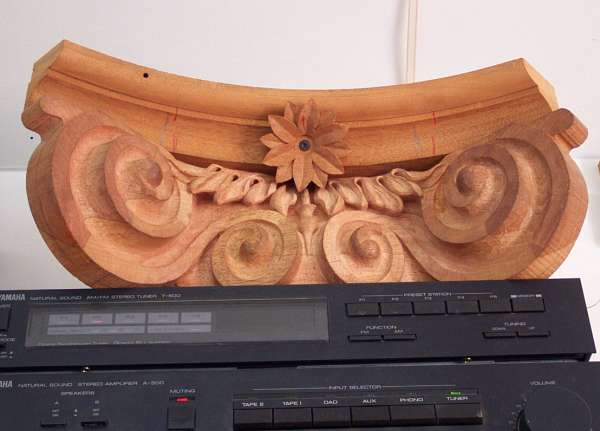
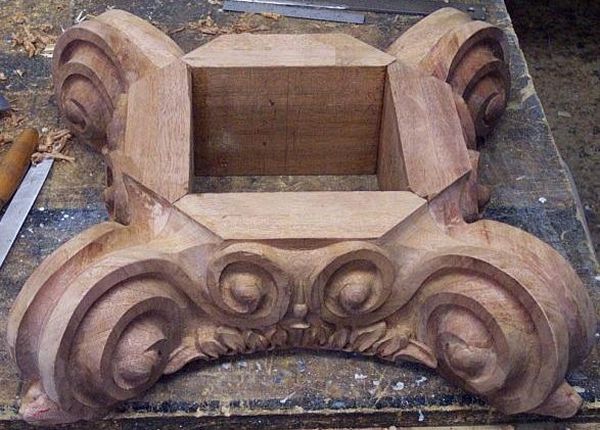
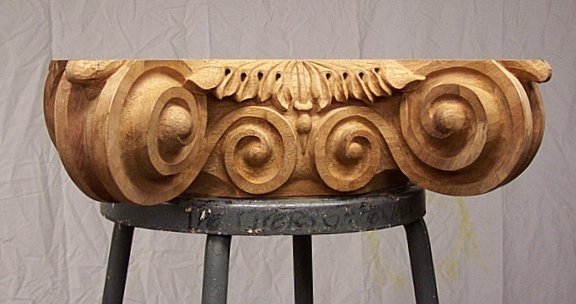
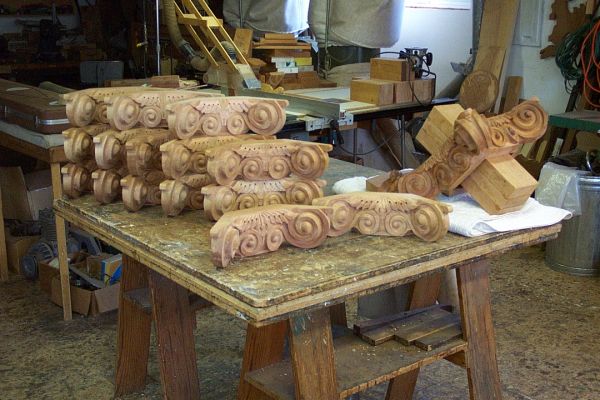
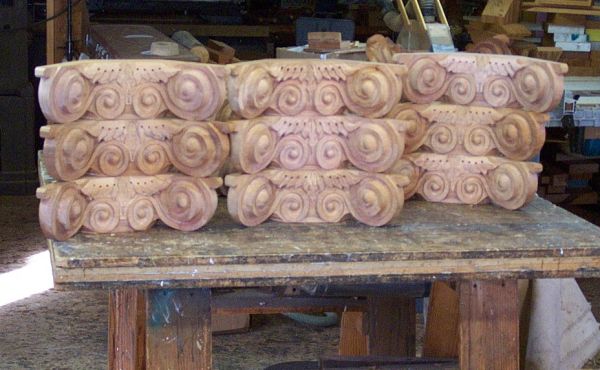
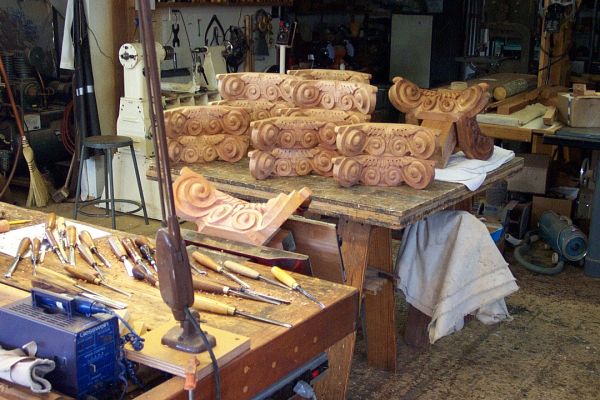
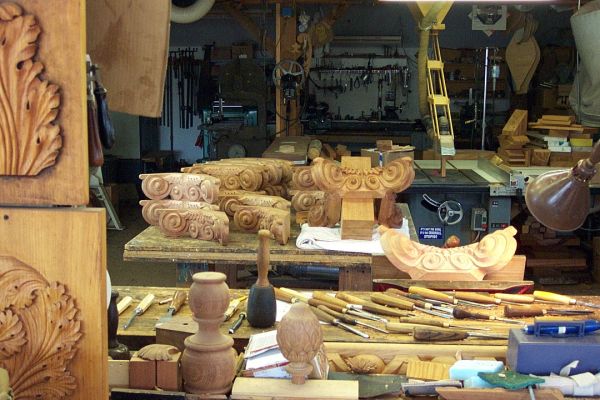
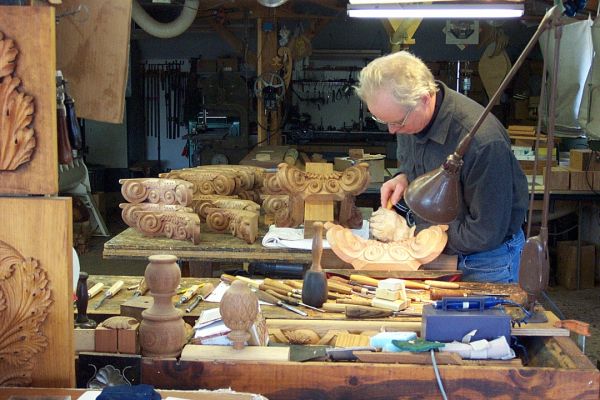
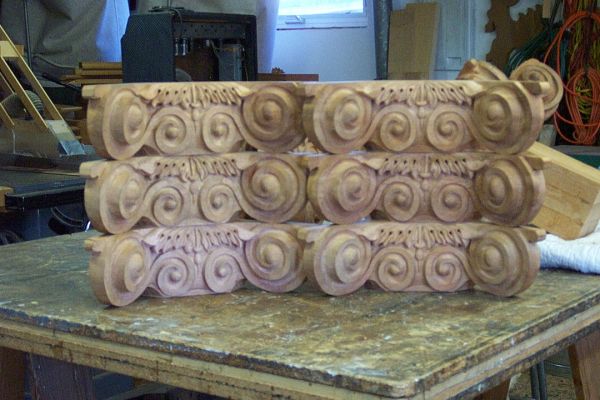
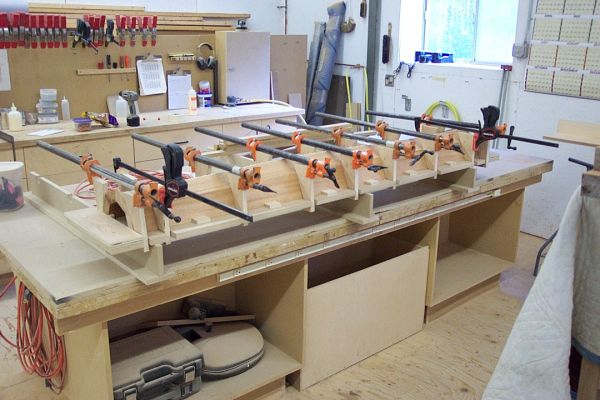
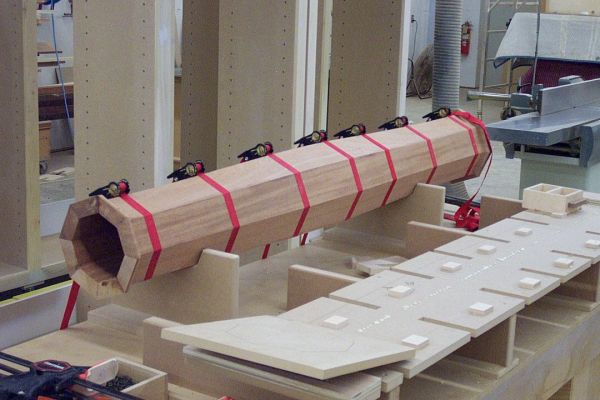
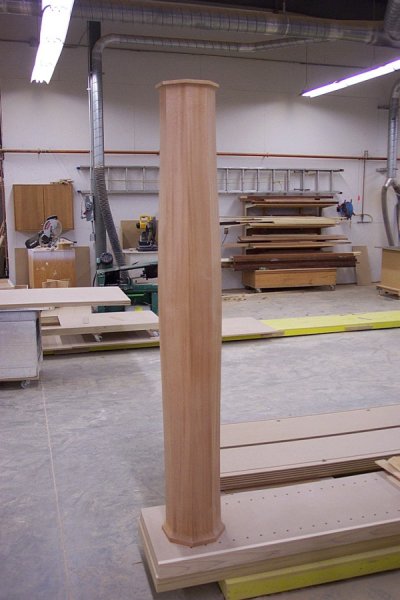
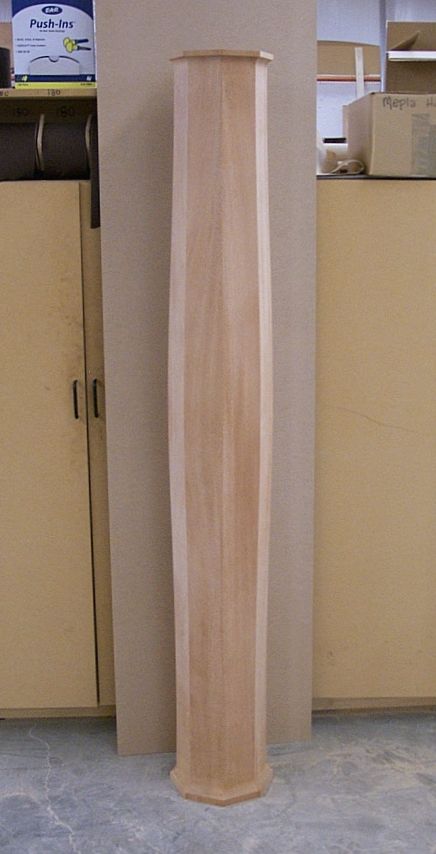
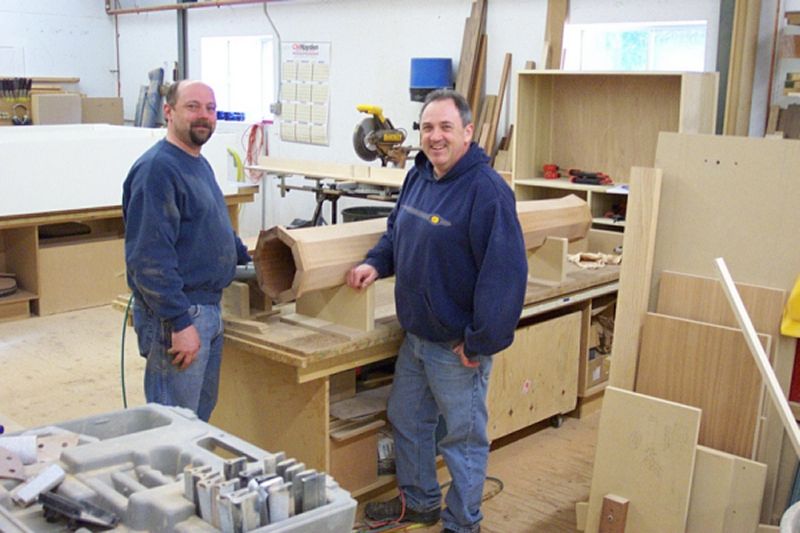
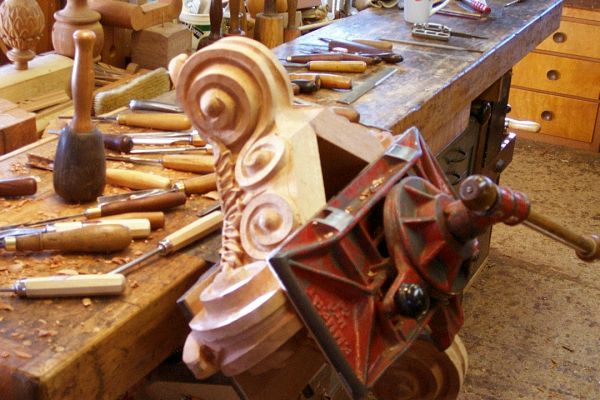
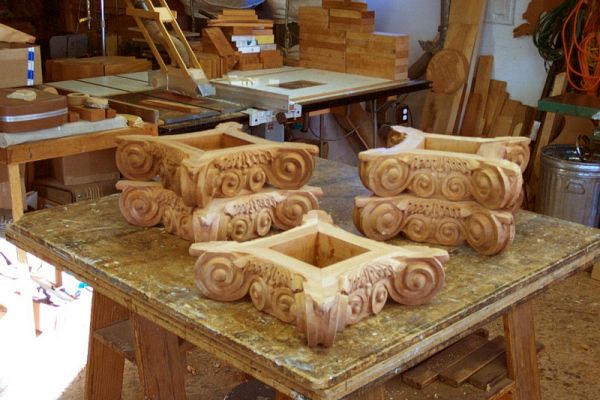
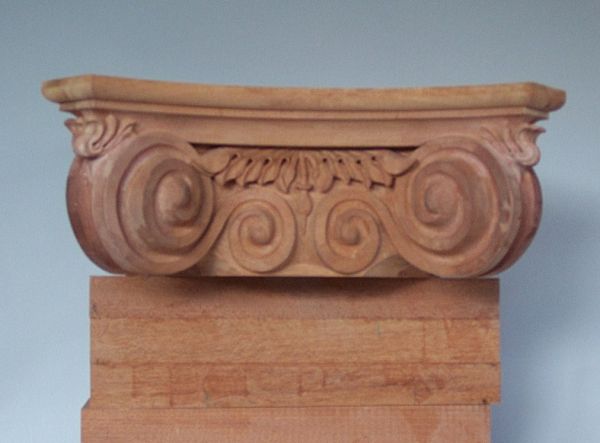
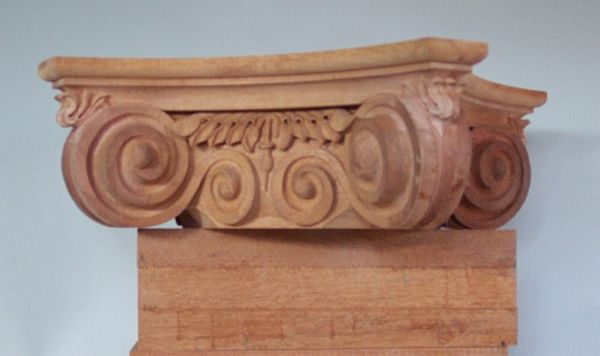
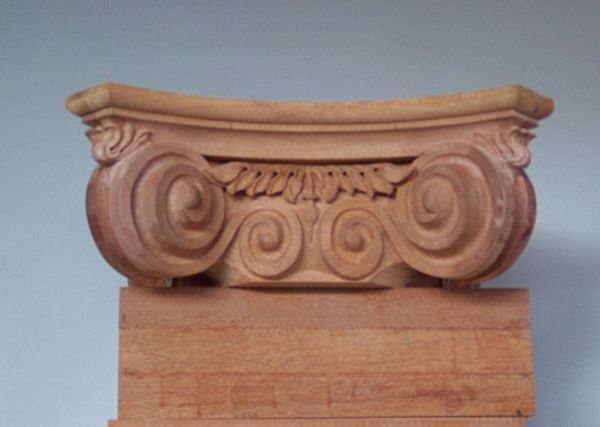
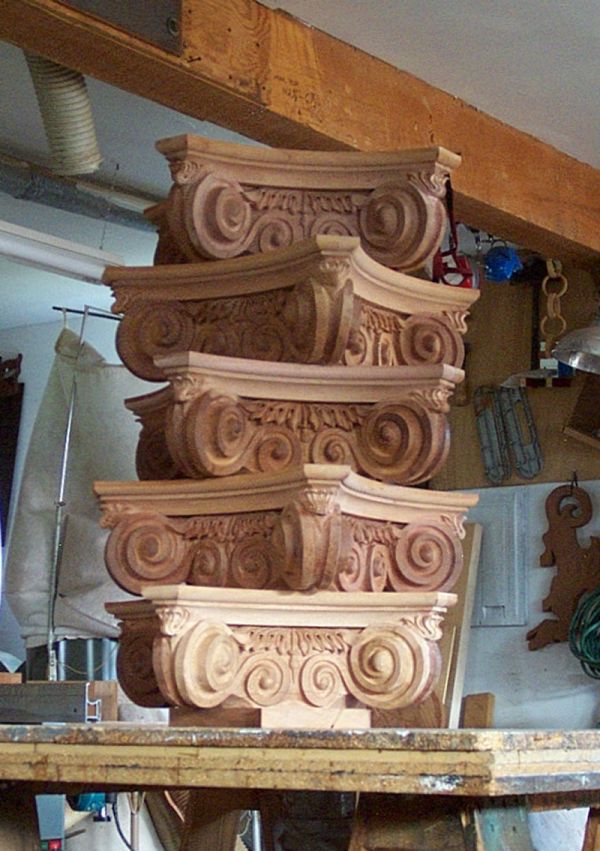
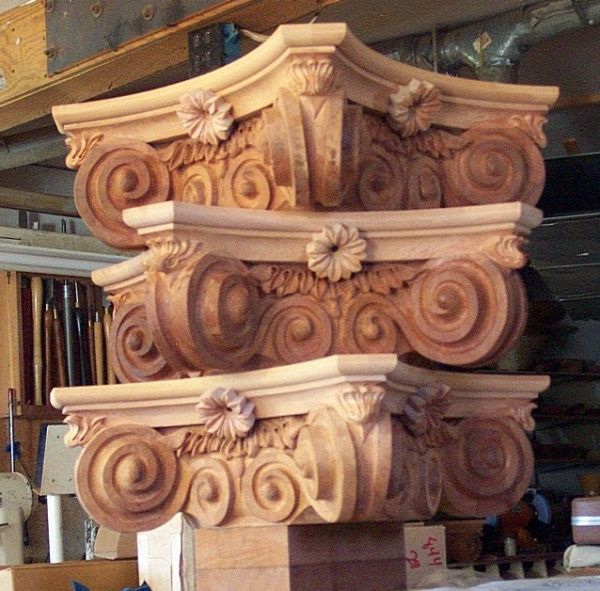
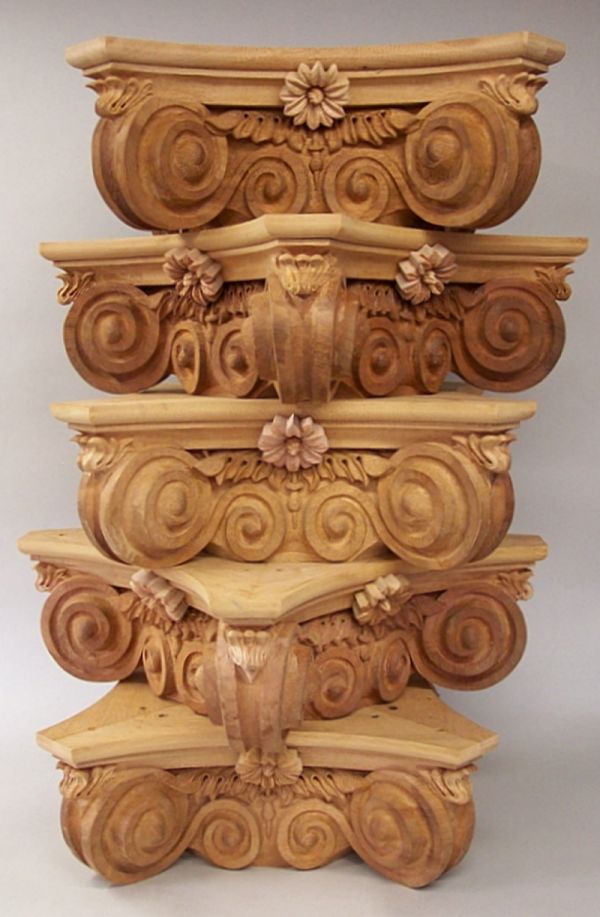
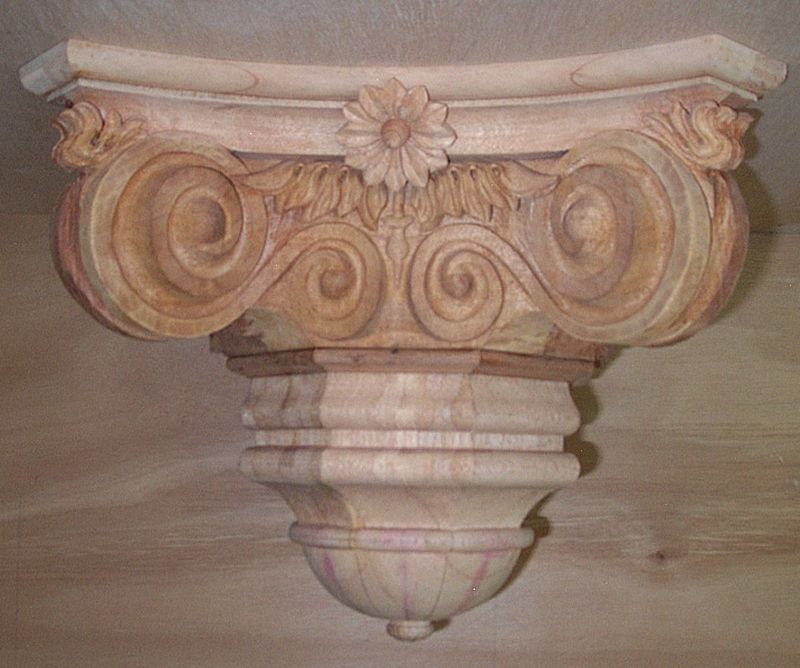
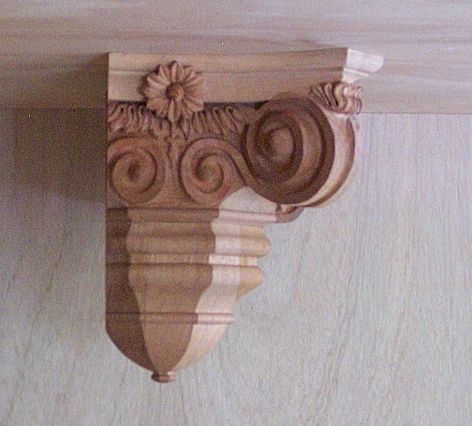
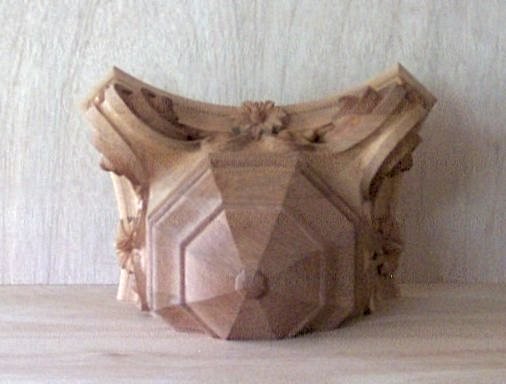
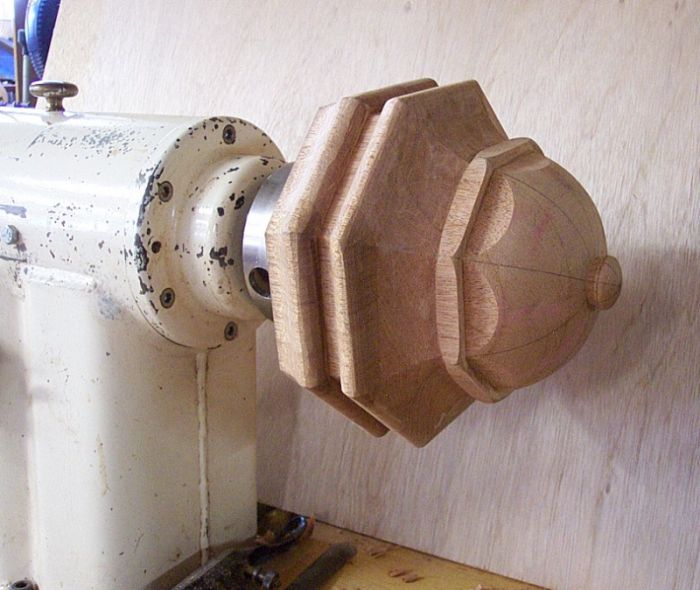
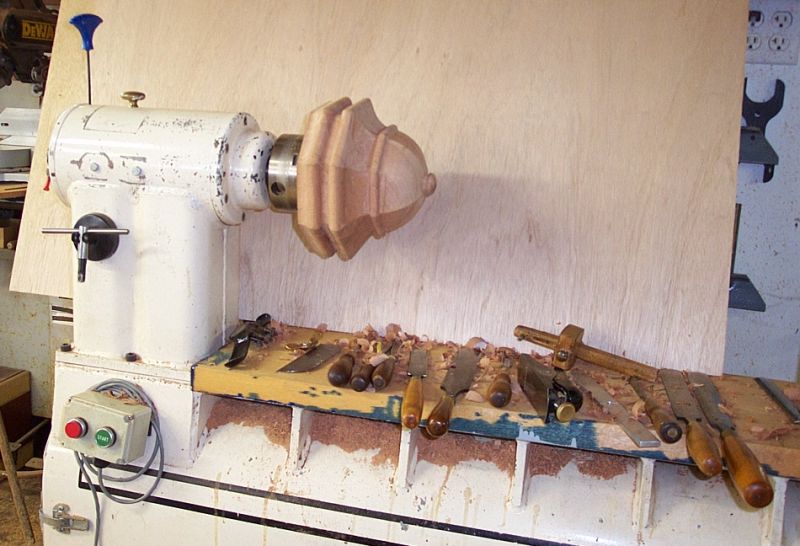
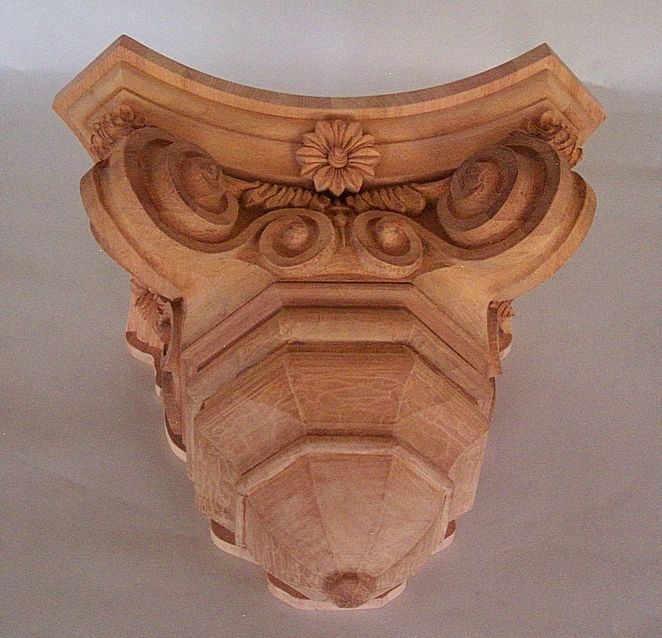
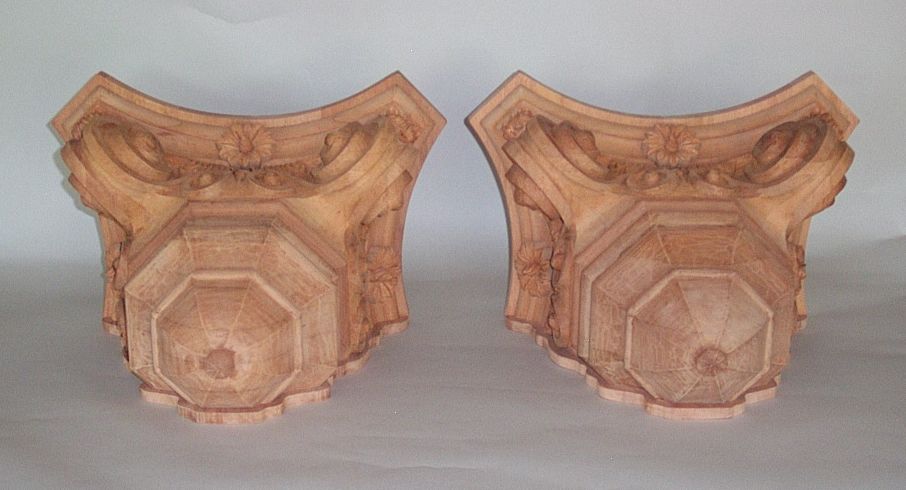
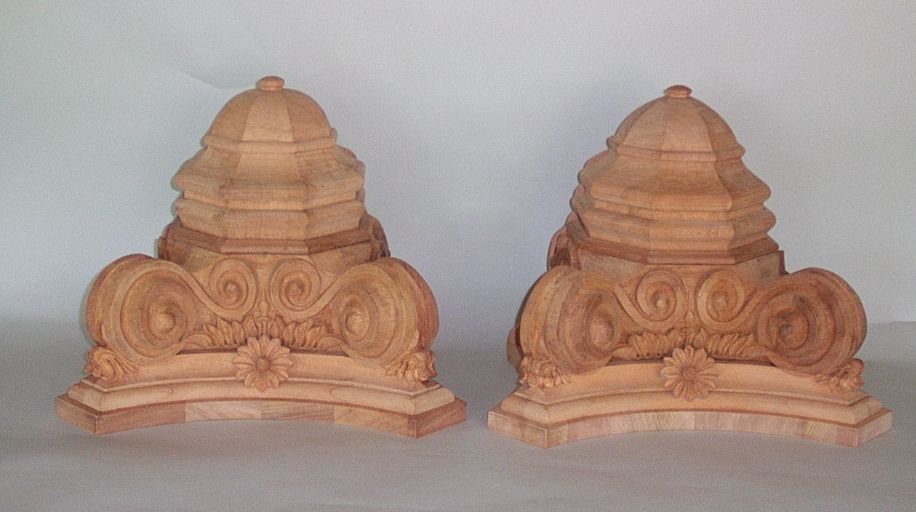
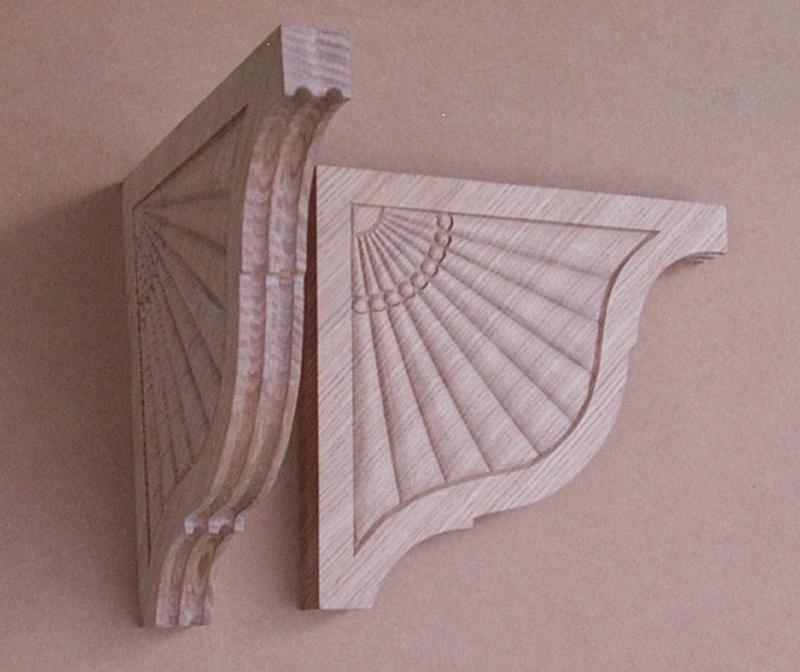
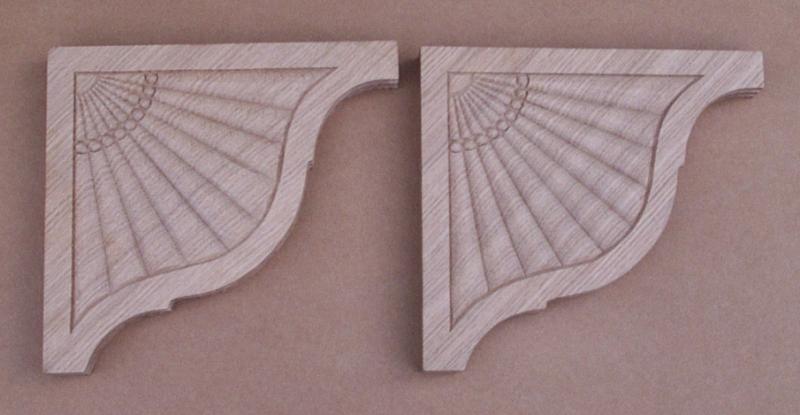
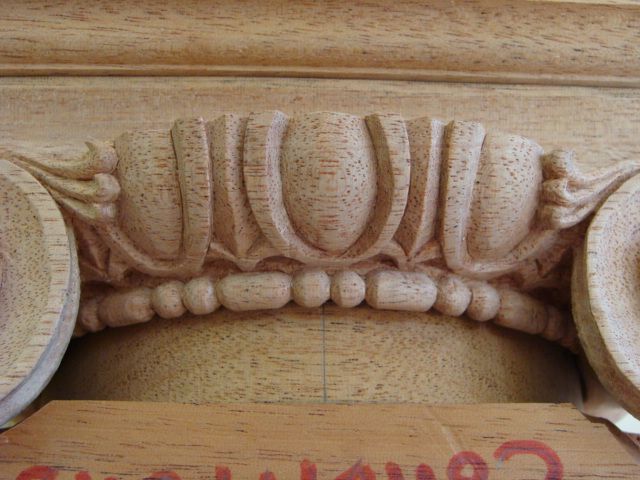
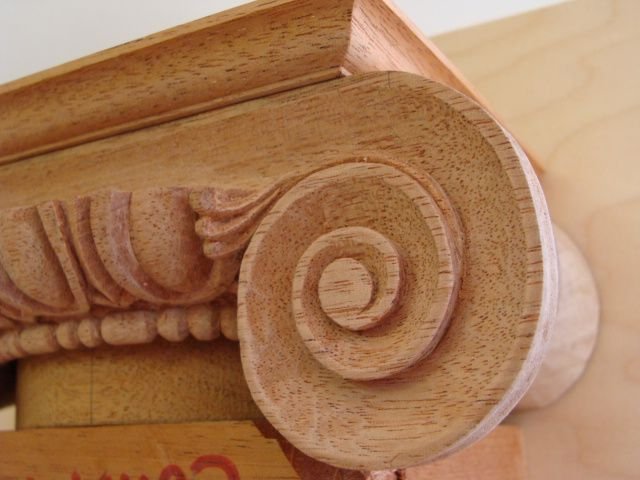
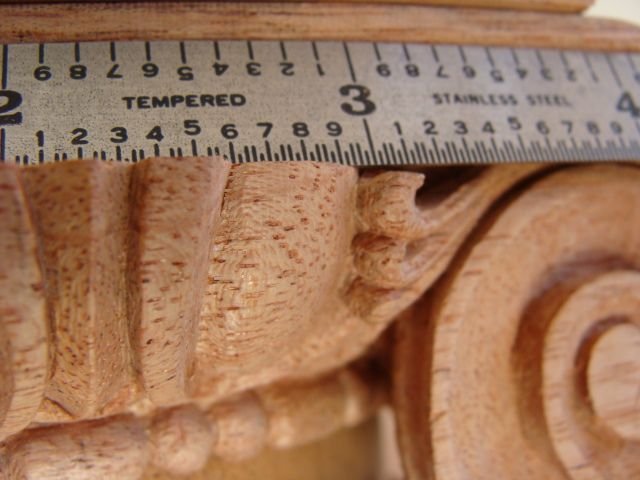
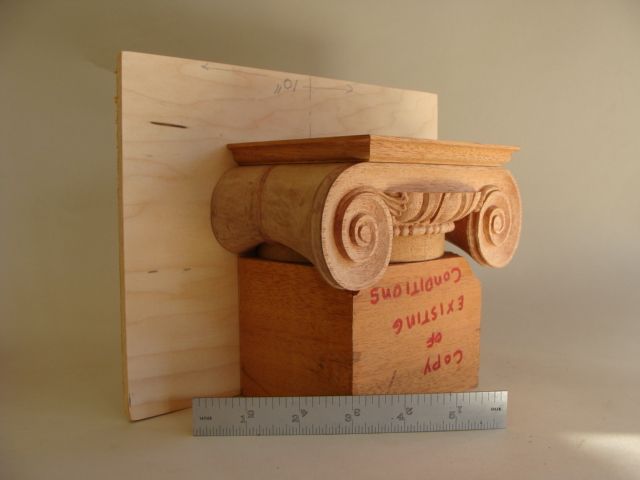
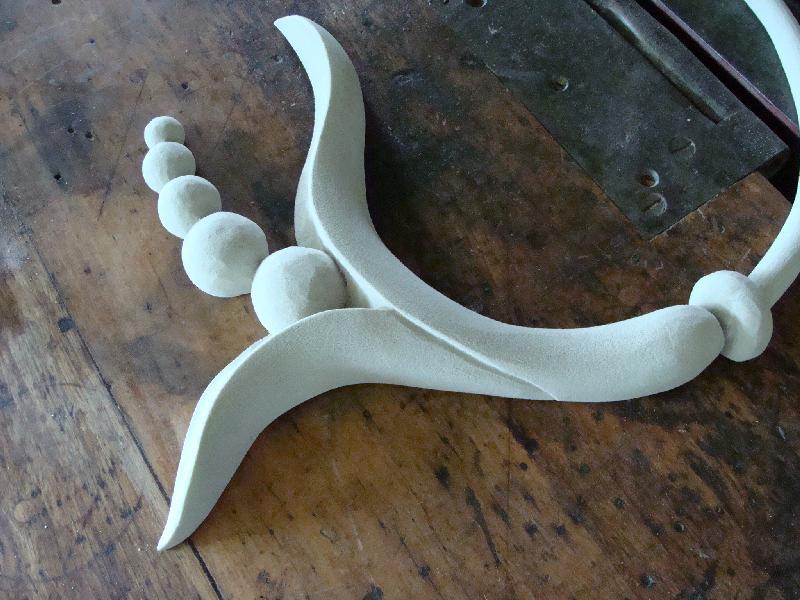
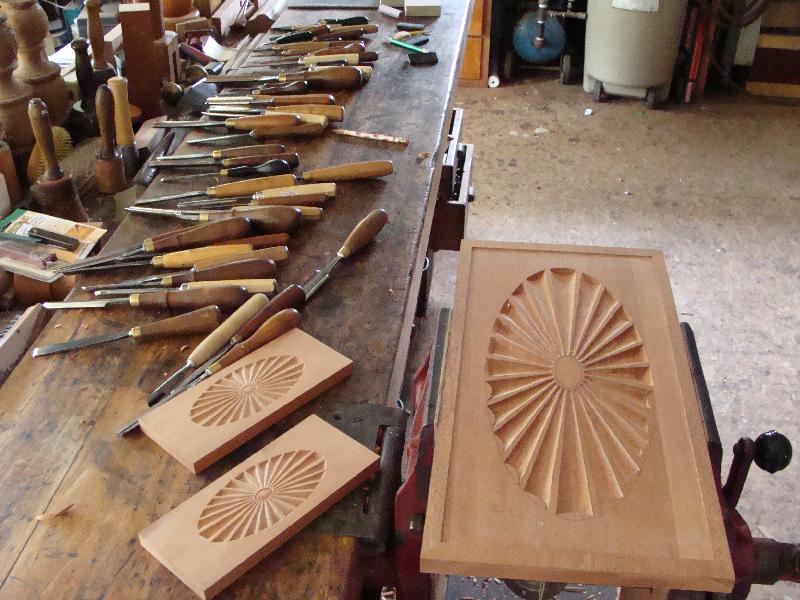
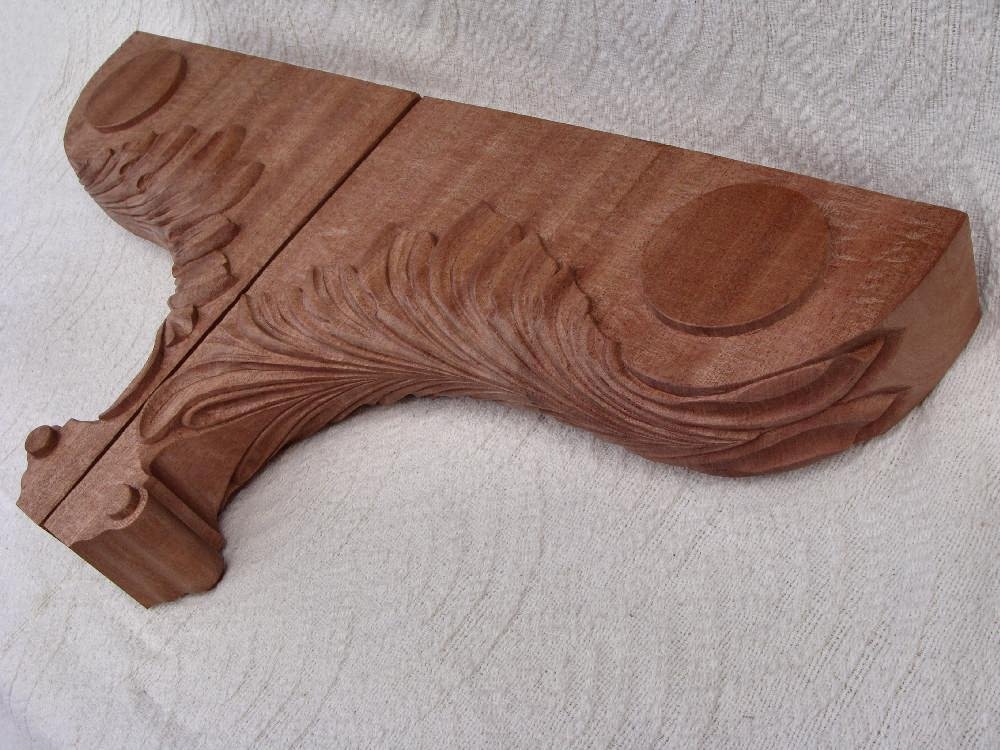
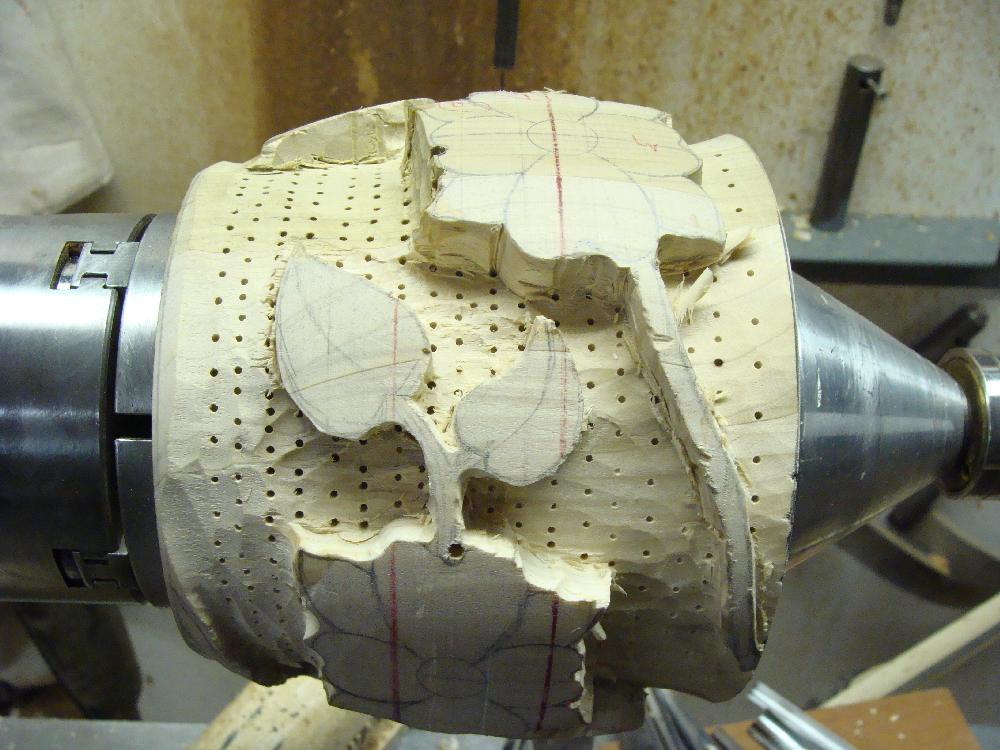
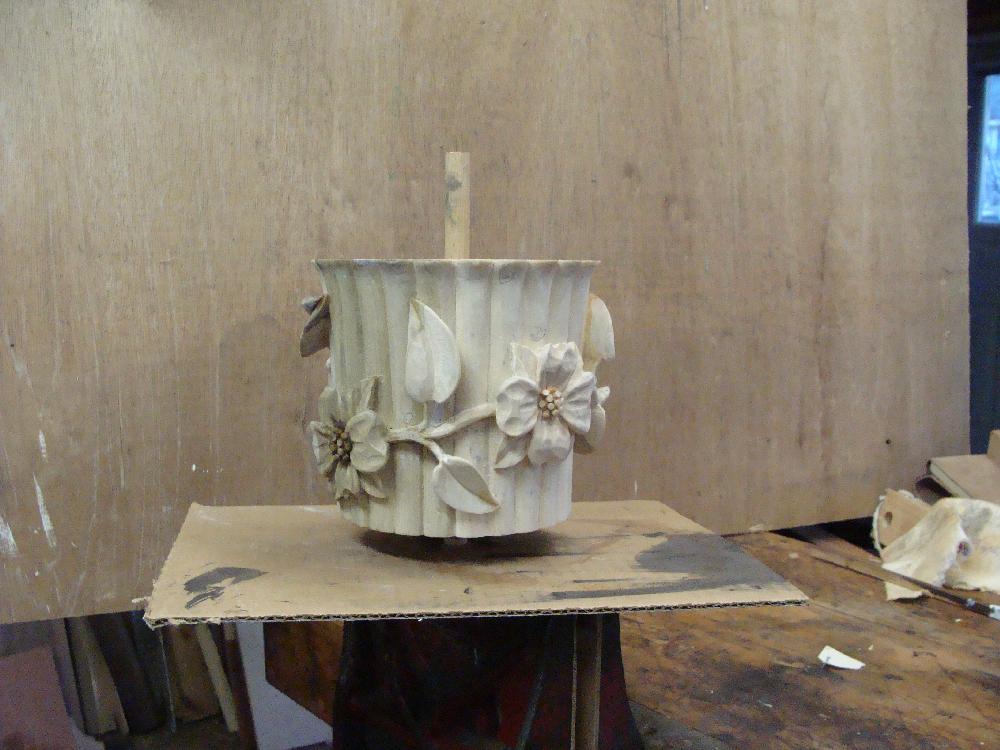
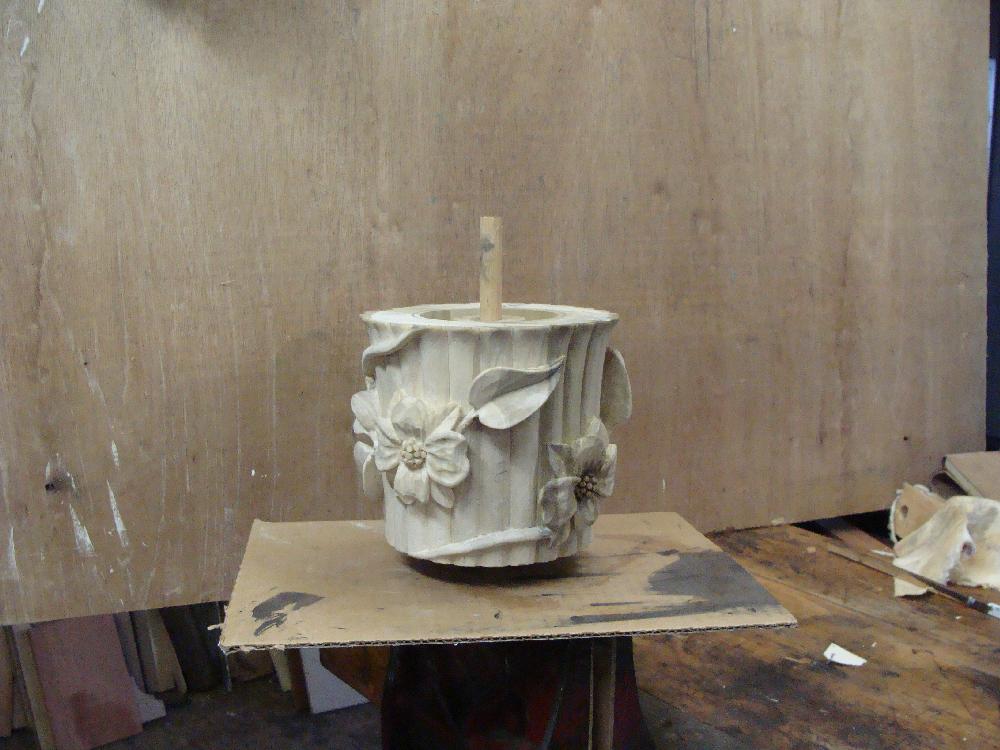
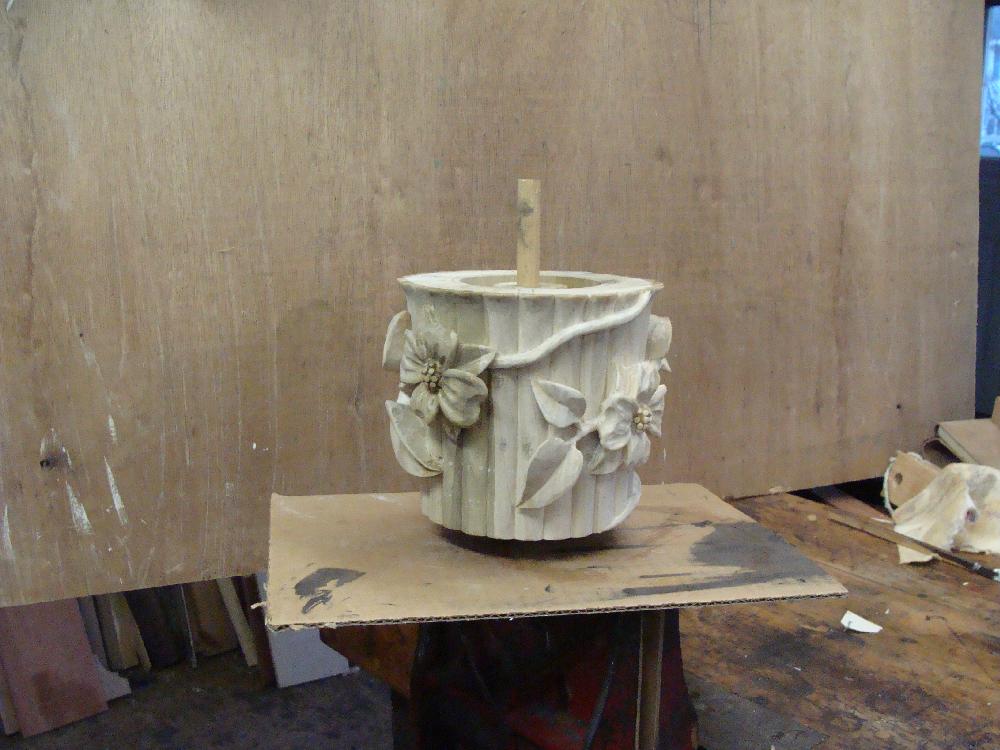
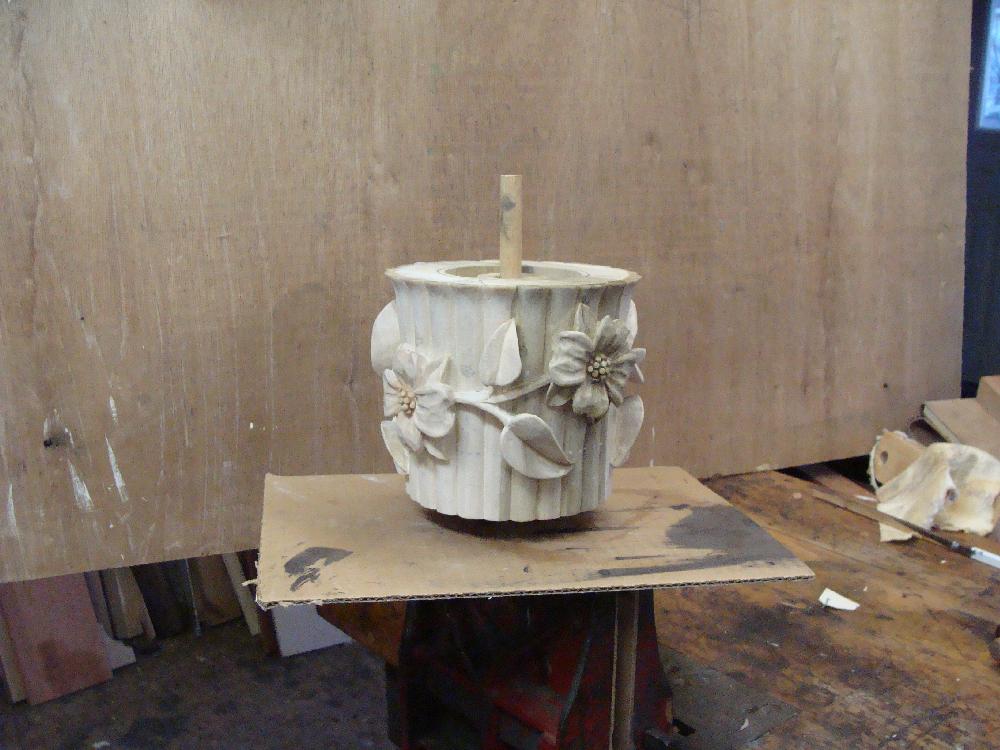
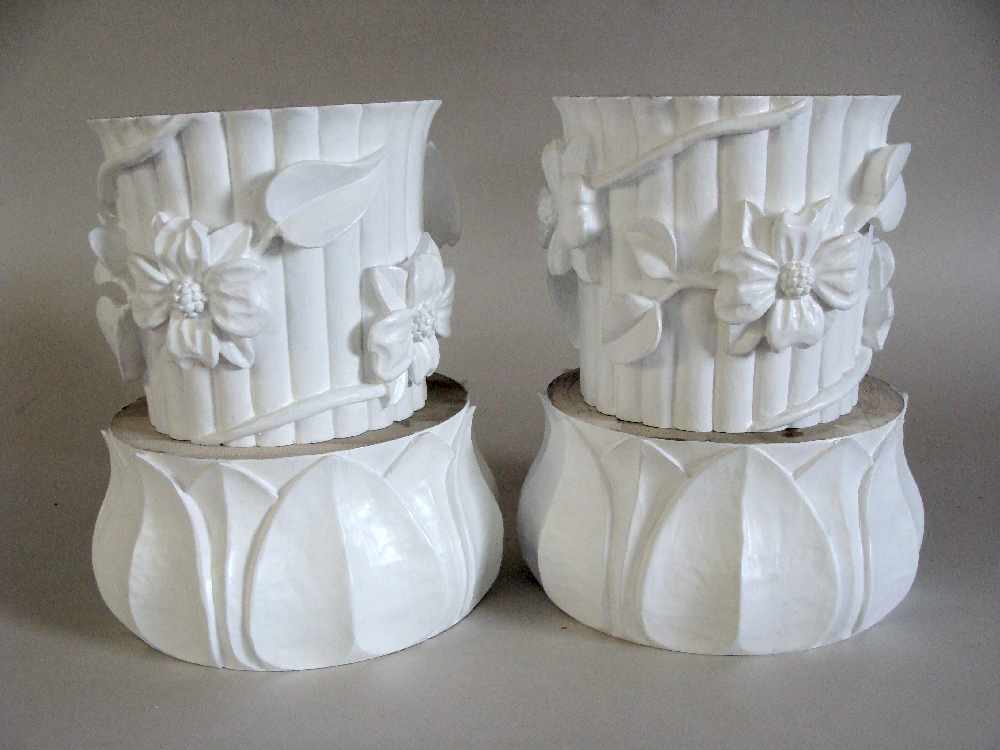
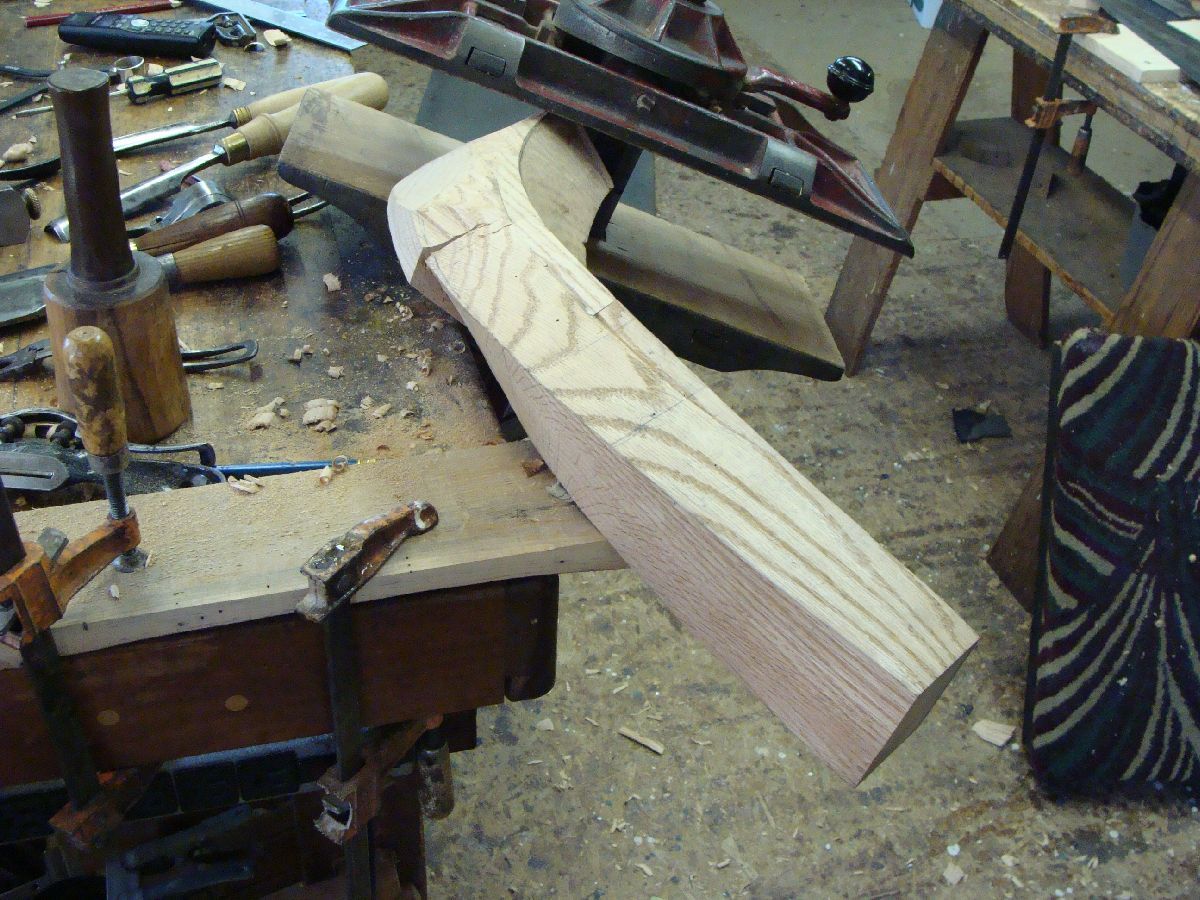
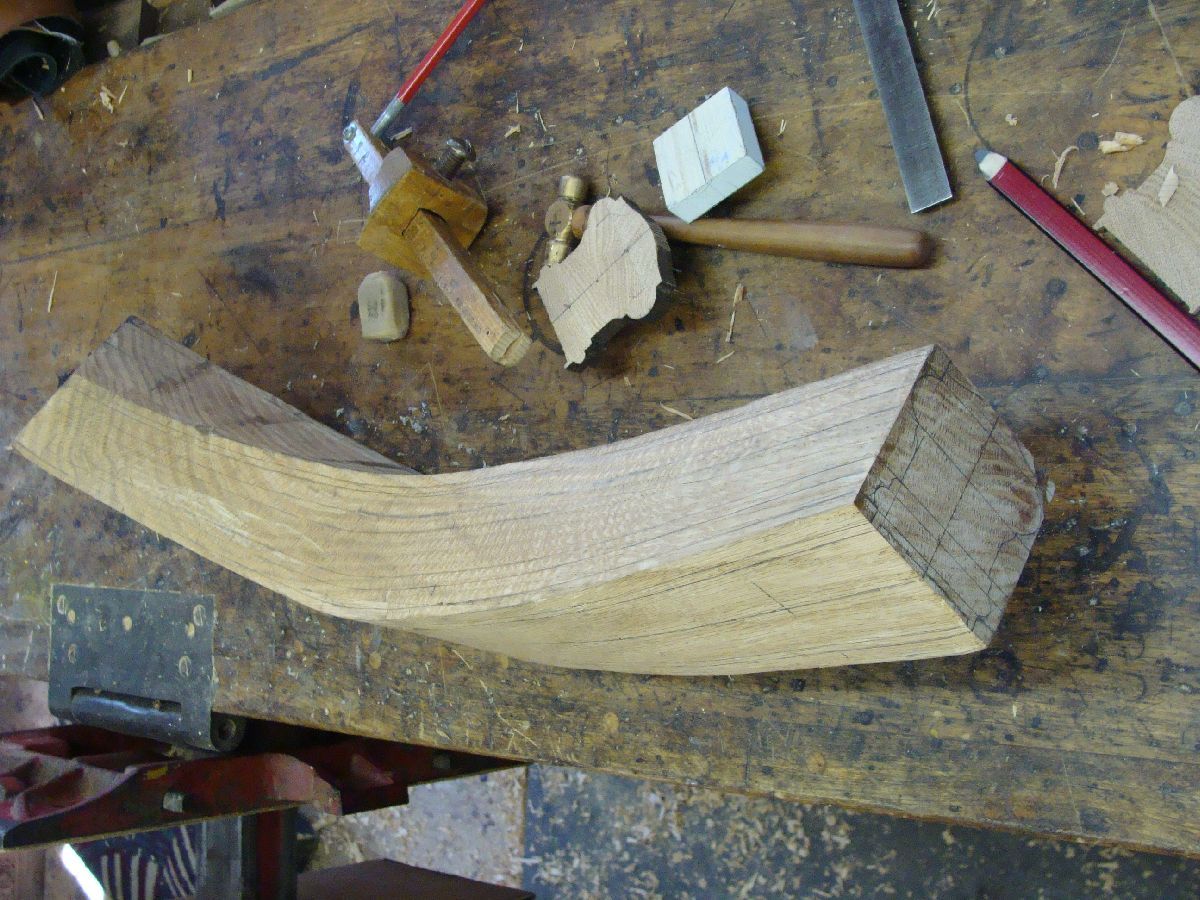
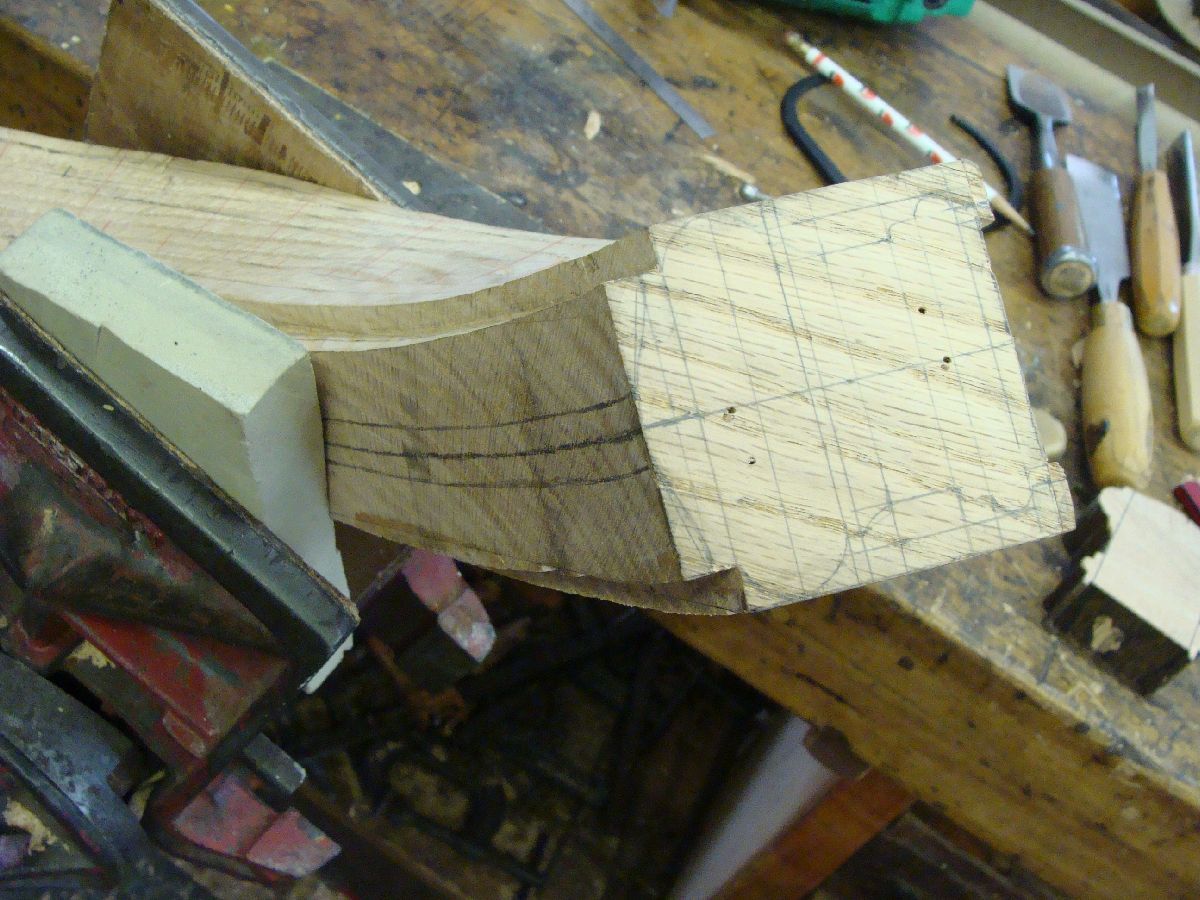
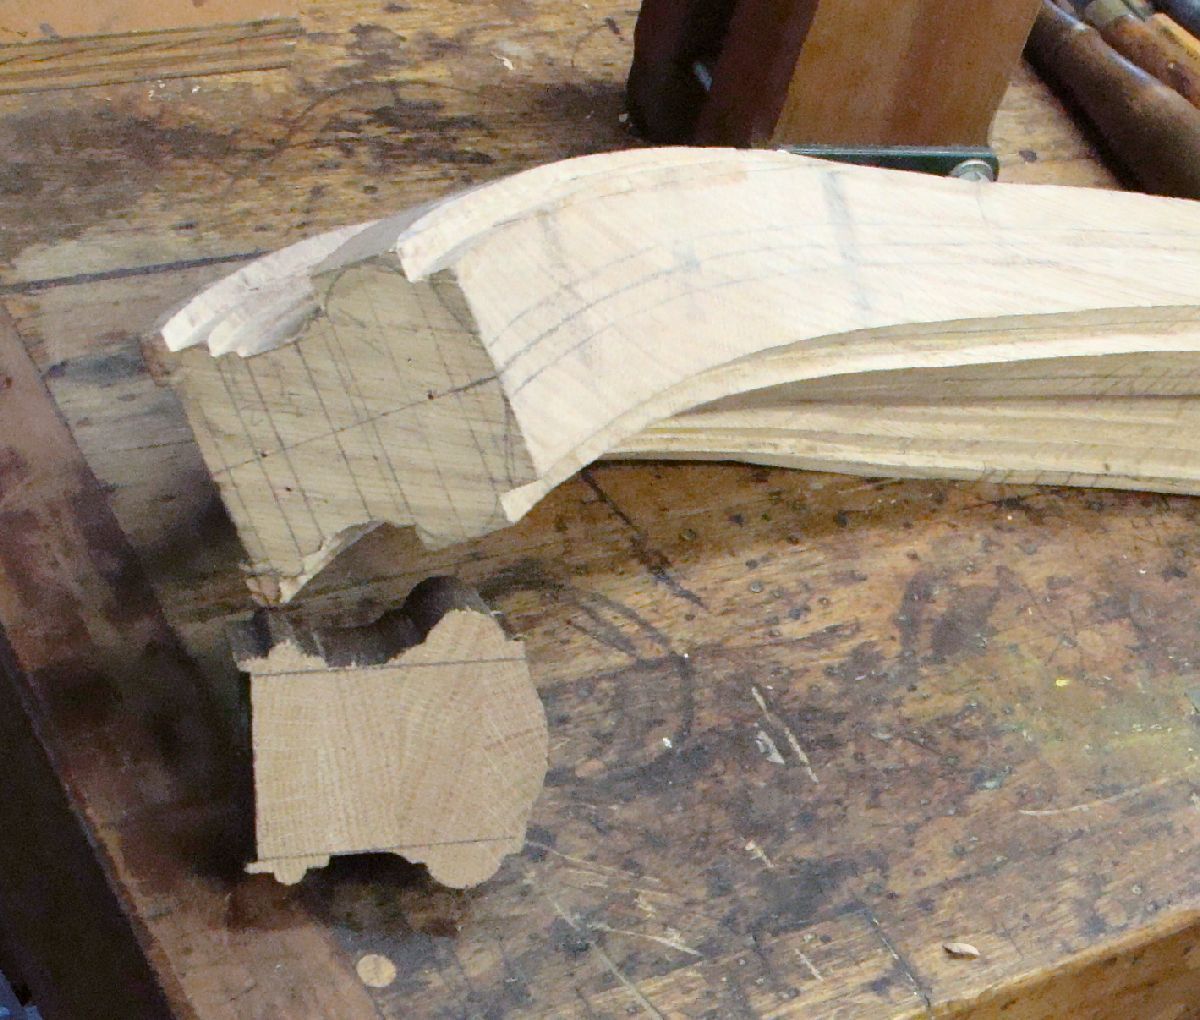
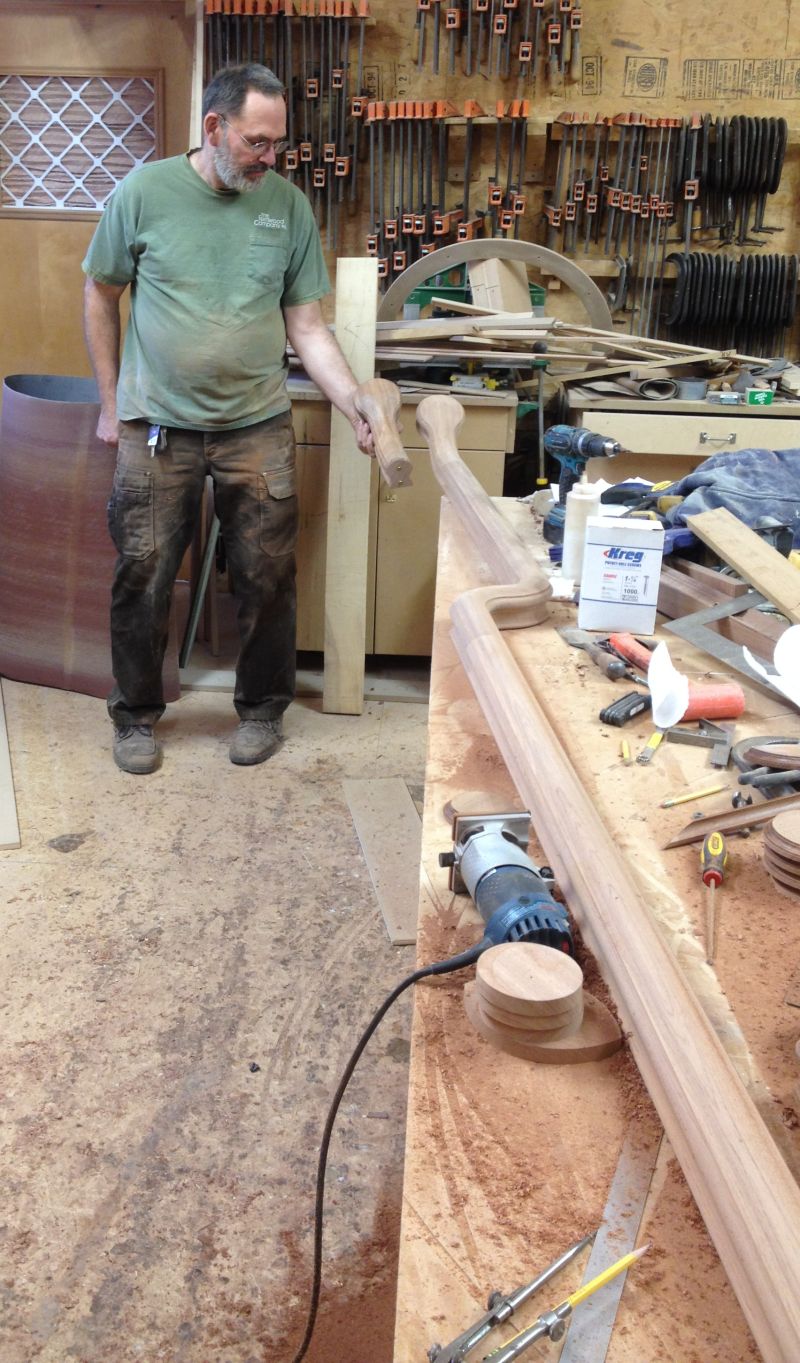
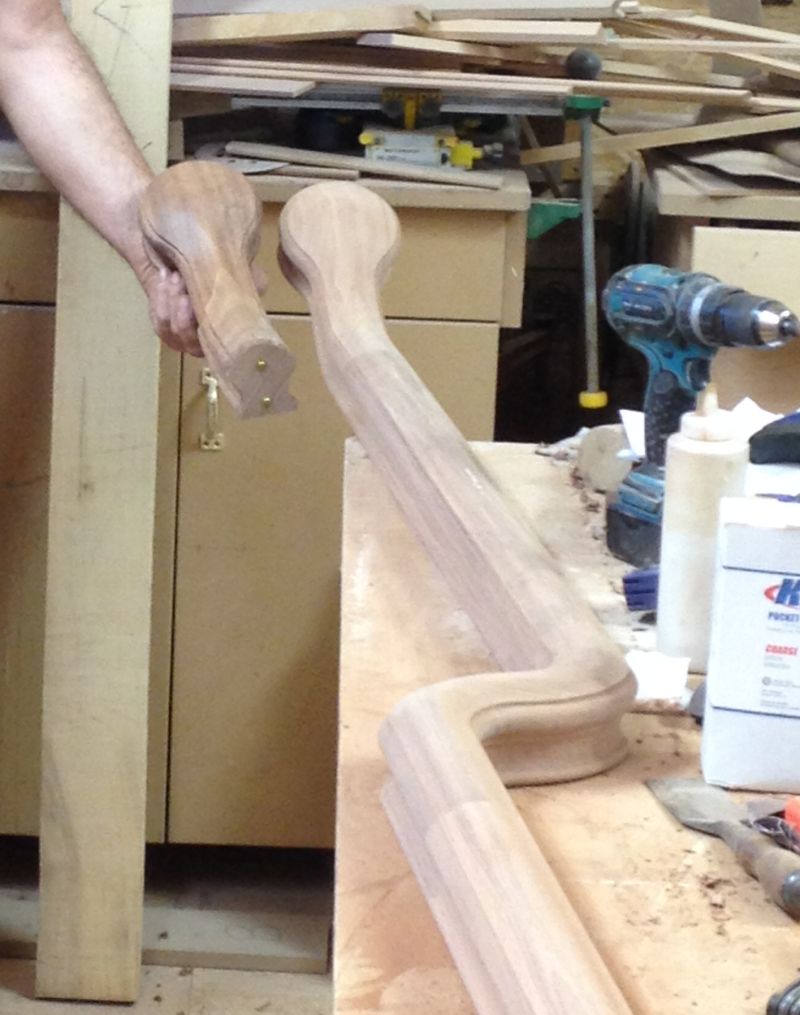
The pictures below are of my work for the winter of 2015 and they represent about 10 weeks of labor. 
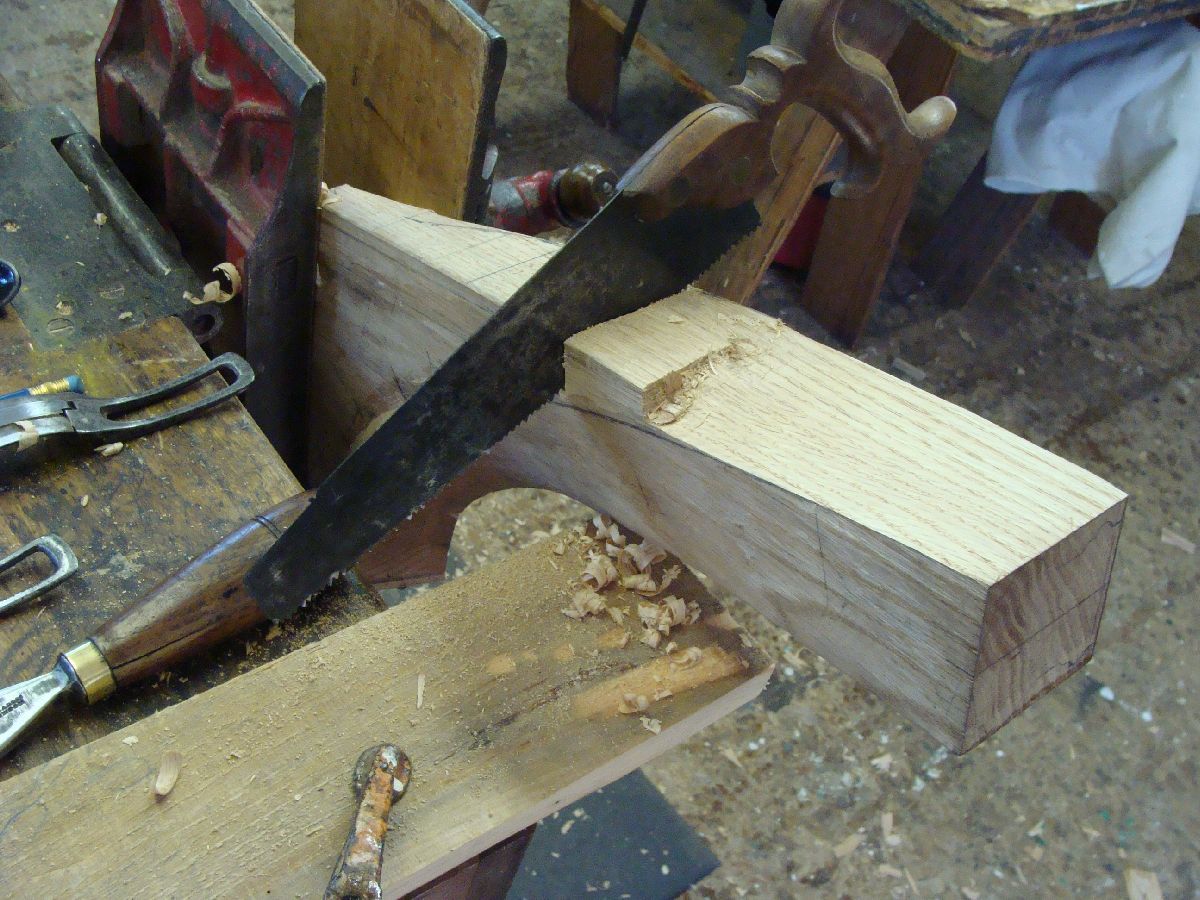
They are made from laminated South American mahogany and are completely 
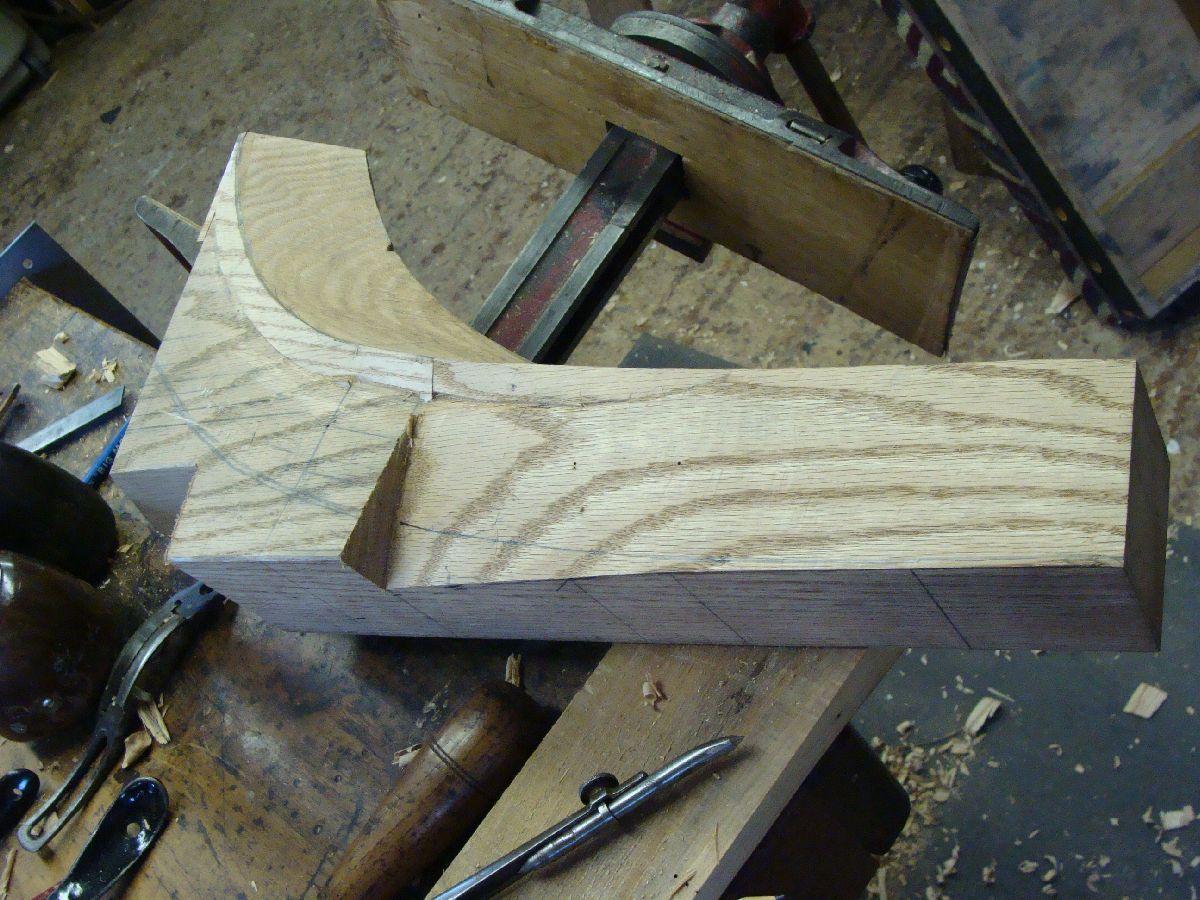
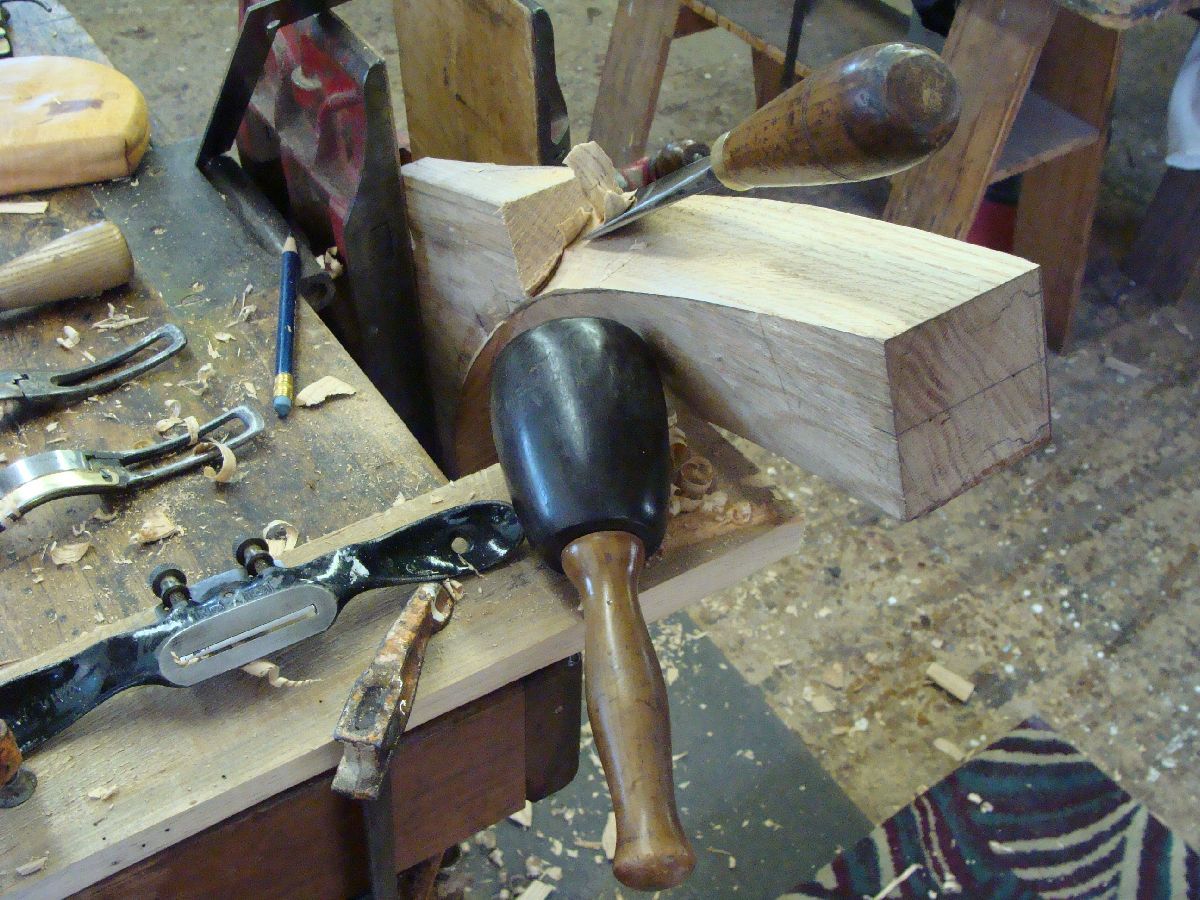
hand carved. The initial, glued up blocks were made large enough so that two brackets could be cut out of each. 


BracketA.jpg (112320 bytes) Bracket1.jpg (100722 bytes) Bracket2.jpg (140089 bytes) Bracket3.jpg (115993 bytes) Bracket4.jpg (80481 bytes) Bracket5.jpg (67719 bytes) Bracket6.jpg (57725 bytes) Bracket7.jpg (68849 bytes)
 
Rectangular blocks cut out into the architect supplied profile.
The serpentine face was then hand carved into the profile shown. 
The leaves live within this profile and are 3/8" in height. Carving the leaves into the carved profile is how you show  the contours of the imaginary surface underneath. 
The last picture shows the eyes and major planes of the leaf pads being defined before the details are carved


Bracket8.jpg (84420 bytes) Bracket9.jpg (68748 bytes) Bracket10.jpg (154582 bytes) Bracket11.jpg (79751 bytes) Bracket12.jpg (134239 bytes) Bracket13.jpg (96670 bytes) Bracket MD Side by Burke 3-2015.jpg (280460 bytes) Bracket15.jpg (64143 bytes)
 
The first picture is a good example of how the leaves are developed from top to bottom. 
The second and third picture shows the fully developed leaves.
Picture four shows the development of the bottom leaves which bump into the minor scroll and turn back toward the serpentine face and the larger, major scroll.
Five and six show more leaf development. 
The second to the last picture shows the development of of the side face spray.
Last picture depict one of the finished brackets. 


Bracket21.jpg (86832 bytes) Bracket16.jpg (103226 bytes) Bracket20.jpg (103071 bytes) Bracket18.jpg (96257 bytes) Bracket MD by Burke 3-2015.jpg (97817 bytes) Bracket MD Carving  Burke 3-2015.jpg (148856 bytes) Bracket MD Portrait by Burke 3-2015.jpg (33602 bytes)
 
First two pictures show the first two fully carved brackets.
These brackets are intended for outside use in South Carolina and so I gave them their first two coats of oil base primer. 
The last three pictures show yours truly with the brackets in progress. 
These brackets will be hung upside down with the square end against the house. The long. flat side holds up a entry door roof. When walking up to these two entries, the small minor scroll and serpentine face leaves will be what greats you. 3-2015


NordicBracket1.jpg (171273 bytes) NordicBracket2.jpg (190111 bytes) NordicBracket3.jpg (91032 bytes) NordicBracket4.jpg (202941 bytes) NordicBracket5.jpg (209025 bytes) NordicBracket6.jpg (116989 bytes) NordicBracket7.jpg (120246 bytes)
 
First four pictures we have two entryway brackets made out of glued up, South American mahogany. 
Last two pictures shows these brackets installed in their new home. 12-2015


Crouch Fitgerald proto type, shop jpg.jpg (48639 bytes) Crouch Fitgerald proto type, store jpg.jpg (40944 bytes) Flying mouldings 4-4.jpg (29119 bytes) Mannequin hands.jpg (35351 bytes) Carved hand rail.jpg (46581 bytes) Newel post carvings jpg.jpg (32002 bytes) 2 goosenecks jpg.jpg (38934 bytes) 3 goosenecks.jpg (46206 bytes)
 
First 2:  One of a kind display case for a Crouch~Fitgerald store.
4 "flying" moldings.
Replacement fingers and hand for a suit dummy (6 pieces per finger).
Carved replacement hand rail turn.
Carved newel post panels. 
Stairway goosenecks.
Stairway goosenecks from the top looking down.  I also turned the prototype for the balusters. 


StairRailWreath1.jpg (502109 bytes) StairRailWreath2.jpg (531438 bytes) StairRailWreath3.jpg (593040 bytes) StairRailWreath4.jpg (565380 bytes) StairRailWreath5.jpg (630306 bytes) StairRailWreath6.jpg (574182 bytes)
 
Work in progress for the stair rail wreaths above.


Acanthus screen blank - oak.jpg (35738 bytes) Acanthus_Screen1.jpg (42506 bytes) Screen 4-4b.jpg (24465 bytes) Screen 4-4.jpg (43547 bytes) Small brackets jpeg.jpg (28627 bytes)
 
First picture: Screen layout on oak blank - partially cut out.
Next 3: Screens used above fixed glass panels and door. Carved on both sides.
Last: 3 3/8" tall X 2 1/8" wide mahogany brackets. 


Coat of arms, wood 4-4.jpg (46116 bytes) Coat of arms, dry fit 4-4.jpg (44935 bytes) Coat of arms, detail 4-4.jpg (46198 bytes) Coat of arms, no shield.jpg (47004 bytes) Coat of arms.jpg (45677 bytes) Coat of arms in it's home.jpg (28932 bytes)
 
American walnut shield and coat of arms. Shield is 1 1/4 inch thick solid walnut and is 48 inches tall by 40 inches wide. The Coat of arms itself is 2" thick and was carved separately, painted, gilded with 23K gold and  aluminum leaf and then attached to the shield. The harp strings are made from "fine" (.996 pure) silver wire. Fine silver is nearly pure silver and will not tarnish. Sterling has a bit of copper in it to make it stronger and it is the copper that tarnishes.  
The last picture shows the arms hanging in its new home. Perfect scale for a room this size. 


Urn centerpiece.jpg (24259 bytes) Shell & acanthus elements.jpg (33694 bytes) Proto-types.jpg (25093 bytes) Organ_keystone.jpg (46246 bytes) Organ keystone application.jpg (44150 bytes)
 
Fireplace urn carving 
Oak shell and valance scroll work.
Three carved prototypes 
Last 2: Two keystones for a church pipe organ and the mock-up picture of same.


Acanthus spray 2.jpg (50234 bytes) Acanthus spray 3.jpg (27871 bytes) Acanthus spray 1.jpg (48898 bytes) Acanthus spray - pine.jpg (95010 bytes) Eagle - secretary.jpg (36640 bytes) Secretary & eagle.jpg (45453 bytes) Navy eagle.jpg (24146 bytes)
 
Three acanthus leaf studies in America honey mesquite followed by one in white pine.
Carved mahogany eagle was done for a friend of mine, Bill Thomas of Rindge, New Hampshire. The 112 inch tall circa 1790 Maryland Federal cylinder-fall desk and bookcase is his masterpiece. Bill is a member of the New Hampshire Masters and you can see his wonderful work at: http://www.williamthomas-furniture.com/
Last eagle carving is of the United States Naval Reserve emblem.


Gargoyle.jpg (47418 bytes) Dragon 2.jpg (23522 bytes) Dragon 3.jpg (44816 bytes) Dragon.jpg (20925 bytes) Shell_2.jpg (21646 bytes) Shell 3.jpg (25223 bytes) Shell 1.jpg (36550 bytes) Shell 4.jpg (42953 bytes)
 
First picture: Gargoyle on a perch.
Next 3: Dragon head from 3 angles.
4 different shell designs.


Pine shell being carved jpeg.jpg (41759 bytes) Pine shell jpeg.jpg (42663 bytes) Foot prototypes 2.jpg (24322 bytes) Foot prototypes.jpg (35583 bytes) Finished foot on skirt.jpg (17352 bytes)
 
First two: Large10 segment shell carved on owner supplied, knotty Eastern White Pine panel. The panel dimensions are 42" X 24"
Last three: Altering designer's plans to accommodate three dimensional realities. 
Working through prototypes.
Finished foot and skirt was worth the prototype effort. 


Mantel 1.jpg (21593 bytes) Mantel 2.jpg (32258 bytes) Keystone.jpg (27492 bytes) Keystone & return.jpg (34331 bytes) Mahogany key.jpg (15460 bytes) Mahogany key & return.jpg (25225 bytes) Prototype newel carving.jpg (16046 bytes) Newel post panels.jpg (17574 bytes)
 
First two: This is a real pretty chestnut mantle made by Fred Wildnauer of South Berwick, Maine. I carved the three oval sunburst medallions. 
Next four: Huge keystones and returns (22" long X 16" top X 10" bottom) for a pair of very large, arched doorways.  Made for GLR woodworks, Kittery, Maine.
Last two: These are every tiny and precise newel post panels. Note the dime in the first picture for scale. The 7 small protruding "buttons" between the shields are 3/16" in diameter. The background piece is 3/16" thick and both shield elements are 3/32" thick except for the last 1/8" of the pointy ends which are 3/16".  17 pieces total plus the prototype. 


Egg & Dart capital 1.jpg (23882 bytes)

Egg & Dart capital 2.jpg (24620 bytes)

Egg & Dart capital 3.jpg (27536 bytes) EggDartCapital3.jpg (17494 bytes)

EggDartCapital4.jpg (18133 bytes)

 
First three: 2 1/2" tall egg and dart carvings (8) in a solid cherry capital.
Last two: Finished and installed capitals.


Pull 2.jpg (21617 bytes) Pull 1.jpg (22639 bytes) Handles.jpg (33737 bytes)
 
First two: 7" long acanthus leaf drawer pull.
Last one: Two sets of two walnut drawer pulls.


Shell lay out.jpg (18894 bytes)

Shell lay out 2.jpg (17950 bytes) Shell carving.jpg (22798 bytes) shelltop_bare.jpg (149836 bytes) shelltop_primed.jpg (165753 bytes) shellcab_bare.jpg (138879 bytes)

shellcabs_primed.jpg (168937 bytes)

 
32" Wide basswood turning being laid out and carved into a cupboard shell. These two shells were carved for G.J.W. Spykman, Cabinetmakers from Keene, NH. Gary's website is at: http://www.gjwspykman.com/ . These two shells were actually one unit to start. They were turned into a bowl shape on a large, patternmakers lathe and then separated into two halves. The shells were carved out of these two pieces.
The last four pictures show the shells in their cabinets both bare and primed.


ShellApplication1.jpg (102150 bytes)

ShellApplication2.jpg (91717 bytes) Flower1.JPG (30123 bytes) Flowers.jpg (69718 bytes) Flower3.jpg (18219 bytes) FlowerApplication1.jpg (106860 bytes)

FlowerApplication2.jpg (100143 bytes)

 
First two pictures show the above shells after painting, gilding and installation. Gary did a fabulous job. 
Third picture shows a wooden flower with brass stem.
The forth shows 40 of them finished.
Fifth picture and they are starting to look like something.
Last two pictures show how they were used in the same home as the shells. 


Dolphin1.jpg (37426 bytes) Dolphin2.jpg (21104 bytes) DolphinPictures.jpg (33580 bytes)
 
These carved walnut dolphins are located in the Naval Ambulatory Care Center at the Historic Portsmouth Naval Shipyard in Kittery, Maine. The board itself depicts the command structure of that clinic. 


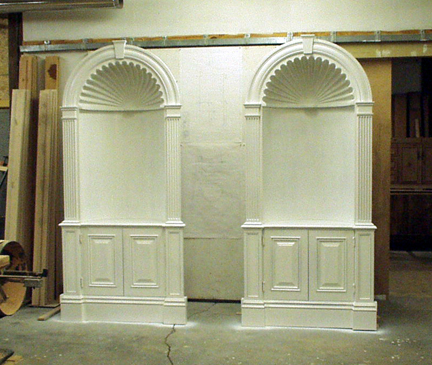
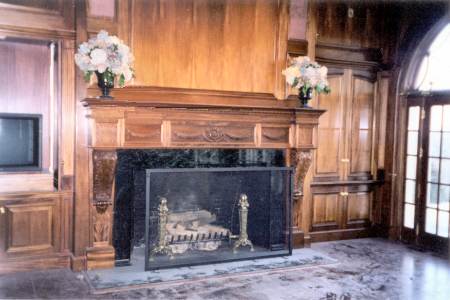
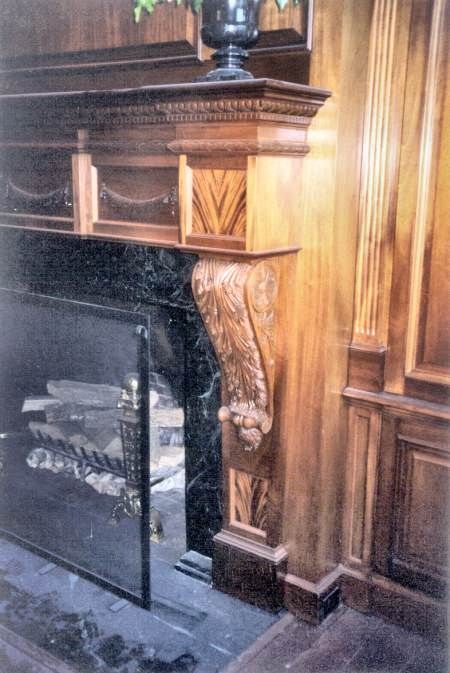
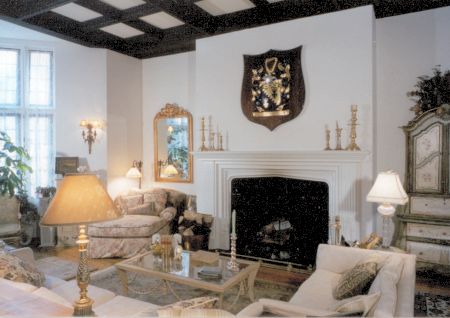
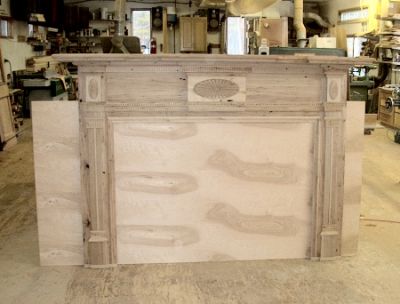
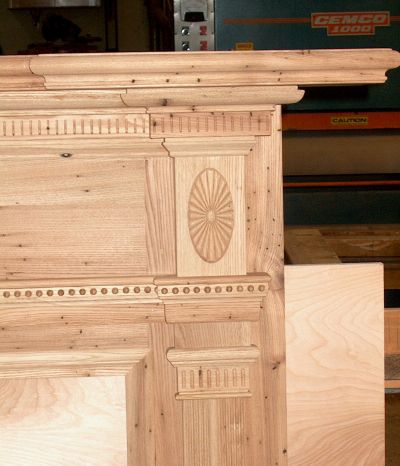
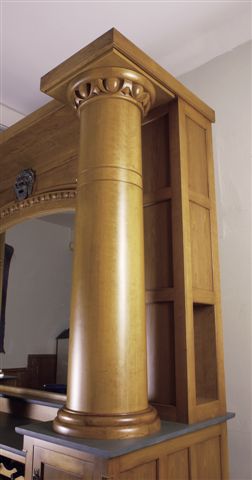
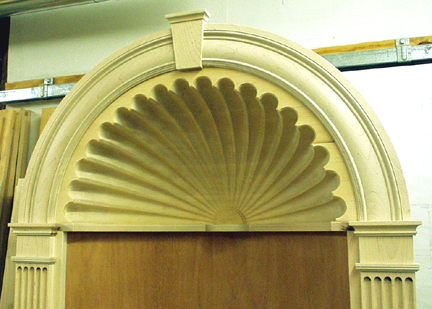
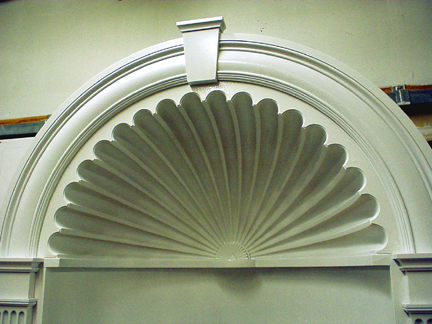
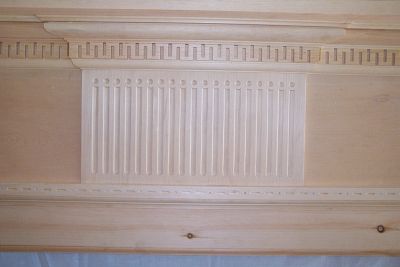
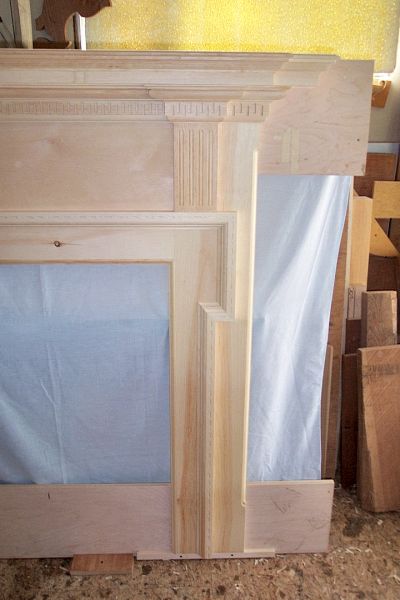
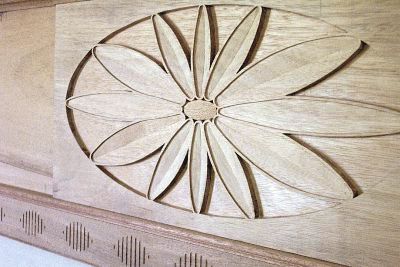
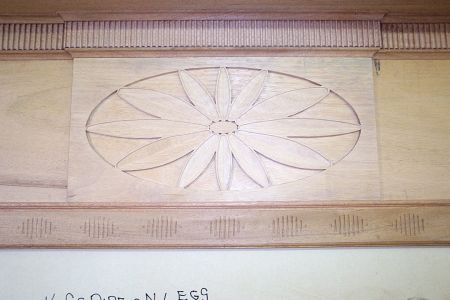
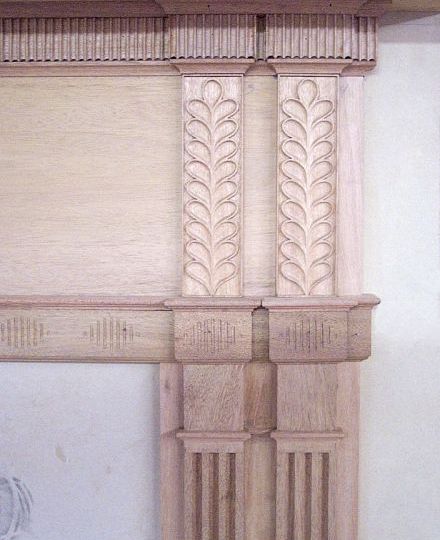
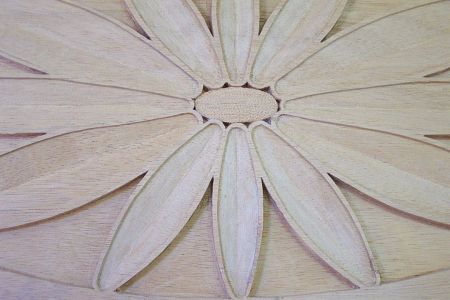
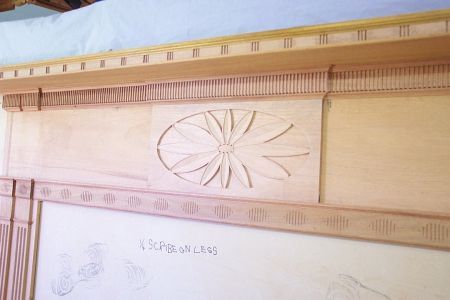
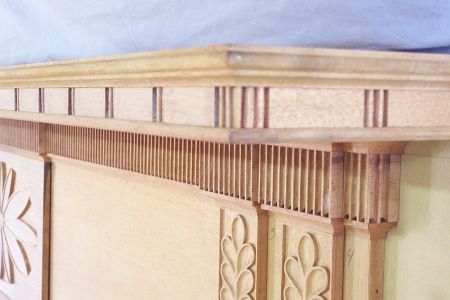
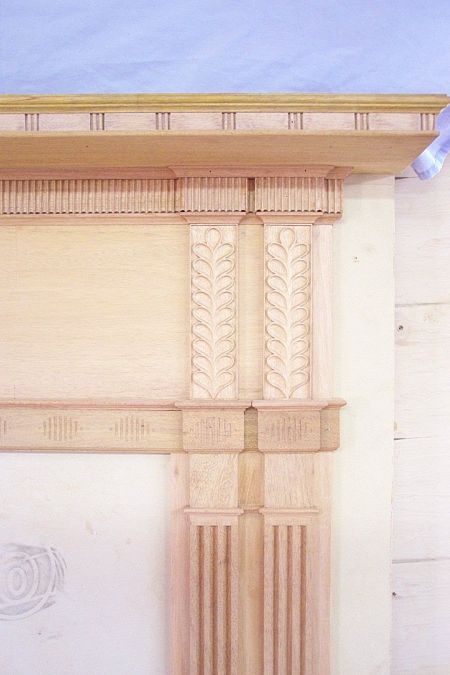
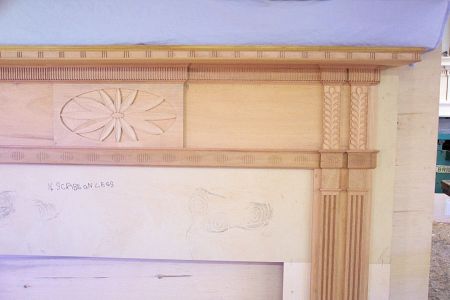
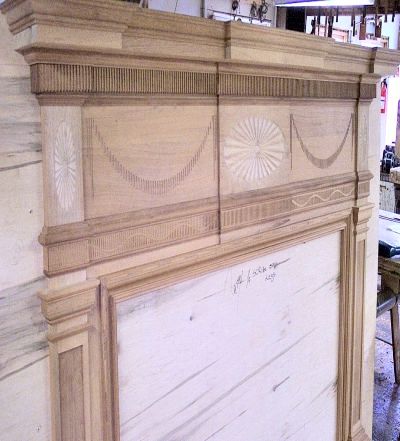
The mantles below were designed by:

Mitchell Studio
35 Elm Street
New Haven, CT 06510
Phone: 203-642-7440

They were built by: 


Grace, Ryan & Magnus Millwork, LLC
17 North Bleeker Street
Mount Vernon , NY 10550

Tel: 914-925-9741


Lbrary mantle.jpg (28766 bytes) Library mantle center panel.jpg (22402 bytes) Library mantle center panel detail.jpg (12943 bytes) Library mantle pilaster detail.jpg (36381 bytes) Library mantle detail.jpg (25369 bytes) Mantle before carving.jpg (27858 bytes)


Pine library mantle.  
Pine library mantle carved center panel.
Pine library mantle carved center panel detail.
Pilaster 
Pilaster detail.
Another mantle before carving.


Mantle - work in progress.jpg (17923 bytes) Mantle - leaf pilasters.jpg (20062 bytes) Mantle - center panel.jpg (28060 bytes) Mantle - carved center panel molding.jpg (23054 bytes) Mantle - more work done.jpg (43802 bytes)


Mantle center panel close up.jpg (23022 bytes) Mantle long view.jpg (20378 bytes) Mantle longer view.jpg (21680 bytes) Mantle reeds, leaves & flutes.jpg (39723 bytes) Mantle reeds, leaves, flutes & center panel.jpg (17753 bytes)
 
A few more pictures of another interesting mantle, carving now complete. 


Living room mantle flute lay out.jpg (38143 bytes) Living room mantle flute carving.jpg (51014 bytes) Living room mantle flutes & chisels.jpg (57255 bytes) Living room mantle sine wave molding.jpg (23526 bytes) Living room mantle panels and molding.jpg (30606 bytes) Living room mantel.jpg (35494 bytes)


Living room mantle flute lay out.
Flutes being carved.
More flute carving with a nice assortment of chisels.
Carved sine wave molding
Carved panels and molding
Molding and panels for one of two identical mantles.  These are "raw'' carvings in that neither the background nor the carvings themselves have been sanded yet.  Every good job starts with a good design and the Mitchell Studio got these designs exactly right!


Carved panel.jpg (48404 bytes) Carved panel detail 1.jpg (28718 bytes) Carved panel detail 2.jpg (21856 bytes) Carved panel detail 3.jpg (35697 bytes) Cherry Shell 1.jpg (11900 bytes) Cherry Shell 2.jpg (9178 bytes)
 
This 4 carved panel was designed by the customer and will be used as a pattern to make a mold that will be used to cast similar panels out of aluminum. 
2 highboy shells in cherry


Carved vanity legs.JPG (11955 bytes) Carved vanity leg, front view.JPG (59491 bytes) Carved vanity leg, side view .JPG (64068 bytes) Carved foot.JPG (46570 bytes)
 
Two interesting vanity legs supplied by Grace, Ryan & Magnus Millwork.
Front view of a leg's carved acanthus leave knee.
Side view of same. 
The feet were carved on the two outside faces. Note the stippled or punched background. This technique helps make the background appear to be deeper than it really is and that makes the carving really stick out. 


Makore shell .jpg (20726 bytes) Carved rope on cherry frame.jpg (25896 bytes) Carved rope.jpg (43183 bytes) Carved leaf & tongue molding.jpg (33852 bytes) Egg & Dart 2.JPG (38324 bytes) Egg & Dart 3.JPG (40337 bytes) Egg & Dart 1.JPG (17310 bytes)
 
Makore shell. One of 40!
Cherry frame with carved rope molding.
Close up of carved rope molding.
Carved mahogany leaf & tongue molding. 74 feet total. 
Last three pictures: Carved Quarter sawn white oak egg & dart molding. 96 feet total.


Pine finial 1.jpg (23378 bytes) Pine finial 4.JPG (76895 bytes) Pine finial 2.jpg (35364 bytes) Pine finial 3.jpg (32312 bytes)
 
4 views of the same pine finial. 


Bracket finished bottom.jpg (54245 bytes) Bracket finished side large.jpg (56382 bytes) Bracket finished end.jpg (102722 bytes) Bracket finished face & end 2.jpg (62571 bytes) Bracket finished face.jpg (57727 bytes) Bracket finished face large.jpg (76345 bytes)


Bracket bottom.jpg (31378 bytes) Bracket end.jpg (23031 bytes) Bracket bottoms.jpg (27809 bytes) Bracket ends.jpg (31790 bytes) Bracket tops.jpg (32333 bytes)


Brackets in formation.jpg (14816 bytes) Brackets nose to nose.jpg (30381 bytes) Bracket pile.jpg (29749 bytes) Bracket top.jpg (35724 bytes) Oak rosette.jpg (31327 bytes)
 

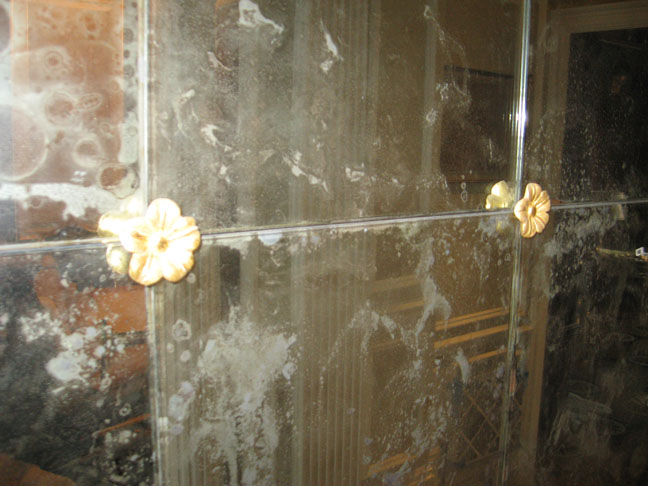
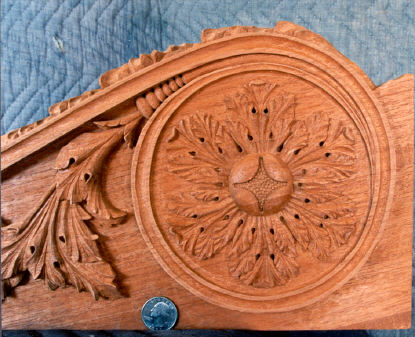
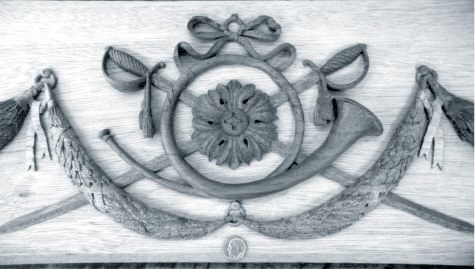
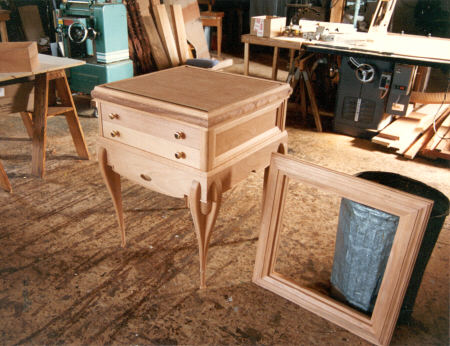
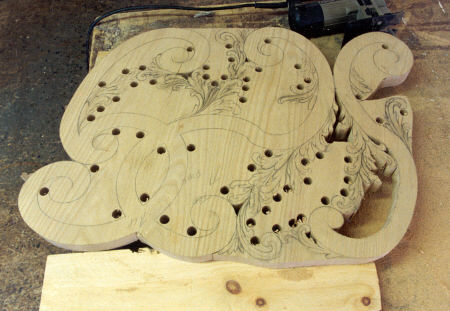
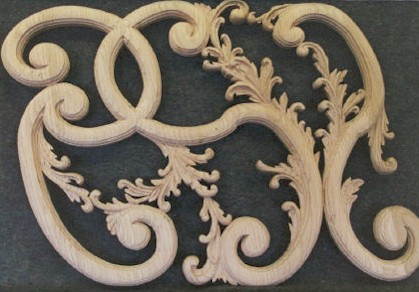
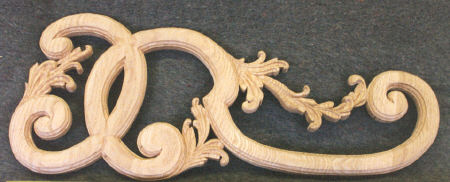
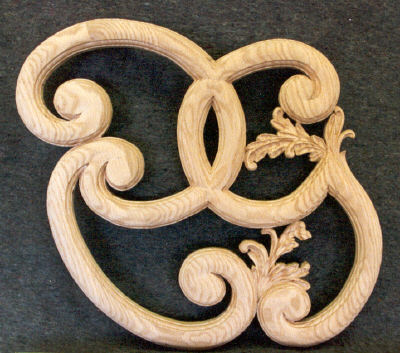
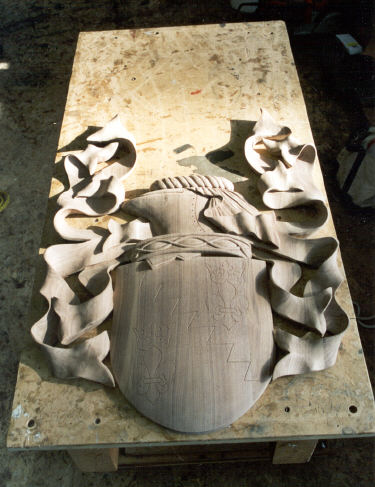
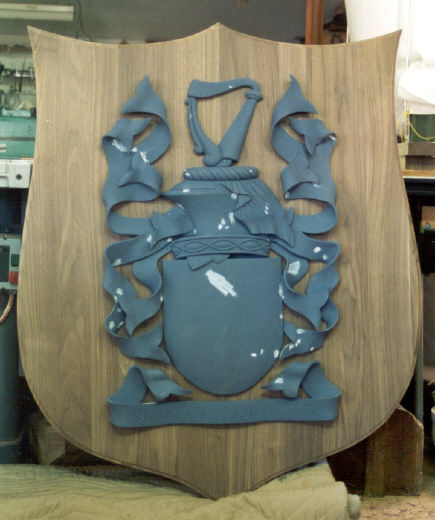
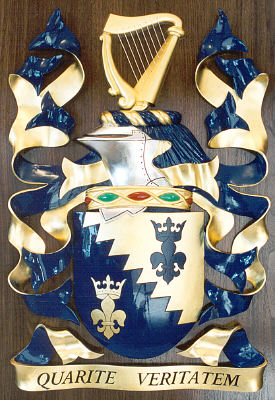
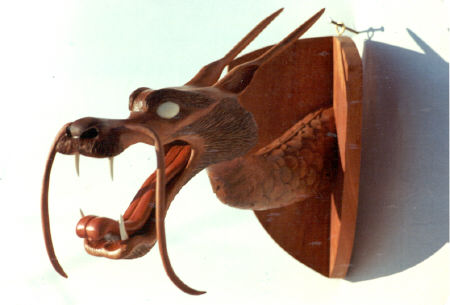
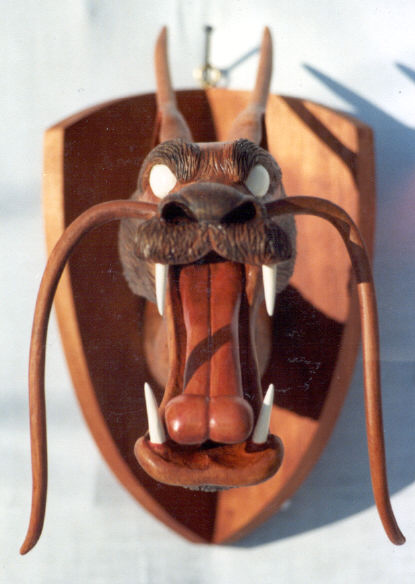
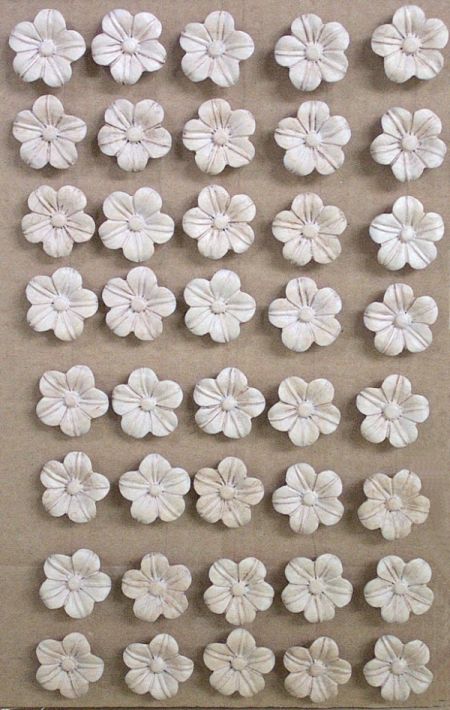
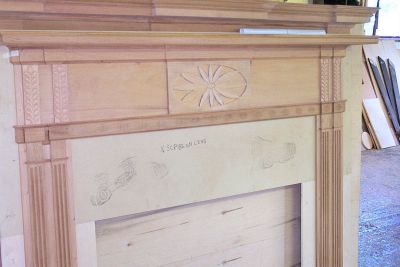
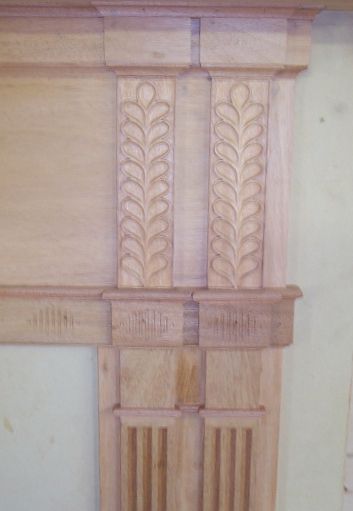
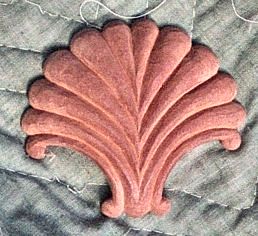
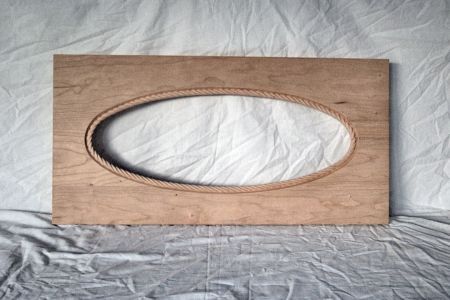
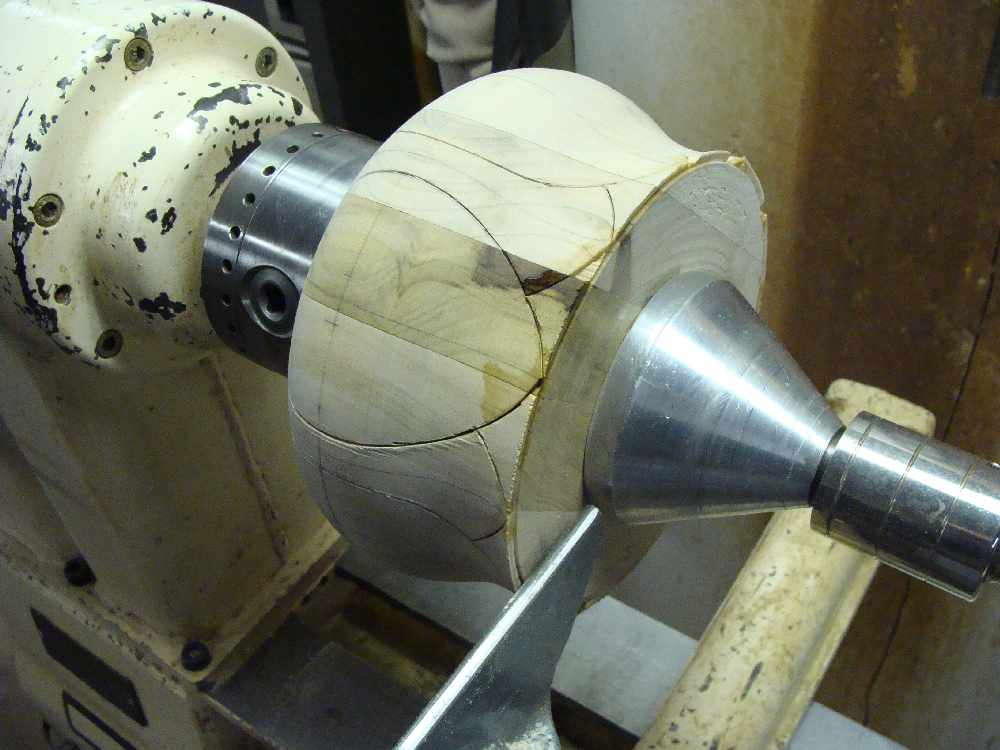
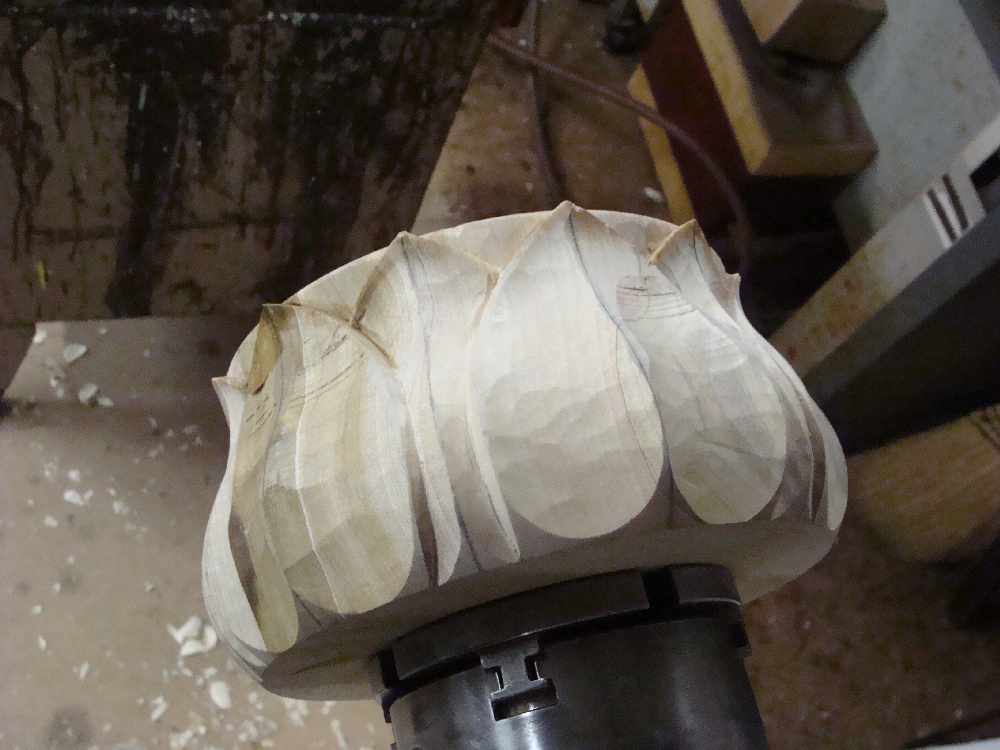
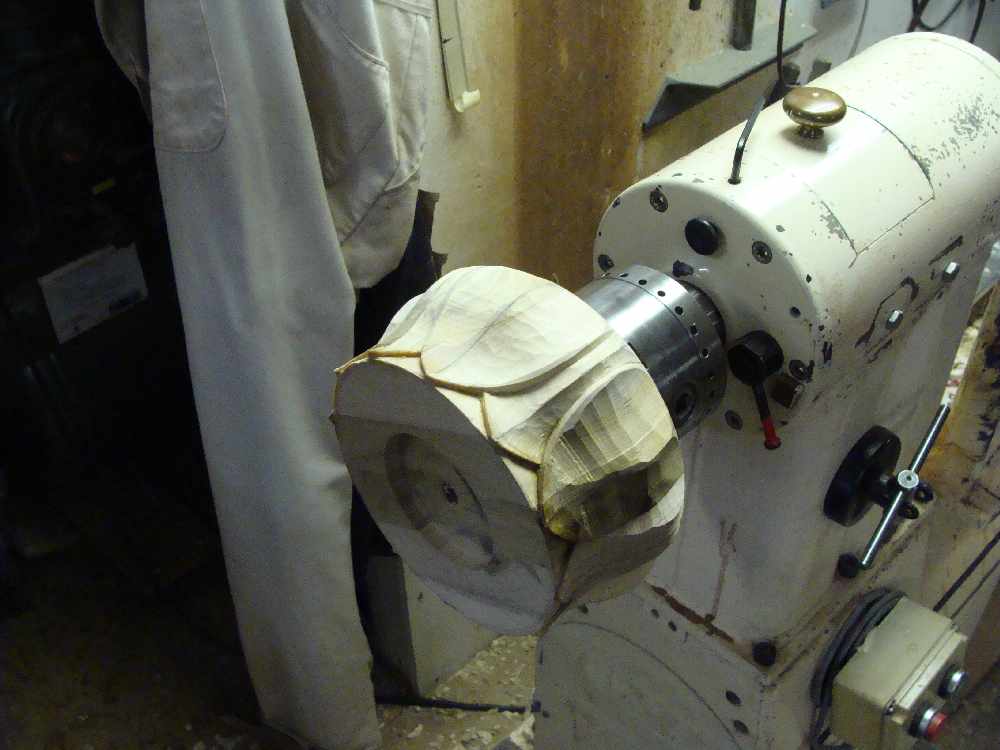
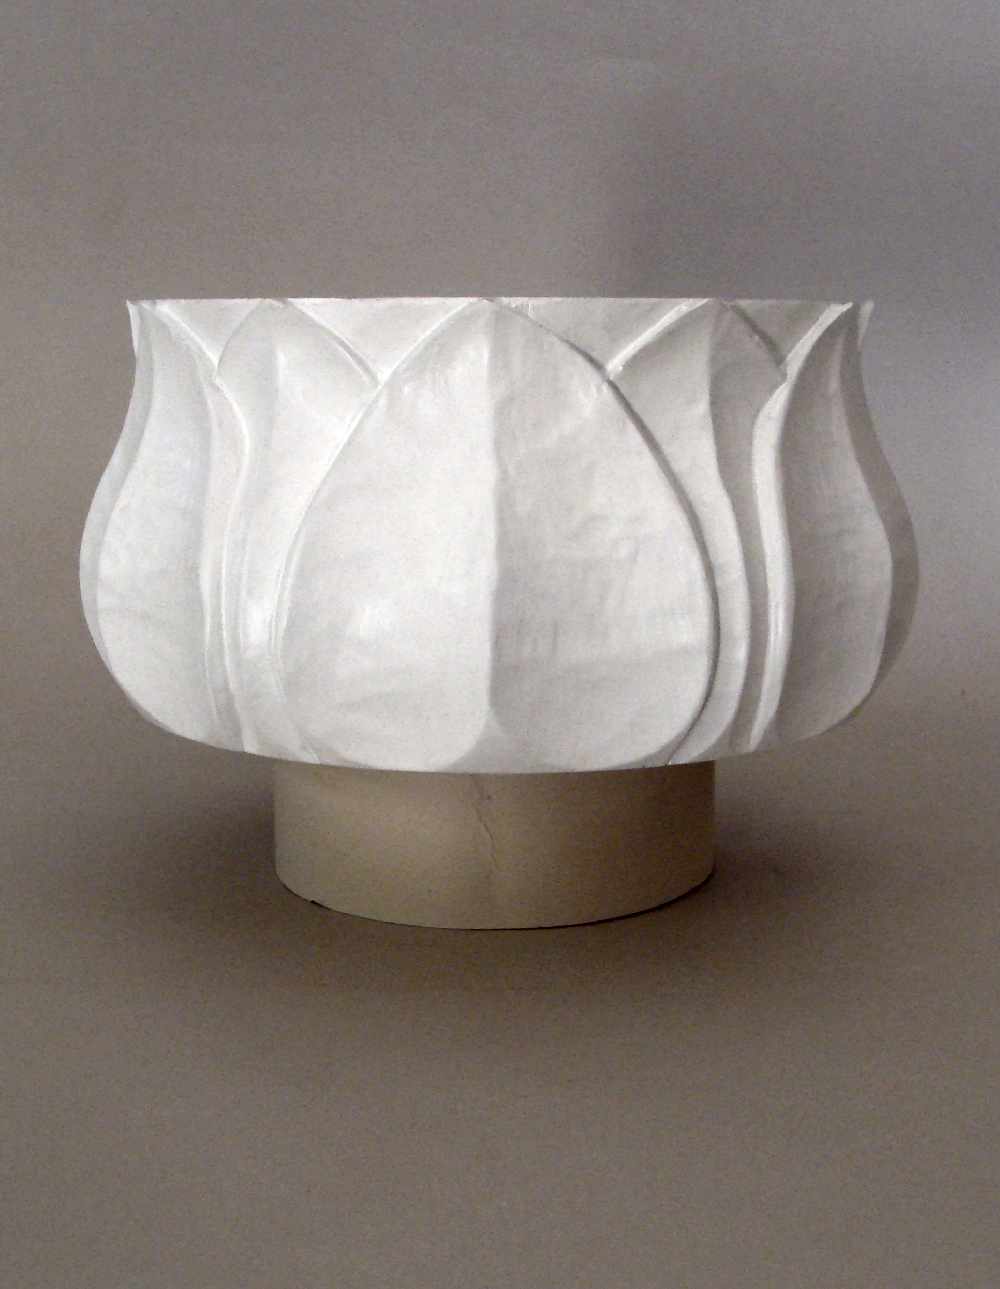
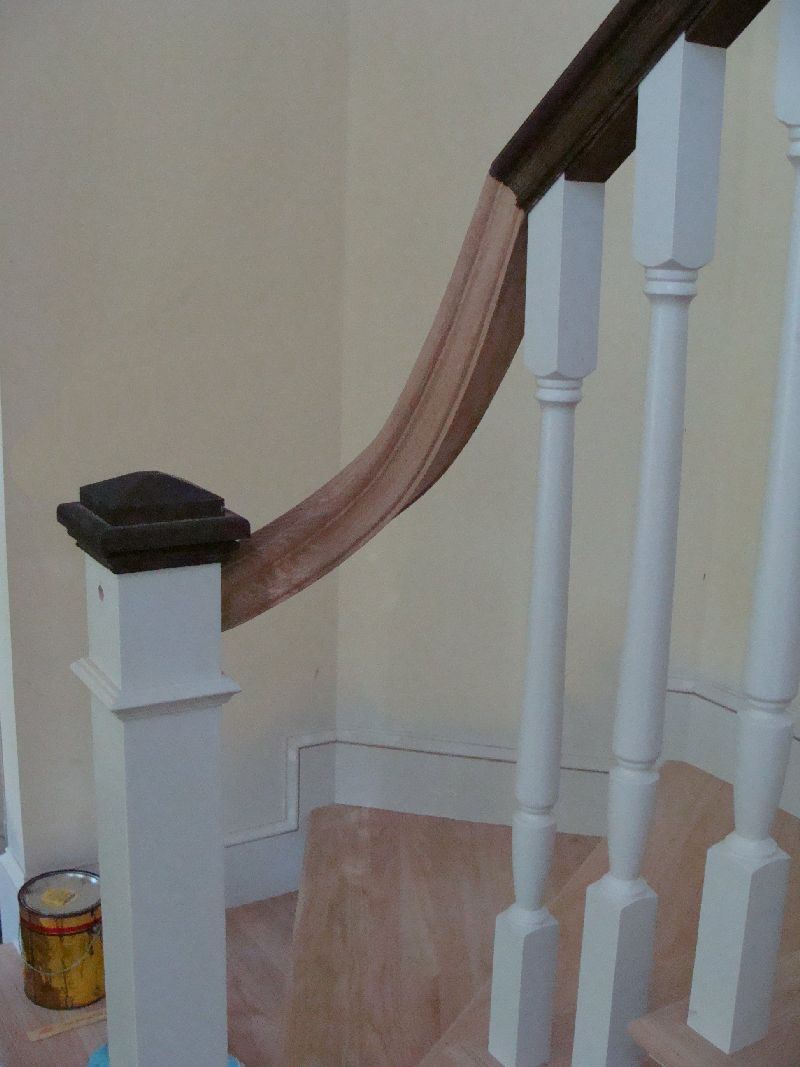
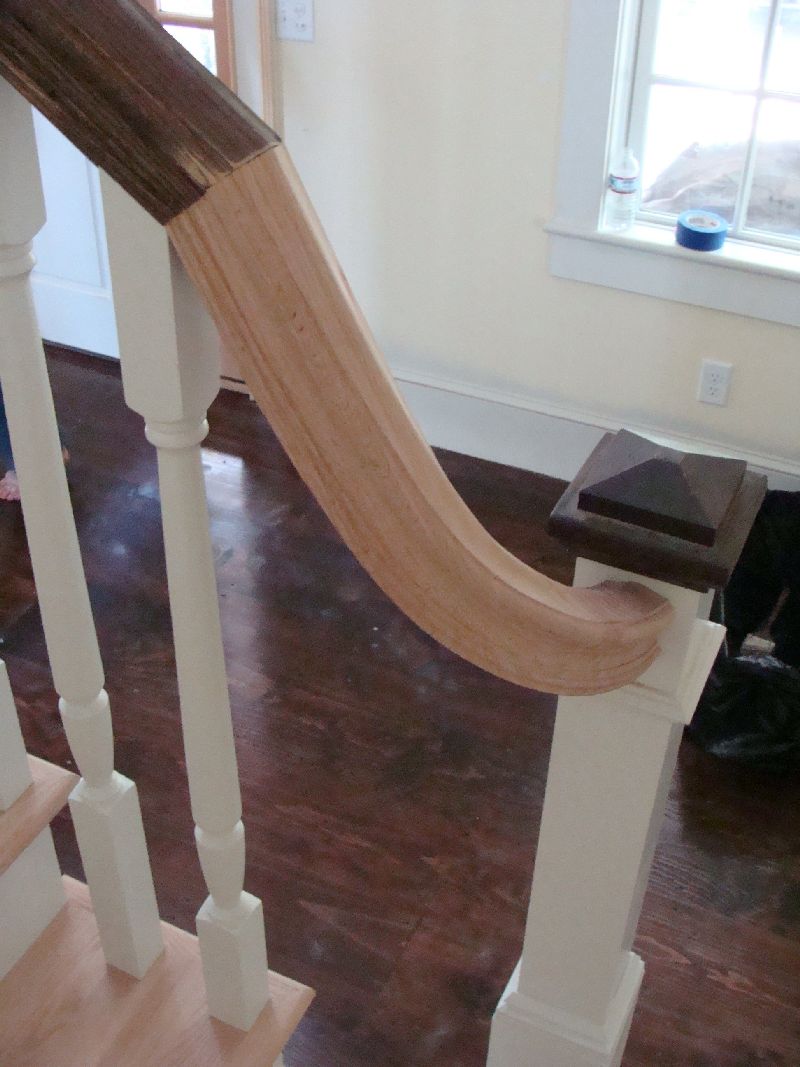
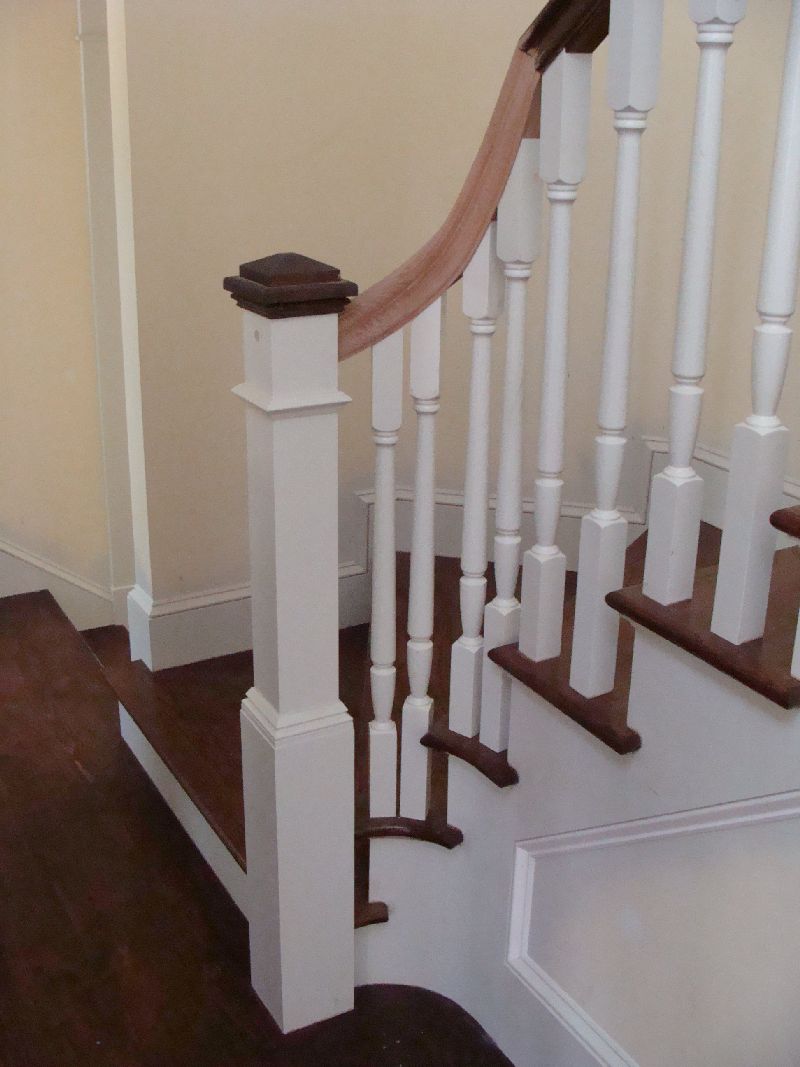
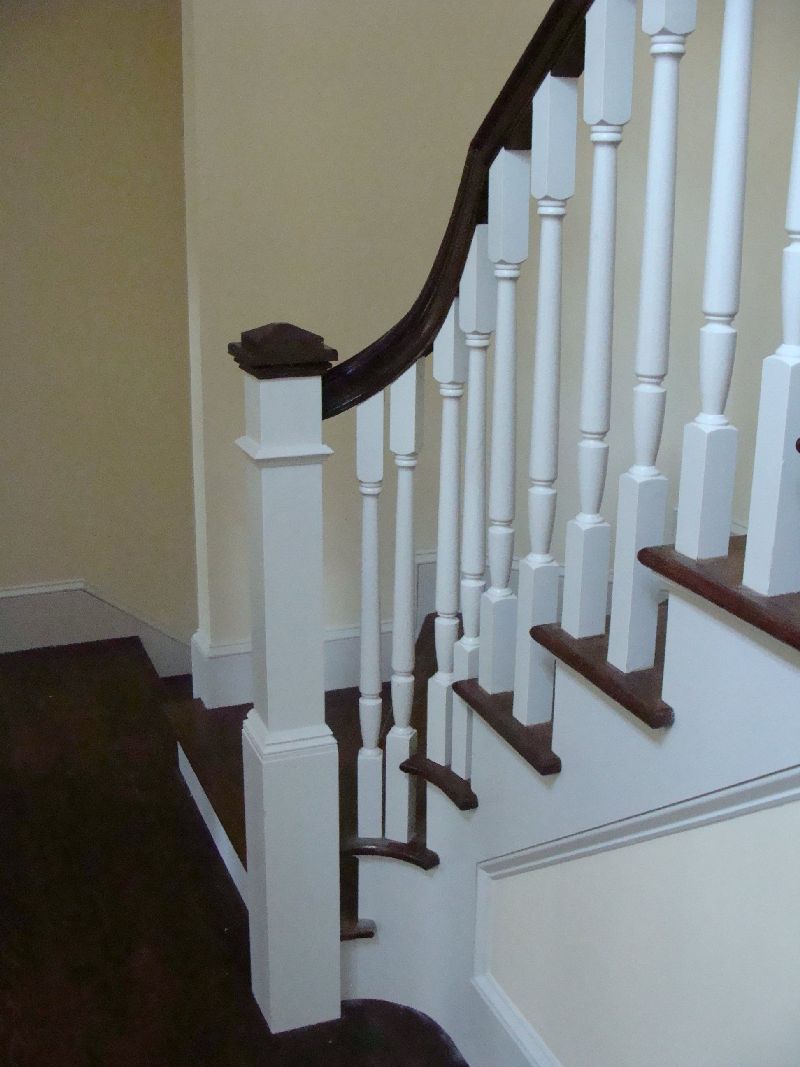
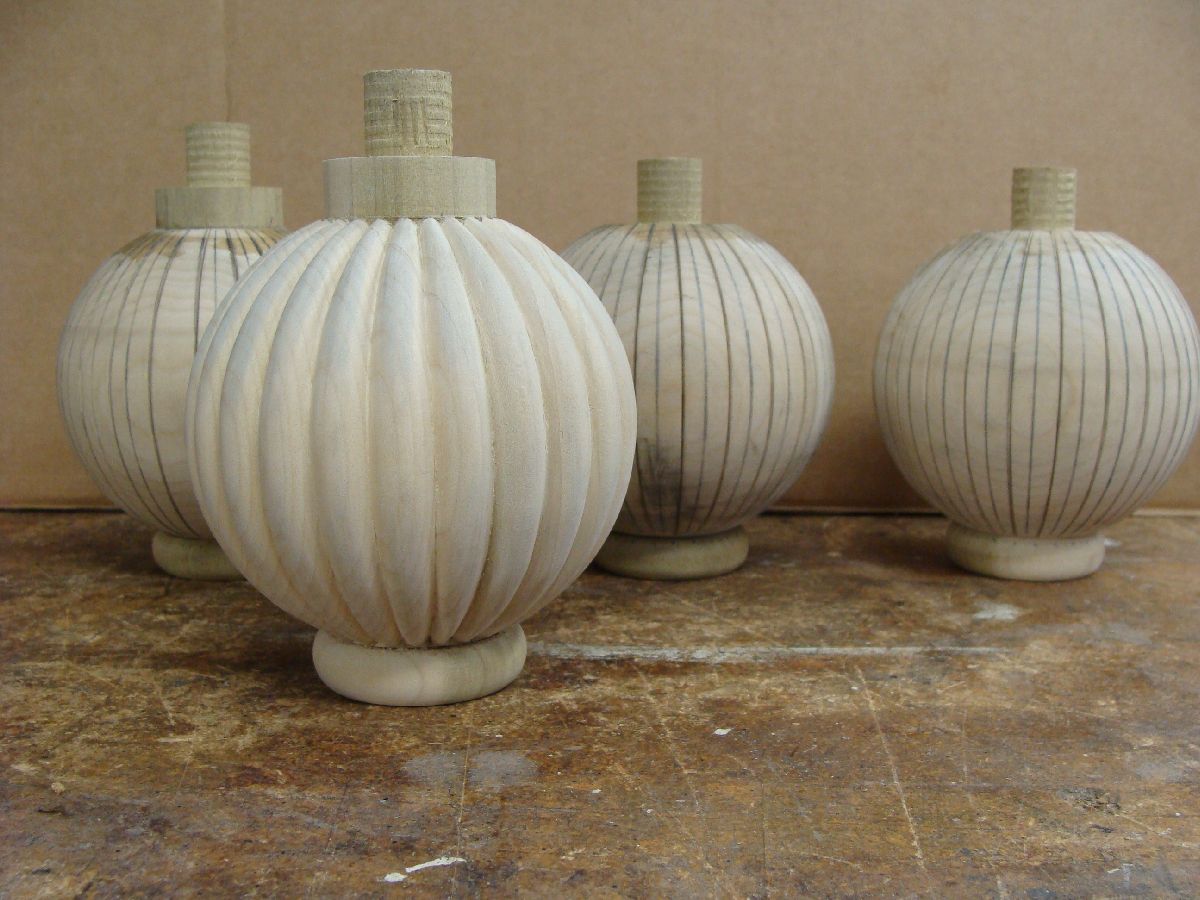
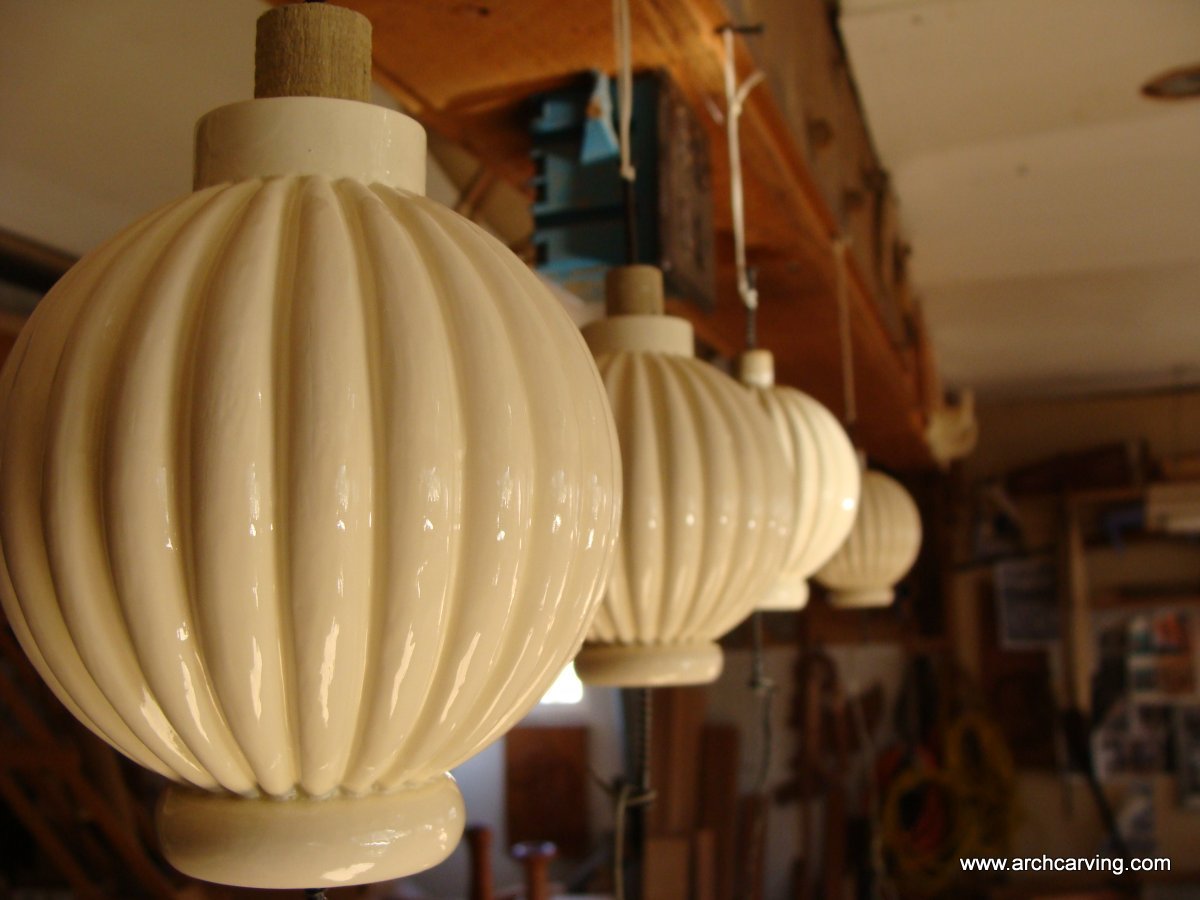
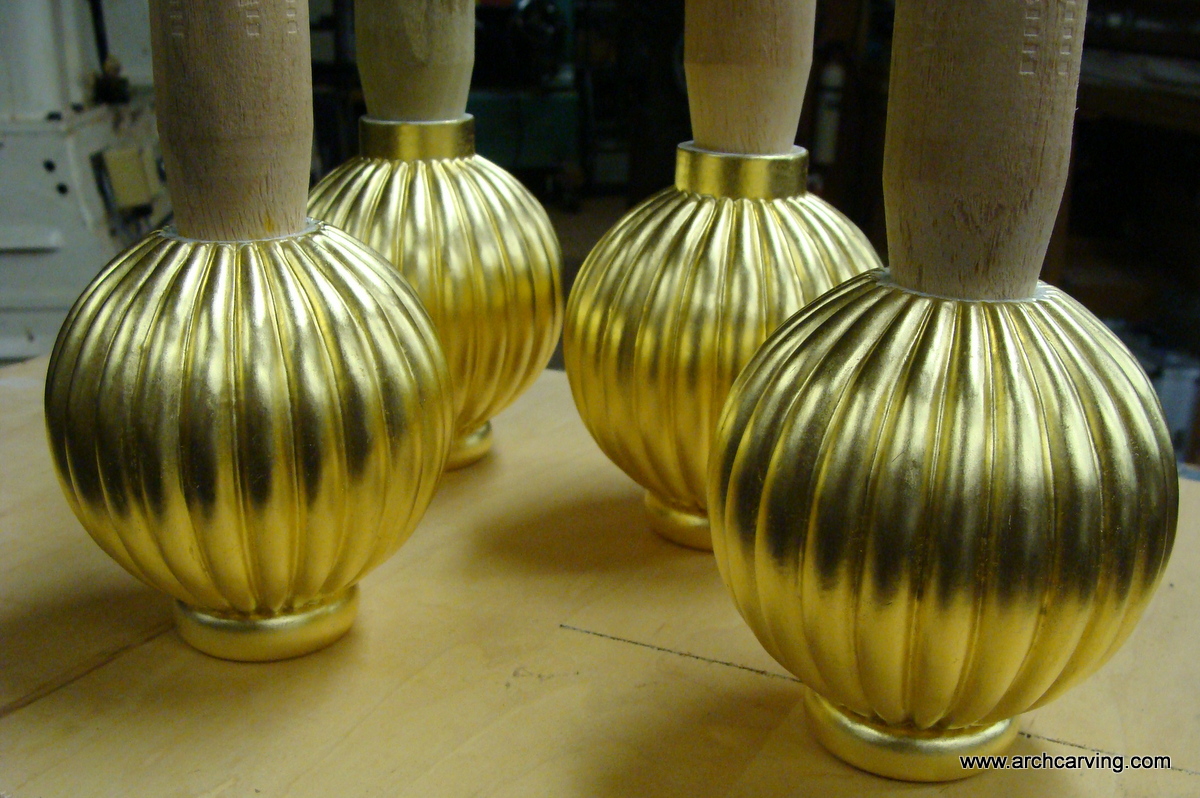
More interesting project for Grace, Ryan & Magnus

11 brackets made out of quarter sawn white oak. Dimensions: 10 3/4" long X 3 3/4" wide (top) X 3 3/8" wide (bottom) X 2 1/2" thick at the top.  Although they were carved a number of years apart, note the similarities between this little oak carving and the 30" tall mahogany mantle brackets at the top of the page. 
The last picture is of a quarter sawn white oak rosette prototype. Designs as smell as this are difficult to transfer to course, open grain wood like oak so gluing the paper to the wood turns out to be the best option. I carved half of the design to get the feel of what I wanted and left the rest with the stuck-on design. 

Ambient light conditions had a dramatic effect on the picture color. 


ScamozziCapitalFace.jpg (33200 bytes) ScamozziCapitalFront.jpg (32385 bytes) ScamozziCapitalEnd.jpg (54347 bytes) ScamozziCapitalMolding.jpg (44212 bytes) ScamozziCapitals.jpg (41578 bytes) ScamozziOnColumn.jpg (50717 bytes)
 
The first  3 pictures are of one of the 5 Scamozzi capitals I recently carved for Grace, Ryan & Magnus. 
Picture 4 shows the Capital body with volutes separated from its molding.
The next picture is of all 5 caps in different positions
The last picture is of the original capital that was later remover and sent to me for copying. These were an interesting pieces to figure out and assemble. The original was made up of 10 separate pieces of mahogany and so were the reproductions. 3 pieces for the body, 2 pieces for each volute and 3 pieces for the egg & dart / bead & reel molding. Made this way, the volutes were assembled and partially carved before being assembled to the body, the molding was turned on my lathe and fully carved before final assemble (picture 4) and the face and ends had the same grain direction for easier carving.   


leafbalusterbottom.jpg (15647 bytes) leafbalusterbottom2.jpg (14878 bytes) leafbalusterbottom3.jpg (45746 bytes) leafbalustertop.jpg (35724 bytes) leafbalustertop2.jpg (36400 bytes) Leafbalusterdone1.jpg (65493 bytes)
 
The first three pictures are of the bottoms for two piece balusters. The spheres are held by carved red oak leaves
The next two are of the baluster tops. 
The last two are of the tops and bottoms, joined, finished and gilded. 


Leaffinial.jpg (44087 bytes) Leaffinial2.jpg (24795 bytes) Leaffinial4.jpg (17729 bytes) Leaffinials.jpg (20771 bytes) Leaffinialdone1.jpg (62338 bytes)
 
The first four pictures are of turned and carved newel post finials. The picture shows what they look like after the finish and gold lead work. All of these finials and the balusters above were installed on a 160' aluminum hull yacht.  Turning was done by others. 


Rosetteoriginal.jpg (33296 bytes) mahoganyrosette.jpg (31989 bytes) mahoganyrosettes.jpg (29476 bytes) Whitebracketfront.jpg (36590 bytes) Whitebracketfrontside.jpg (25438 bytes) Whitebracketside.jpg (20604 bytes) Whitebracket.jpg (51873 bytes)
 
The first picture is of the original carved rosette. Its original use is unknown.
Next two pictures is of the five reproductions.
Last four pictures are of one of a pair of carved and painted wooden brackets.


WhiteOakFinial.jpg (36778 bytes) WhiteOakFinial2.jpg (46933 bytes) WhiteOakFinial3.jpg (41248 bytes) WhiteOakFinial4.jpg (44605 bytes)
 
These are pictures of a quarter sawn, white oak newel post finial and hand rail elbow. The elbow connects the angled handrail to the horizontal finial via a miter. This part of stair work is always interesting. 


CapitalPatterns.jpg (36386 bytes)

FourPartCapitalInside.jpg (24831 bytes) FourPartCapitalPattern.jpg (98243 bytes) FourPartCapital2.jpg (27725 bytes)

FourPartCapital.jpg (26417 bytes)


First three: These are pictures of two interesting capitals I was asked to reproduce. They were part of the surround for a palladium window that is in a 1710 barn and one is for a column and one for a pilaster. On the column capital, the egg and dart molding and the bead astragal are made up of two small pieces that were fit into a cut out section at the bottom front of the capital (pictures 2 and 3). Then the bottom piece with carved scotia was fit in to slots carved into the inside of each scroll and turned 90 degrees to lock all three pieces in. I stripped the paint off one just to find out how deeply it was carved. The grain goes from front to back on the stripped capital! 


Urn1.JPG (45978 bytes)

Urn2.JPG (35816 bytes)


 6" tall urns with 3 carved acanthus leaf motifs on each. These have different contrast to show detail.  


CapitalFaces1.jpg (42488 bytes) CapitalCut.jpg (62436 bytes) CapitalLookUp2.jpg (25870 bytes) CapitalBigBottom.jpg (63271 bytes) CapitalBigFace.jpg (39091 bytes)


The first picture shows what the individual capital faces look like after the overall, rough design was band sawed into the block. The blocks are 4 3/4" thick and made out of mahogany and the ends have been mitered to 45 degrees. 
Second picture shows a face with the design penciled on and the beginning, rough cuts made. 
Third picture shows one face complete with a prototype abacus and floron sitting on top and the assembly at the approximate installed viewing height. 
Fourth picture shows the bottom of all four, carved faces glued together and the major volute lines under the "chin" cut in.
Fifth picture is of the completed assembly. It lacks the abacus, floron and bottom "nose" molding that will interface with the octagonal columns.     


CapitalBigNose.jpg (38857 bytes) CapitalProgress3.jpg (58683 bytes) CapitalProgress2.jpg (48816 bytes) CapitalProgress4.jpg (62761 bytes) CapitalProgress1.jpg (60469 bytes)


The first picture is of the completed, four face assembly from a different view.
Second picture shows 15 carved partially carved faces.
Third picture shows some faces with the acanthus leaves drawn in and some (middle stack) with the leaves roughed in.  Each individual element is carved on all faces - then on to the next element. This method aids in consistency and time.   
Fourth picture of the partially carved faces with one in the vice. 
Fifth picture is the same from  another angle. 


CapitalCarving.jpg (59136 bytes) ColumnPrototype1.jpg (18360 bytes) ColumnPrototype2.jpg (26260 bytes) ColumnPrototype3.jpg (24554 bytes) ColumnFullProto.jpg (62421 bytes)


First: Carving a capital face. 
Next three: Prototype column made from fiberboard.
Last: Full Column fiberboard prototype.


ColumnFullProto&Mark.jpg (62053 bytes) CapitalFacesDone.jpg (50956 bytes) ColumnMilling1.jpg (57220 bytes) ColumnMilling2.jpg (65013 bytes) ColumnAssembly1.jpg (43088 bytes)


First: Full Column fiberboard prototype and Mark, the maker. 
Second: Capital faced done.
Third: Column staves being milled
Fourth: Another  milling view.
Fifth: Wooden column half being assembled.


ColumnAssembly2.jpg (50926 bytes) ColumnAssembly3.jpg (42789 bytes) ColumnAssembled1.jpg (44465 bytes) ColumnAssembled2.jpg (42730 bytes) ColumnTop.jpg (26154 bytes)


First: Another view of a wooden column half being assembled.
Second: Full column assembled
Third & fourth: Column done.
Last: Column top.


ColumnBottom.jpg (30044 bytes) ColumnMakers.jpg (66774 bytes) CapitalCarvingProgress.jpg (56968 bytes) CapitalsCarvingDone.jpg (53778 bytes) AbacusNoseLeaf.jpg (53233 bytes)


First: Column bottom.
Second: Maine Wood & Design woodworker/column maker Mark standing to the left of project manager Bill. Maine Wood & Design is located in York, Maine. 
Third: Carving the last of the assembled capital faces.
Fourth: Capital faces assembled and carved - finally! 
Bottom molding of the abacus carved along with the nose acanthus leaves. 


CapAbacus1.jpg (28698 bytes) CapAbacus2.jpg (25424 bytes) CapAbacus3.jpg (23398 bytes) CapAbacus4.jpg (28067 bytes) CapAbacus5.jpg (27390 bytes)


First through fifth: Different angles of the same capital showing off its new abacus. The abacus is the molding that sits on top and on this one part of the major volutes and nose acanthus actually live on it.  


CapStack.jpg (97746 bytes) CapitalFloronOn.jpg (74180 bytes) CapitalFloronDone.jpg (76471 bytes) CapitalColumn.jpg (36817 bytes) CapitalColumn2.jpg (50665 bytes)


Five: A stack of five capitals showing off their newly carved and installed abacus molding.  
Second: Florons installed and waiting for their leaf covered seed pods.
Third: Florons with their leaf covered seed pods - each  one carved just a bit differently from the others. 
Fourth & Fifth: Capital meets column. 


CapitalColumn3.jpg (12055 bytes) CapitalColumn4.jpg (12493 bytes) CapitalColumn5.jpg (7269 bytes) ColumnBase.jpg (18142 bytes) CapitalOnBase.jpg (21678 bytes)


First, second & third: Capital and column without base. Too much white background for a good detailed picture. 
Fourth: Column base.
Fifth: Finished capital on base - just for fun.


CapColInterface 026.jpg (27777 bytes) ColumnBaseInterface.jpg (36319 bytes) CapColLong.jpg (29091 bytes) CapColLongShadow2.jpg (29202 bytes) CapColLongShadow.jpg (26556 bytes)


First: Capital / column interface.
Second: Column / base interface.
Third, fourth & fifth: Capital / column long shots.


CaplColBaseAssembled.jpg (24579 bytes) Me&MyColumn.jpg (71953 bytes) Corbel1.jpg (75553 bytes) CorbelFront.jpg (46008 bytes) CorbelSide.jpg (34061 bytes)


First: Completed work.
Second: 6'2" woodcarver and completed work. 
Third: Partially completed corbel. 
Fourth: Same corbel with bottom finial completed.
Last: What they look like from the side before back and top are attached. 


CorbelBottom.jpg (30657 bytes) CorbelsBadkToBack.jpg (60567 bytes) CorbelsBottomCarve2.jpg (62902 bytes) CorbelsBottomCarve.jpg (76901 bytes)


First: From the bottom looking up
Second: Both corbels, back to back. Some of these pictures were taken upside down and turned 180 degrees for presentation. 
Third: The finial shape was turned round, indexed and eight sides marked, then carved. This one is partially done.
Last:  The eight sides were hand carved using the tools shown. The most enjoyable part of the process. 


CorbelUp.jpg (76879 bytes) CorbelsUp.jpg (58249 bytes) CorbelsPair.jpg (56327 bytes) CorbelsAngle.jpg (73963 bytes)


Finished corbels in different poses. Corbels are 14" tall X 14" wide X 12" deep.  Each corbel is 5/8 of a capital in depth and 88% of it's volume.


E&D1.jpg (40598 bytes) E&DDoor1.jpg (95799 bytes) E&DDoor2.jpg (61555 bytes) E&DDoor3.jpg (96124 bytes) E&Dclose.jpg (35781 bytes)


This project is 120 feet of 5/8' X 7/8" egg & dart molding for an entry door and side lights. Unlike most, the molding will be used on both the inside and outside of the door.  
Three pictures showing the beautiful doors and side lights with all woodworking done. Framed in the door, on the left is Fred Wildnauer, owner of F.A.Wildnauer Woodworking in South Berwick, Maine. On the right is woodworker Nate Russell  who made the doors. 


Acorn2.jpg (50914 bytes) Acorn.jpg (61621 bytes) Acorn3.jpg (55706 bytes)


Turned acorn sitting on oak leaves carved out of a 6" X 9" white oak keystone. Tung oil and wax finish.


QSWOBrackets.jpg (55046 bytes) QSWOBrackets2.jpg (35742 bytes) QSWOBrackets3.jpg (30242 bytes)


 Brackets carved from quarter sawn white oak.   


UShell1.jpg (55334 bytes) UShell2.jpg (72528 bytes) UShell3.jpg (93841 bytes) NicholaeffShell1a.JPG (84852 bytes) NicholaefShell2a.JPG (77074 bytes)


This carved shell is 6' 6" long X 3'3" wide X 3" thick and is made out of Sign Foam, a high-density polyurethane product that is unaffected by weather or temperature. It is installed over the entry way of this beautiful private home on Cape Cod.  Special thanks to: 

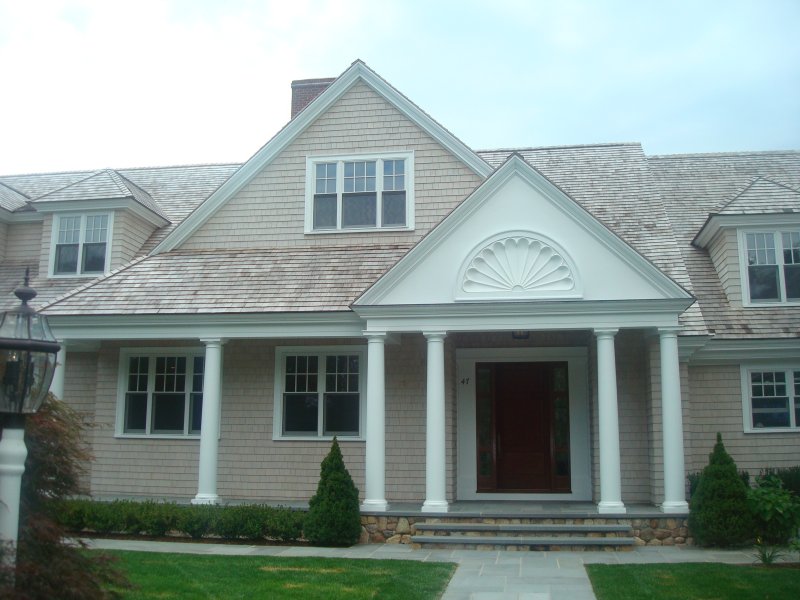
Gilman Martiny - Project Manager 
Nicholaeff Architecture + Design


Ionic1-08.jpg (34232 bytes) Ionic2-08.jpg (55957 bytes) Ionic3-08.jpg (49338 bytes) Ionic4-08.jpg (49241 bytes) Ionic5-08.jpg (22870 bytes)


Five different views of two Ionic order capitals carved out of mahogany.


Butler1.jpg (70723 bytes) Butler2.jpg (74079 bytes) Butler3.jpg (93285 bytes) Butler4.jpg (75267 bytes) Butler5.jpg (113255 bytes) Butler6.jpg (75114 bytes) Butler7.jpg (97715 bytes)


Seven views of letter carving for a York High School trophy case dedicated in the memory of Gertrude M. Butler. 


Scroll1.jpg (265152 bytes) Scroll2.jpg (65203 bytes) ScrollFlower.jpg (77736 bytes) ScrollsSegmen2.jpg (79719 bytes) ScrollsSegment1.jpg (115044 bytes)


This is a 90" long scroll  for the left side of a two scroll pediment for the porch of a  house. The material it is made out of is a high density, polyurethane product that carves very well, does and is not affected by moisture or sun light. The major scroll is 20" in height.


ScrollUrn1.jpg (27302 bytes) ScrollUrn3.jpg (50744 bytes) ScrollUrn2.jpg (44344 bytes) ScrollsInstalled8-24-09.jpg (61135 bytes) ScrollsMounted8-09.jpg (76242 bytes)


A 24" tall urn that is the centerpiece for the scroll pediment. Same material.  
Scrolls installed. 


OvalSunburstConcave8-14-09-1.jpg (90991 bytes) Brackets9-16-09-1.jpg (153299 bytes) Brackets9-16-09-5.jpg (73656 bytes) Brackets9-16-09-6.jpg (136213 bytes) ClockFinial9-09-1.jpg (129241 bytes) ClockFinial9-09-2.jpg (88981 bytes)


First picture: Concave oval sunbursts for a fireplace.
Next three: Mahogany brackets carved with an acanthus leaf motif.
Last two: Grandfather clock finial.


Cap11-20-09-4.jpg (107712 bytes) Cap11-19-09-2.jpg (97832 bytes) Cap11-19-09-3.jpg (63211 bytes) Cap11-19-09-1.jpg (99960 bytes) Cap11-20-09-1.jpg (103724 bytes) Cap11-20-09-2.jpg (101926 bytes)


Two poplar capitals, turned by others and sent to me for carving. Following the architect's sketches, I first drew the design onto the blank followed by evenly spaced lines of latitude from top to bottom. On a full size drawing, corresponding lines were drawn and measurements taken from the outside of the wood to the inner "vase like" shape. Each line has its own depth and holes were drilled to that exact depth perpendicular to the spindle centerline. 
Second picture: When the drill bit touched the outside wooden surface at any line, the scale's pointer was set at "zero." The depth stop was set when the drill bit reached the desired depth. The drill is tapered along its length so in carving away the waste, the closer I got to the bottom of the hole the smaller its diameter. A very convenient (an accidental) visual clue.   


Cap11-20-09-3.jpg (101573 bytes) Cap12-1-09-3.jpg (91392 bytes) Cap12-1-09-5.jpg (98299 bytes) Cap12-1-09-6.jpg (103422 bytes) Cap12-3-09-2.jpg (88125 bytes) Cap12-3-09-3.jpg (86950 bytes) Cap12-3-09-4.jpg (88621 bytes)


After wasting away the poplar down to the bottom of the holes and finding the "vase" shape, the reeds were laid out and carved.  


Cap12-3-09-5.jpg (89767 bytes) Cap12-8-09-4.jpg (52097 bytes) Cap12-8-09-5.jpg (38241 bytes) Cap12-8-09-6.jpg (45991 bytes) Cap12-11-09-1.jpg (43416 bytes) Cap12-11-09-2.jpg (35901 bytes) Cap12-11-09-3.jpg (176730 bytes)


The base was laid out and carved in a conventional way. 
I disliked the variations in the wood color so much that I had to prime it.  


Wreath1.jpg (201919 bytes) Wreath2.jpg (199451 bytes) Wreath3.jpg (217791 bytes) Wreath4.jpg (216027 bytes) Wreath5.jpg (216976 bytes) Wreath6.jpg (178826 bytes) Wreath7.jpg (186389 bytes)


The seven pictures above and fourteen below show the making of a handrail wreath for a house on the Atlantic ocean here in town. 


Wreath8.jpg (194970 bytes) Wreath9.jpg (164976 bytes) Wreath10.jpg (327965 bytes) Wreath11.jpg (98450 bytes) Wreath12.jpg (82610 bytes) Wreath13.jpg (124584 bytes) Wreath14.jpg (70721 bytes)


The material is white oak and the expert instillation was thankfully done by others. 


Wreath15.jpg (77045 bytes) Wreath16.jpg (96002 bytes) Wreath17.jpg (81371 bytes) Wreath18.jpg (85183 bytes) Wreath20.jpg (162619 bytes) Wreath21.jpg (114172 bytes) Wreath19.jpg (103172 bytes)


Handrail wreaths are about as complicated a woodworking project as you see now days. With the advent of CNC milling machines, making one by hand is quite rare.    


ReededFeet11-23-11-5.jpg (154297 bytes) ReededFeet11-23-11-10.jpg (143438 bytes) Feet12-2-2011.jpg (108775 bytes) ReededFeetGoldLeafed12-14-11-1.JPG (485037 bytes) ReededFeetGoldLeafed12-14-11-2.JPG (513091 bytes)


These four reeded feet are made from 4" diameter poplar spheres. Stop cut lines and reed center lines have been drawn.
Stop cut lines have been cut. Reeds have been hand carved in one of the feet.
Sanding and three coats of paint have them smooth, shiny and ready for the gold.
Three hours of gilding later and they are looking good.


Rail1.jpg (285802 bytes) Rail2.jpg (243514 bytes) Rail3.jpg (176102 bytes) Rail4.jpg (241682 bytes) Rail5.jpg (263138 bytes) Rail6.jpg (198895 bytes) Rail7.jpg (178645 bytes)


Two hand rail ends are needed by The Fernwood Company in Cape Neddick, Maine. I received two perfect mahogany blanks from their resident woodworking artisan Steve Fiske.  
There were a number of cardinal points I had to locate before I began to carve. All these were delineated with a small hand held ancient laminate trimmer with modified bed and rolling fence.
Screwing on a cut off end of the hand rail profile makes carving easier. 
The cove cuts were continued around the head and faired in with a half round file.    


Rail8.jpg (217492 bytes)
Rail9.jpg (181959 bytes) Rail10.jpg (198829 bytes) Rail11.jpg (203154 bytes) Rail12.jpg (207377 bytes) Rail13.jpg (94182 bytes)


One of the completed ends poses for a picture.
At the Fernwood shop the ends meet and are joined with the very interesting handrail. 
Steve holds one of the ends next to the other completed rail. Tell me that doesn't look sharp!  


Rail14.jpg (91546 bytes) Rail15.jpg (102346 bytes) Rail16.jpg (85240 bytes) Rail17.jpg (85240 bytes)


Here are what they look like after site instillation.  


Home ] [ Carving ] Signs ] Pattern Making ] Turning ] Restoration ] National Archives ] Bagpipes & Bellows ] Sculpture ] Bellamy Eagles ]