Turning
Home ] Carving ] Signs ] Pattern Making ] [ Turning ] Restoration ] National Archives ] Bagpipes & Bellows ] Sculpture ] Bellamy Eagles ]


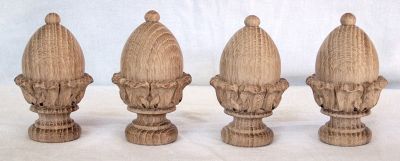
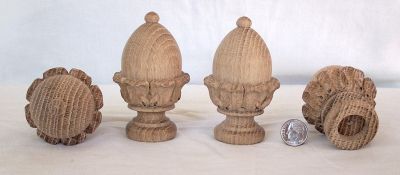
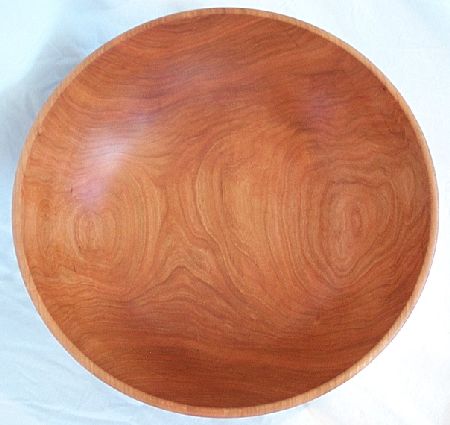
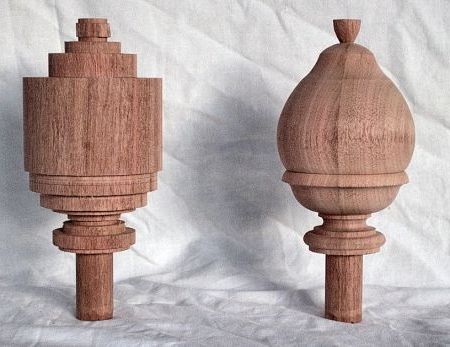
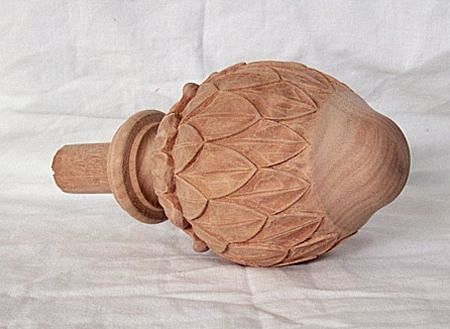
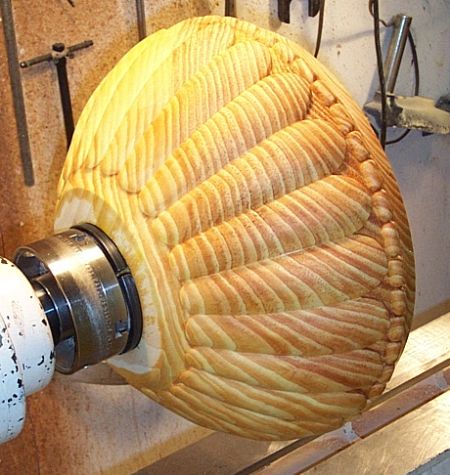
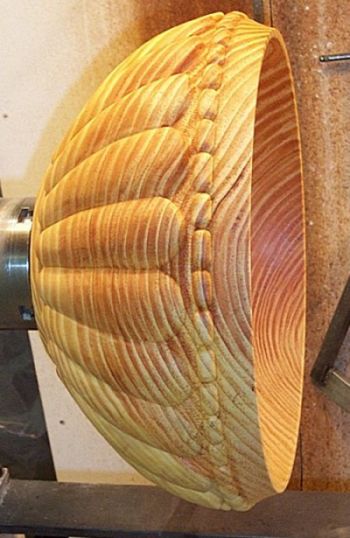
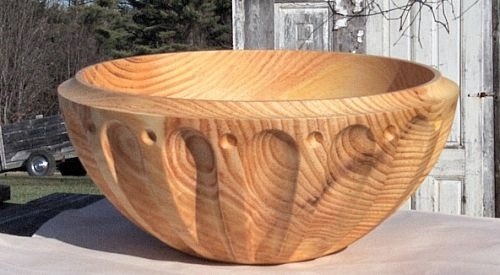
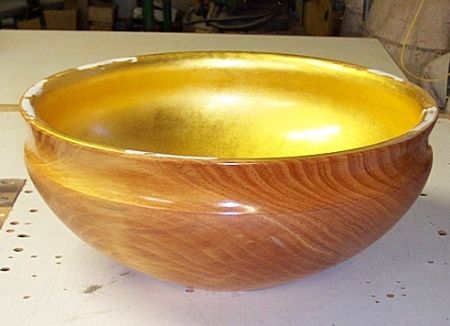
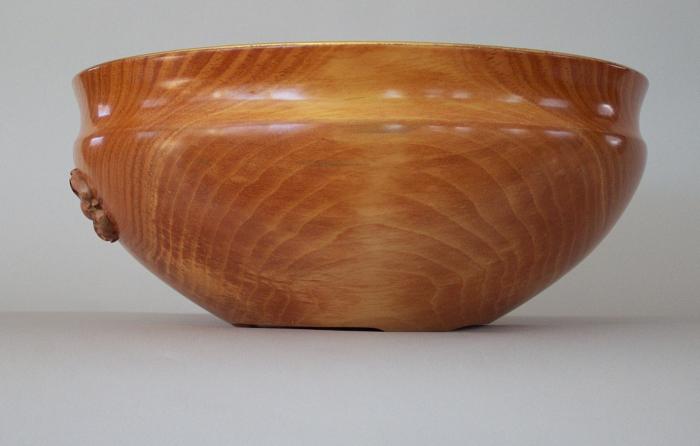
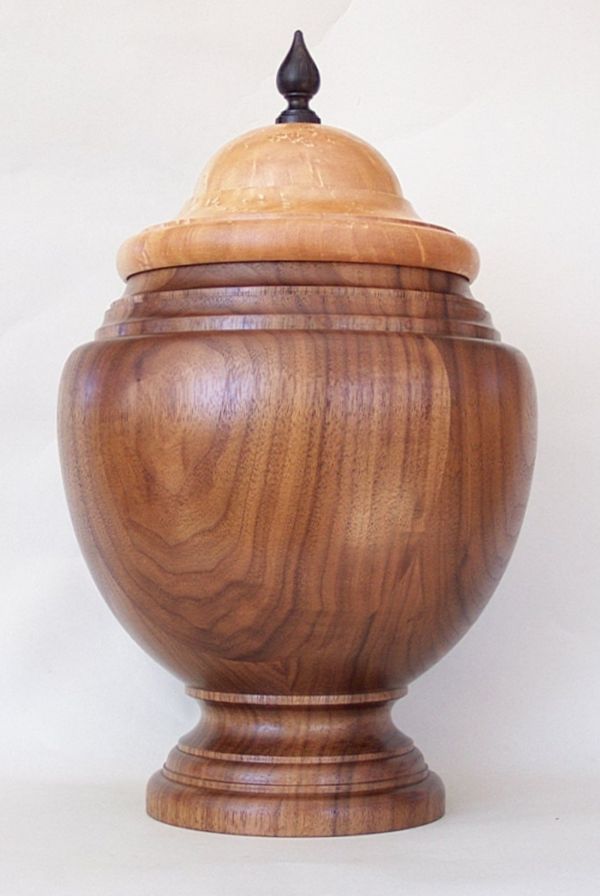
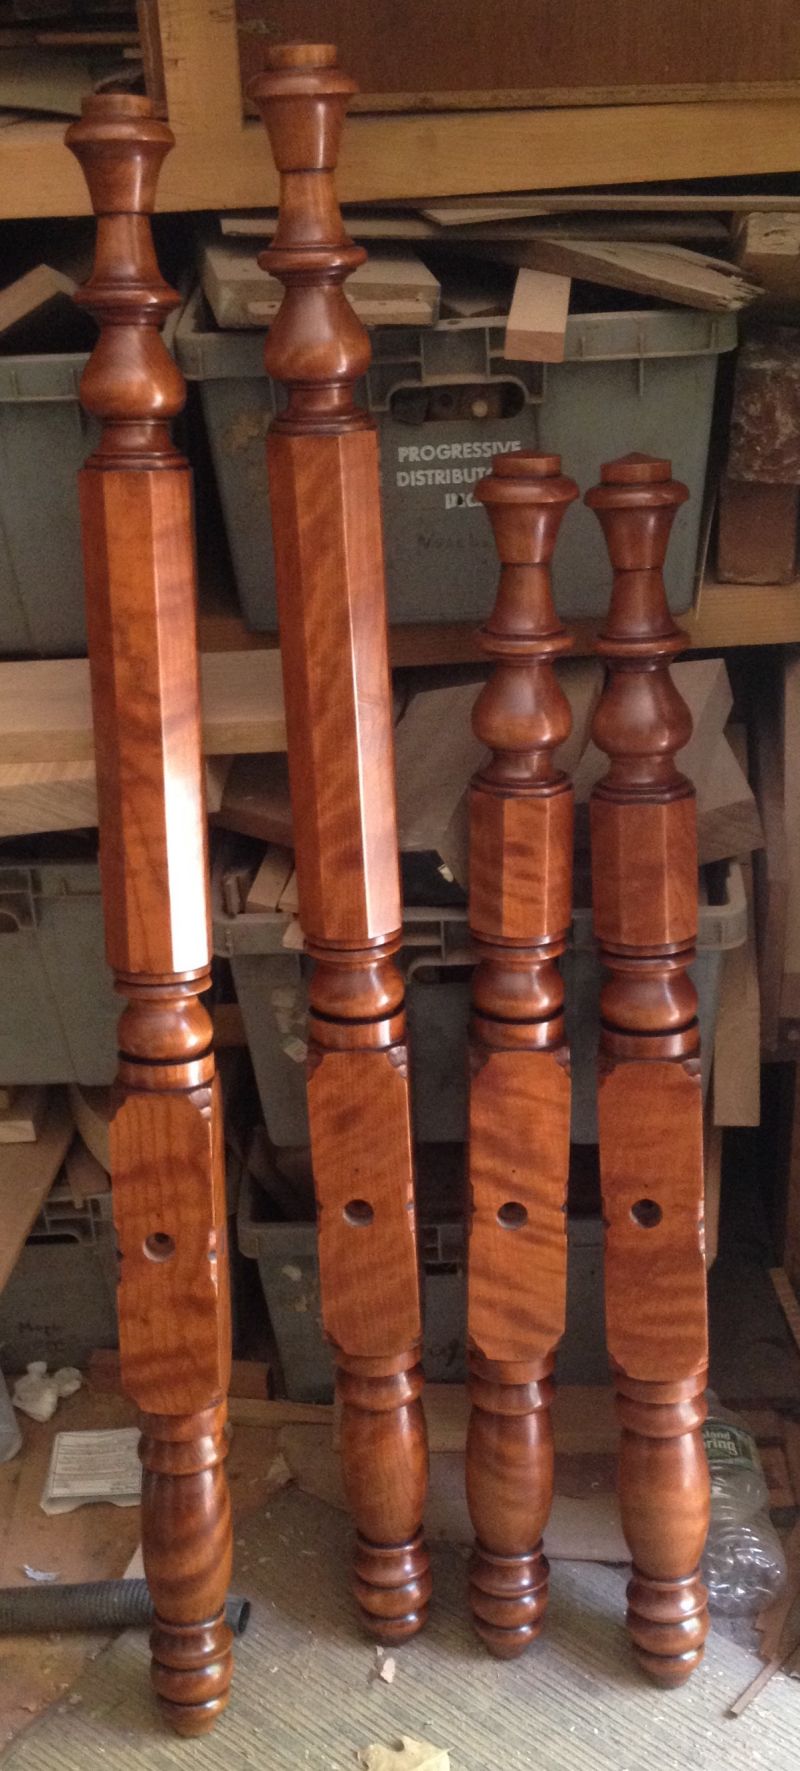
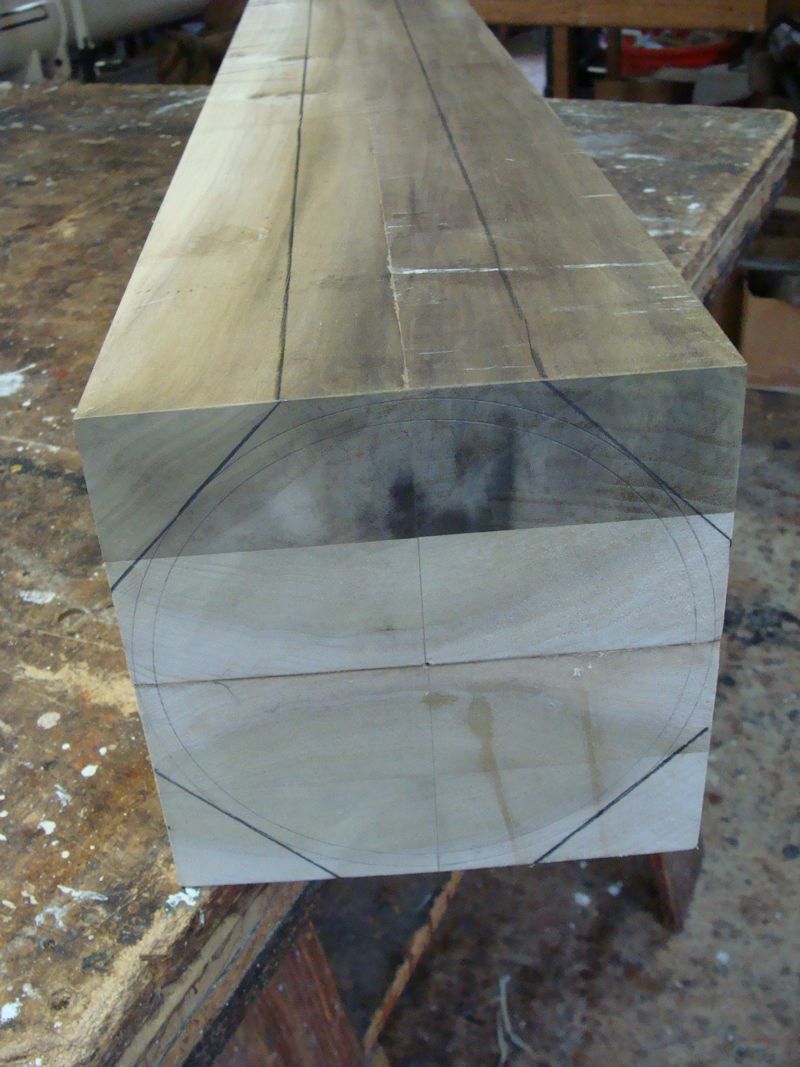
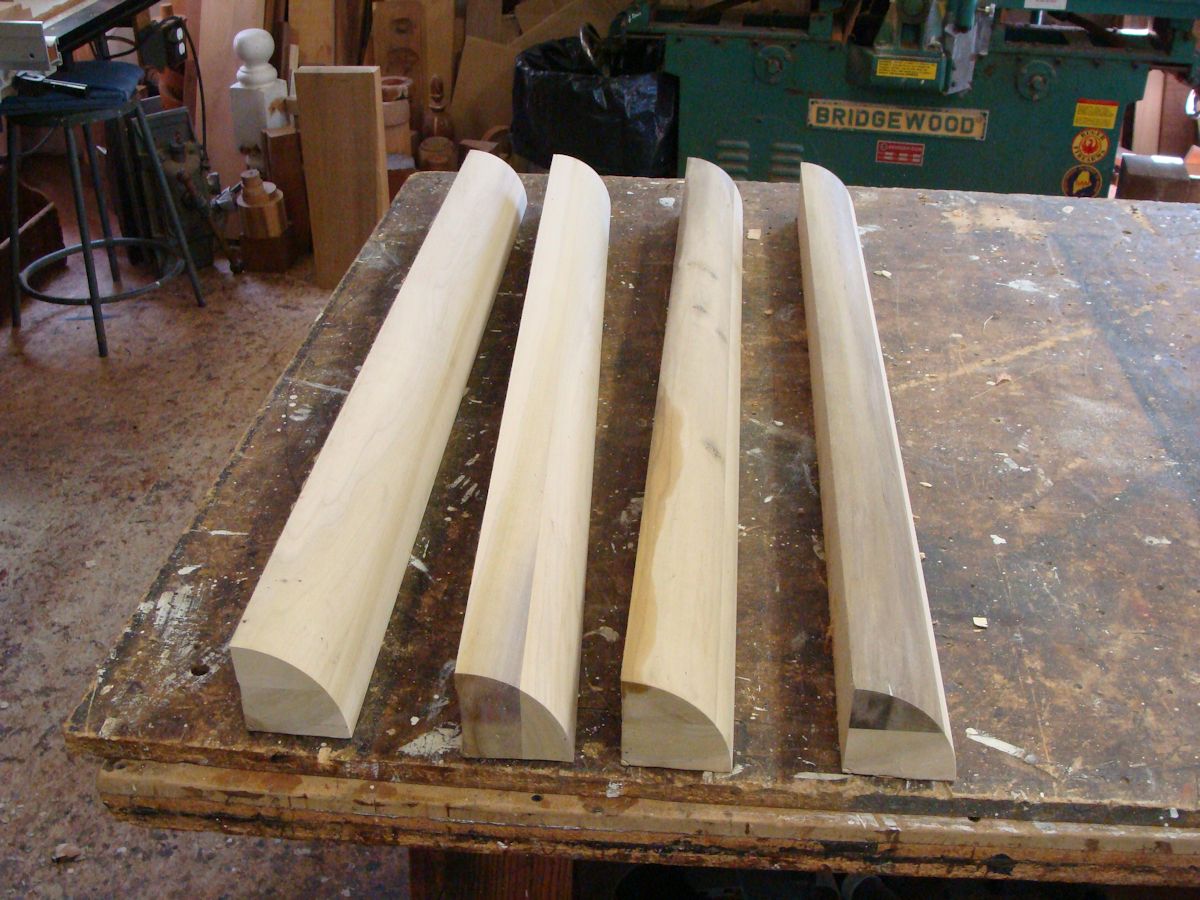
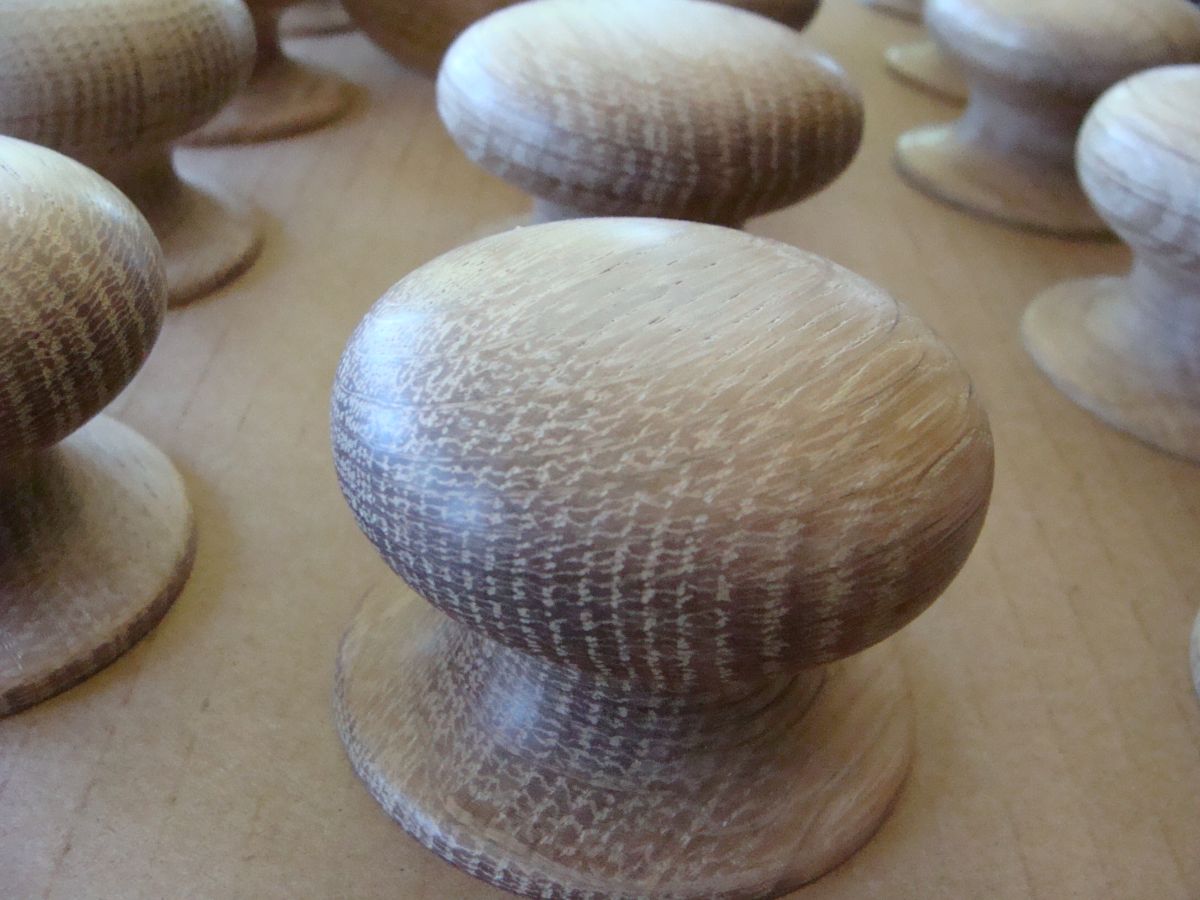
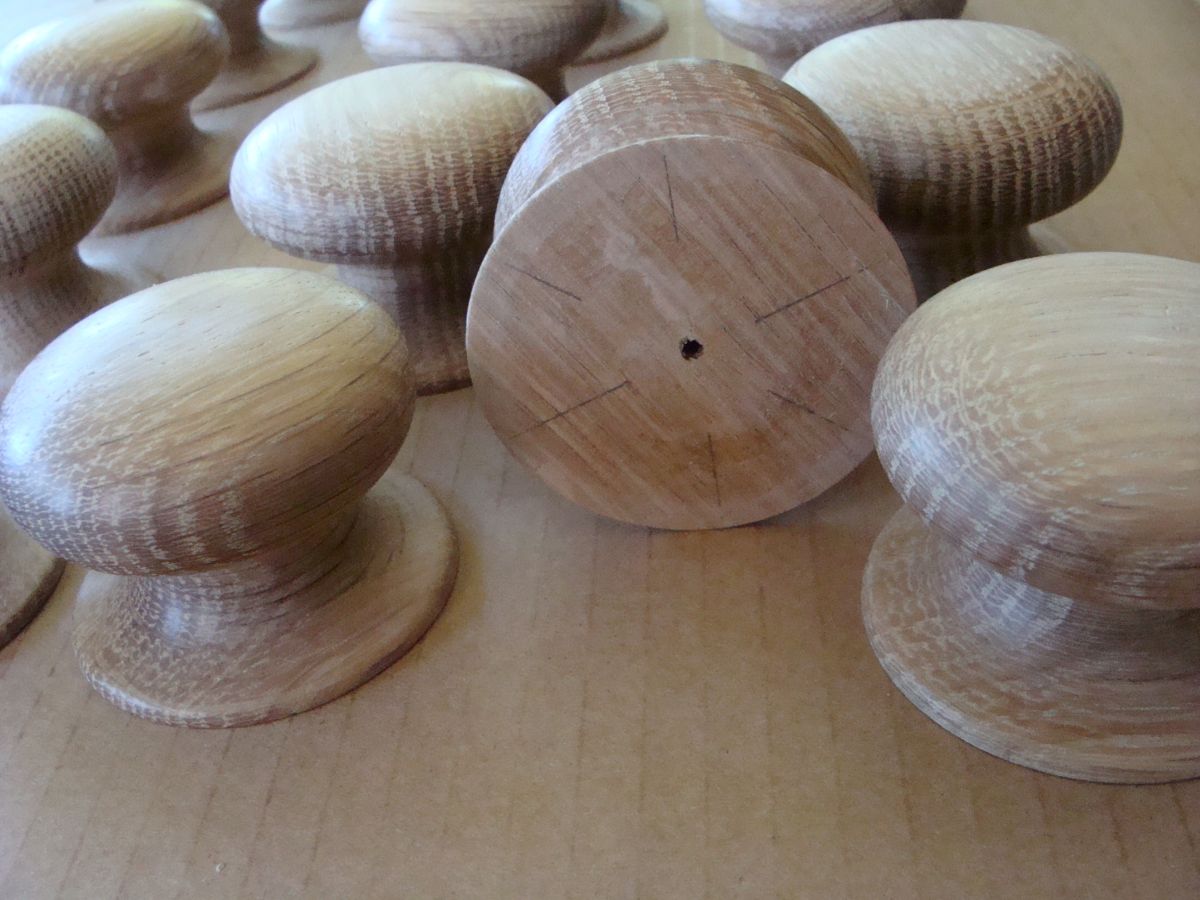
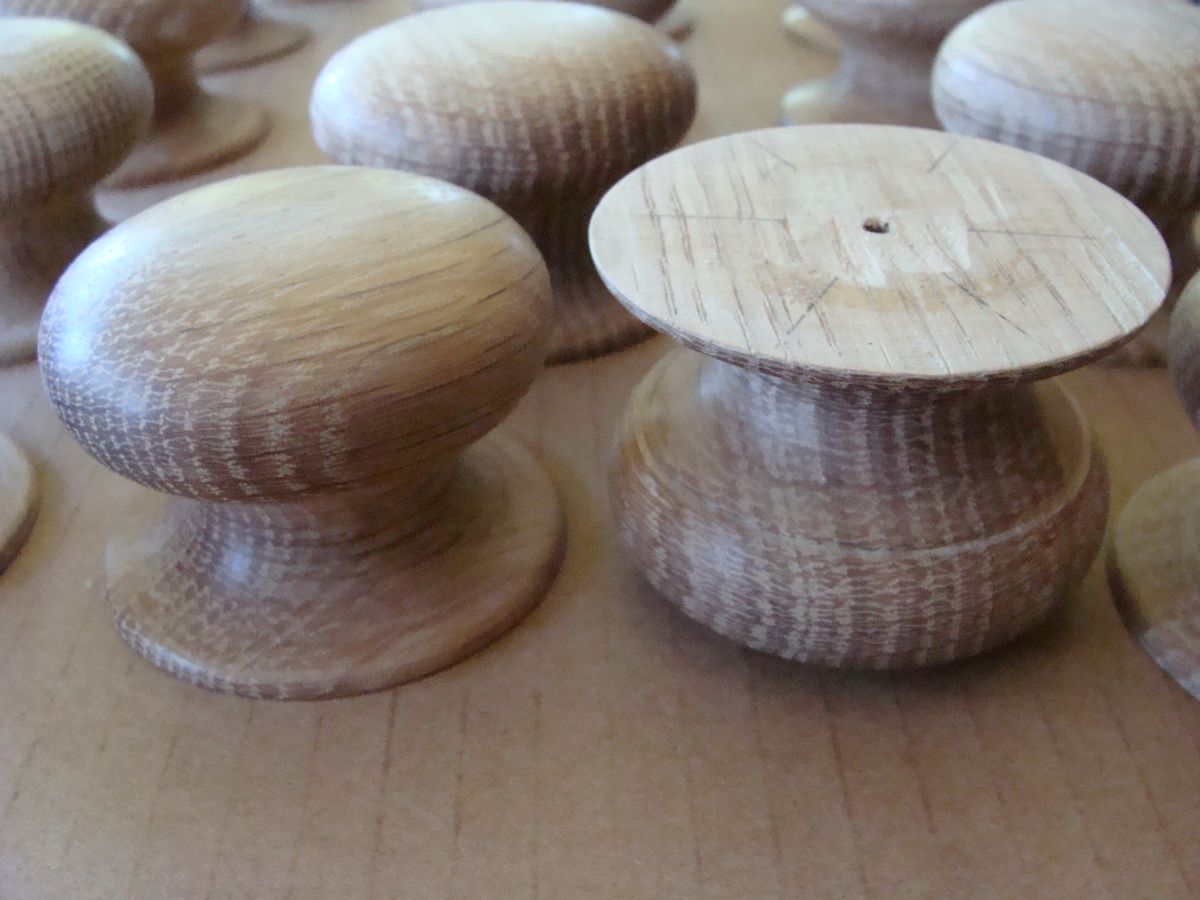
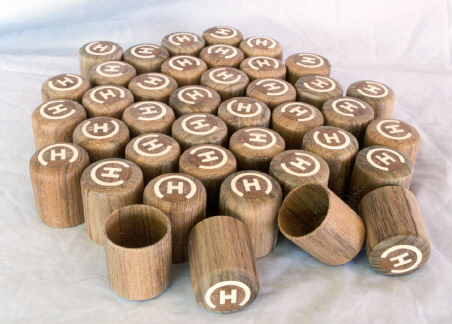
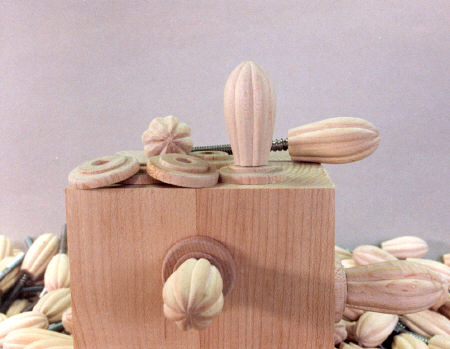
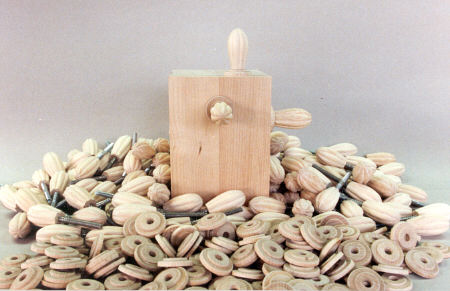
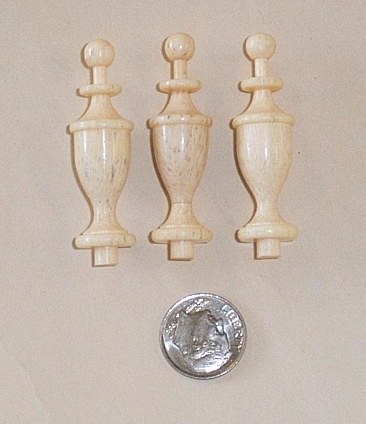
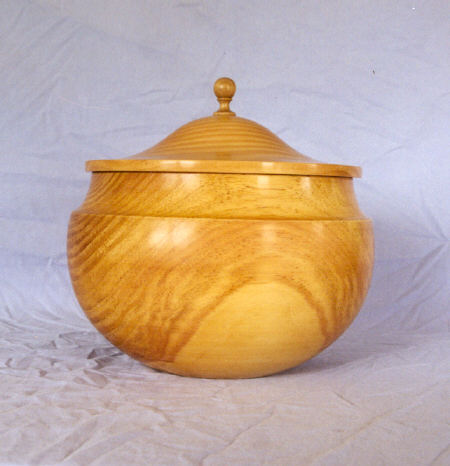
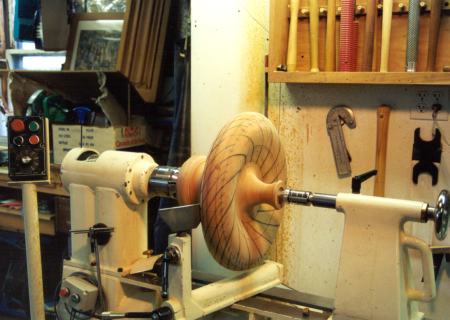
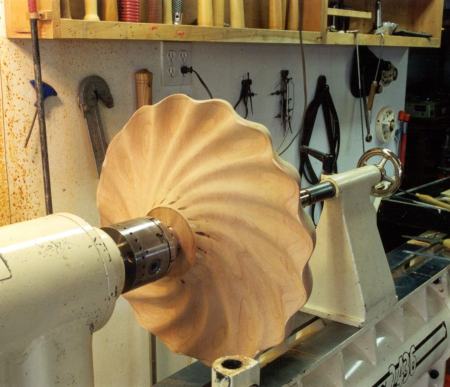
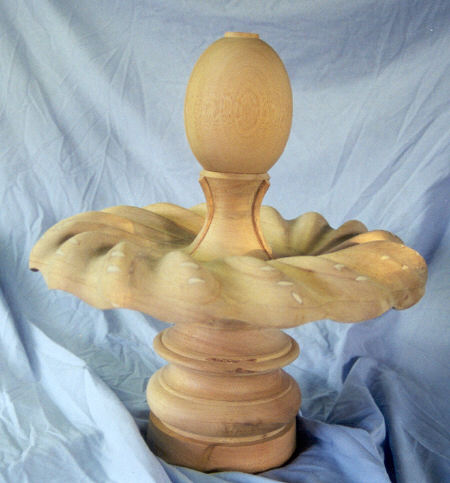
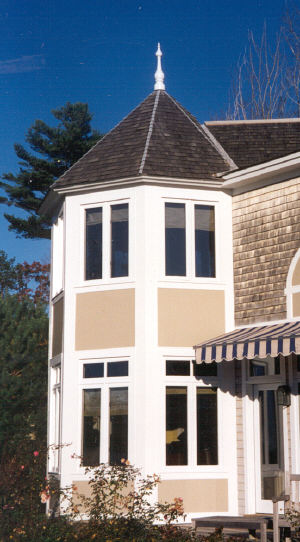
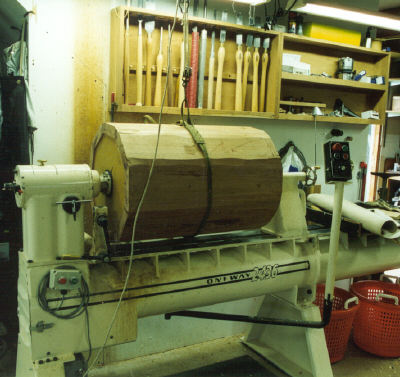
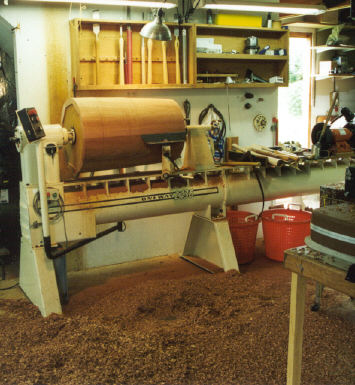
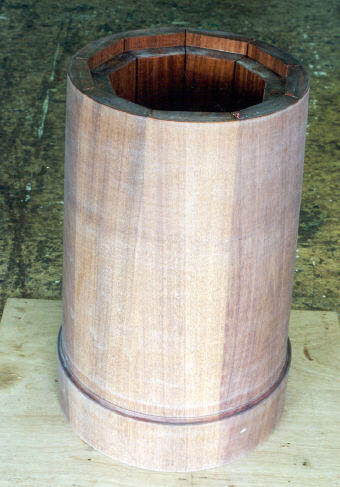
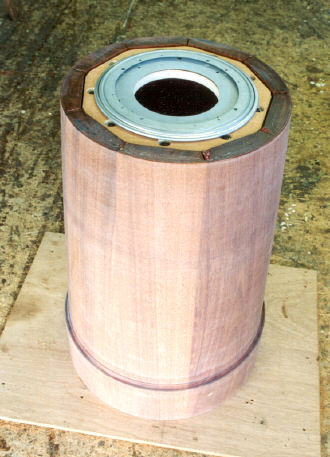
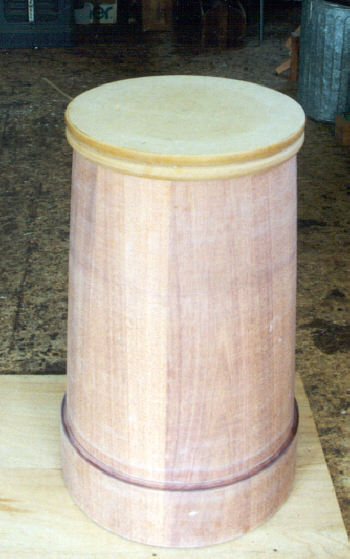
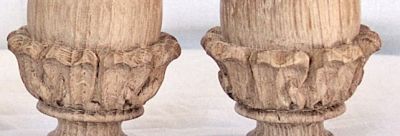
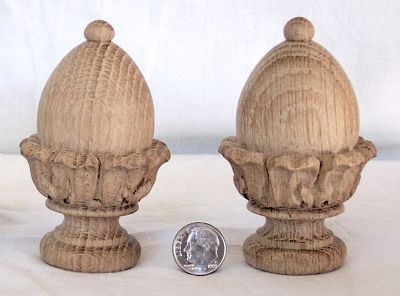
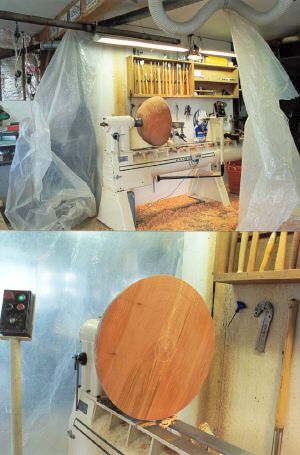
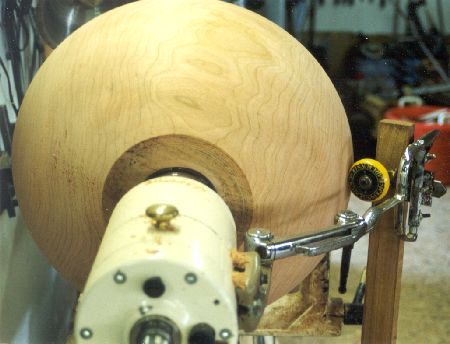
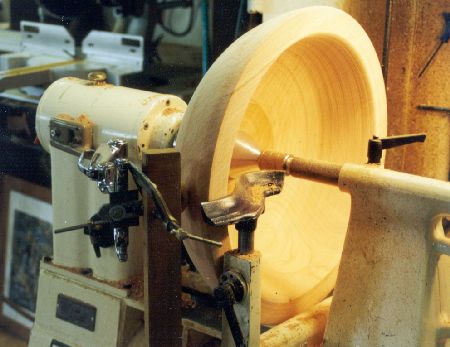
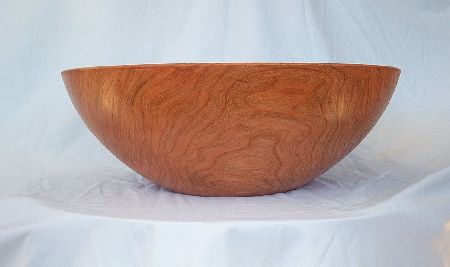
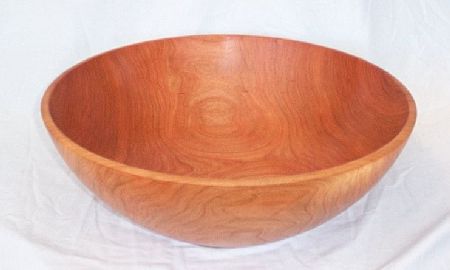
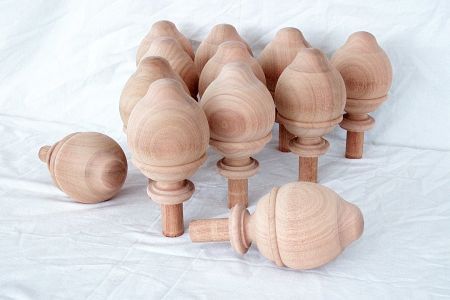
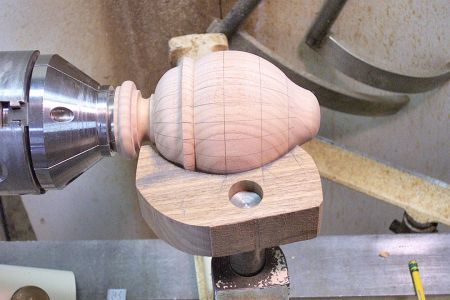
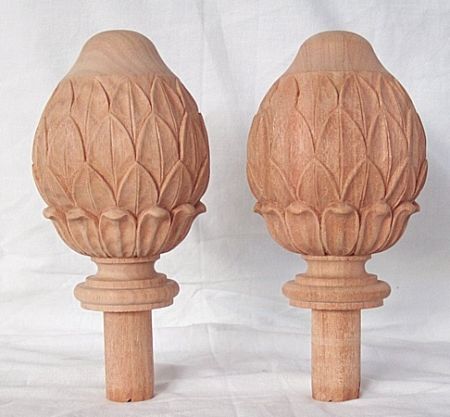
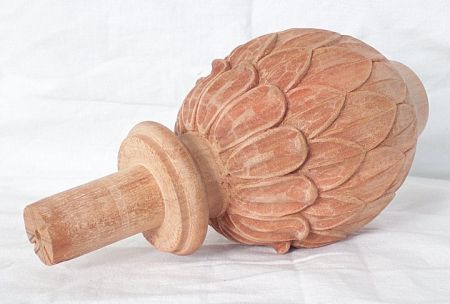
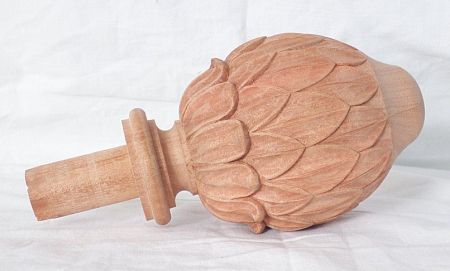
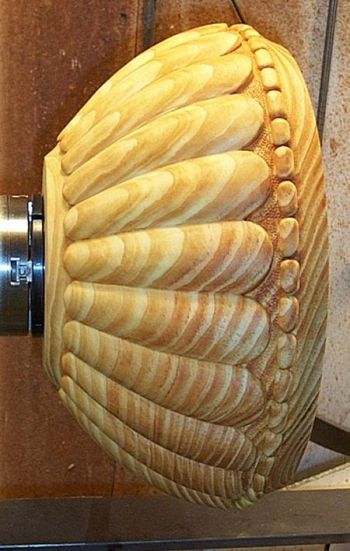
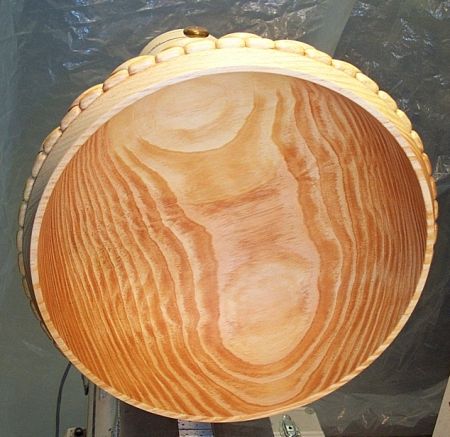
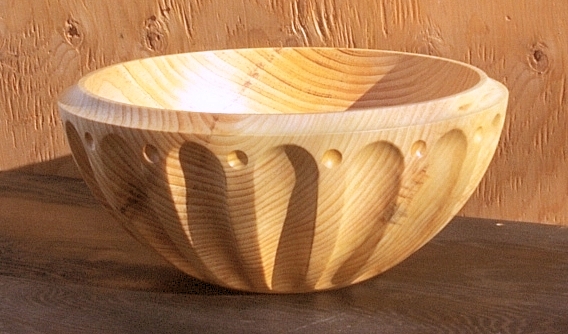
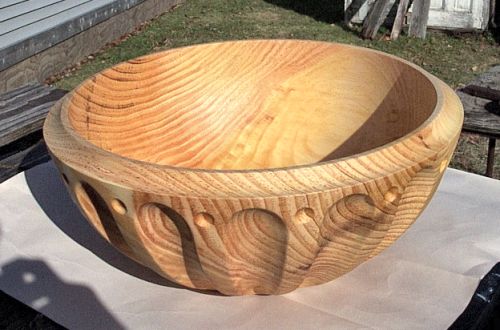
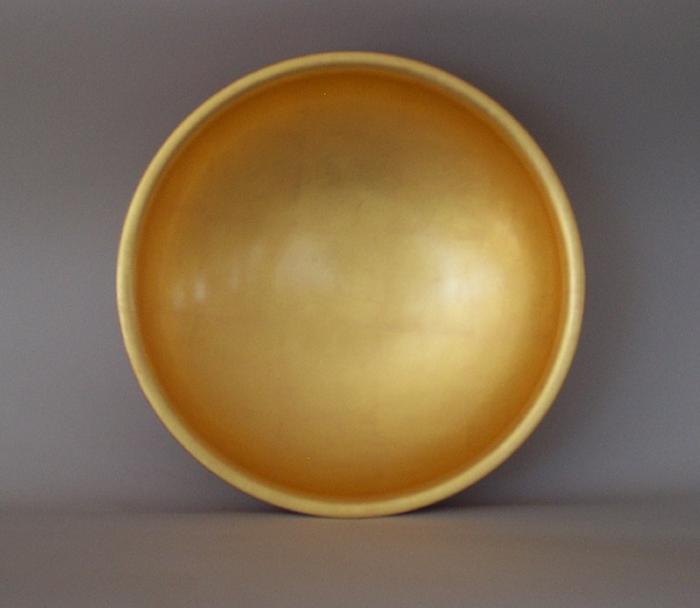
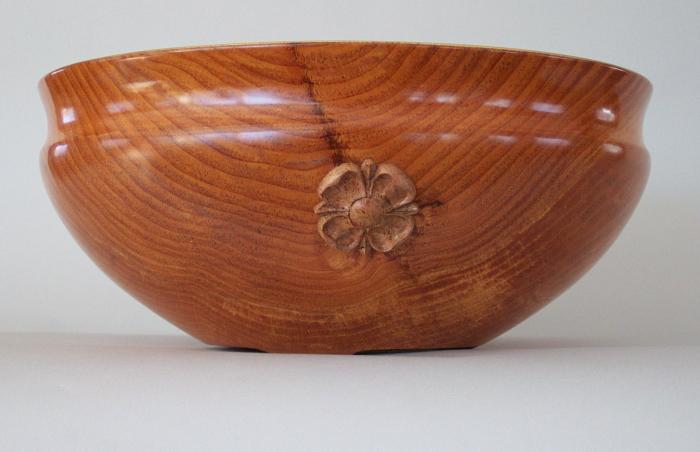
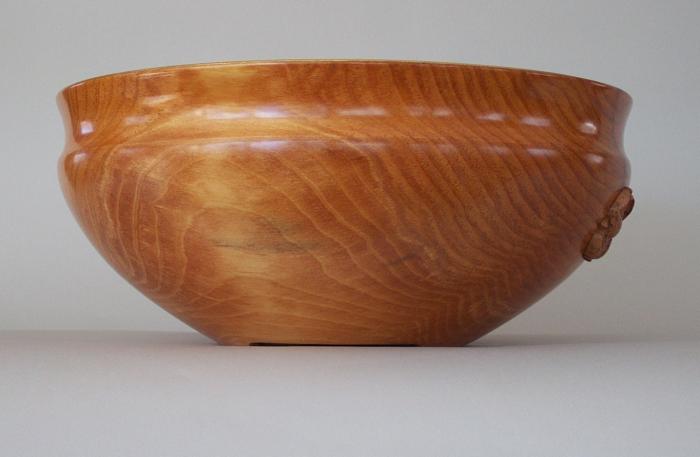
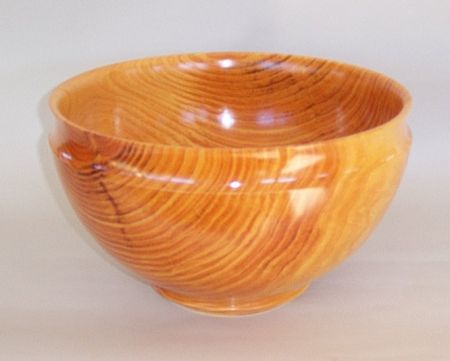
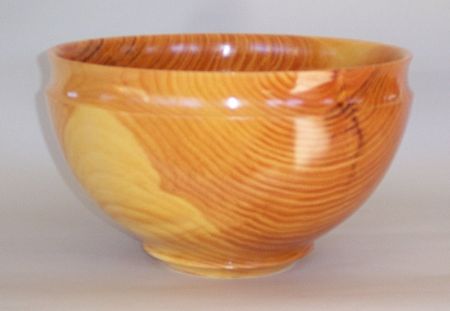
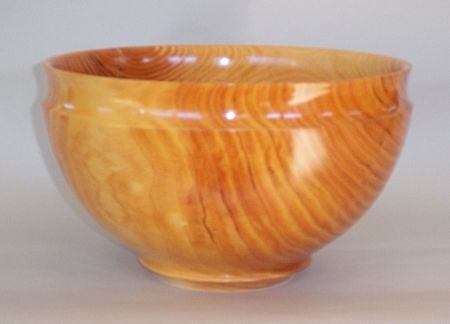
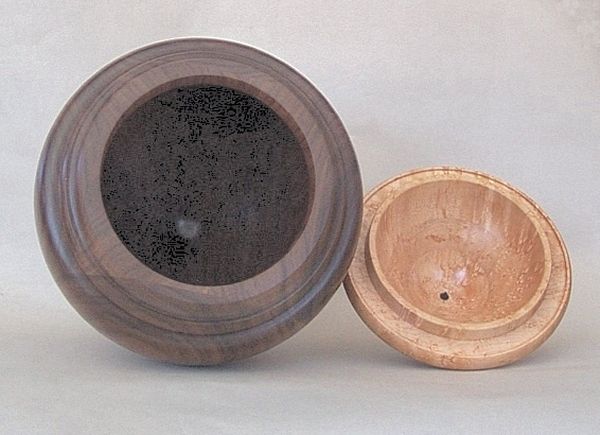
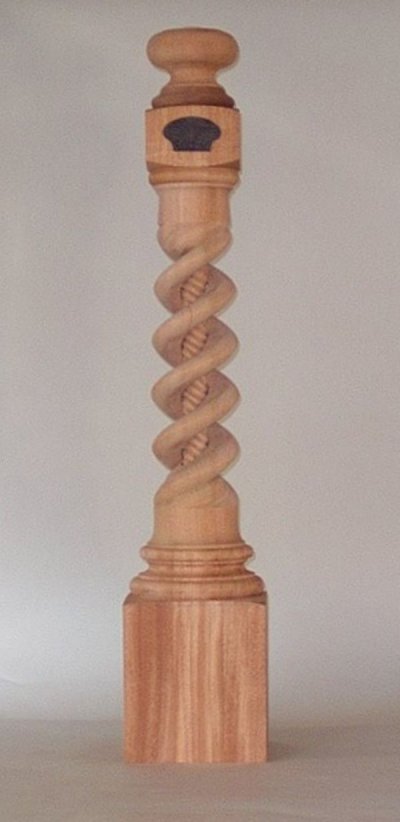
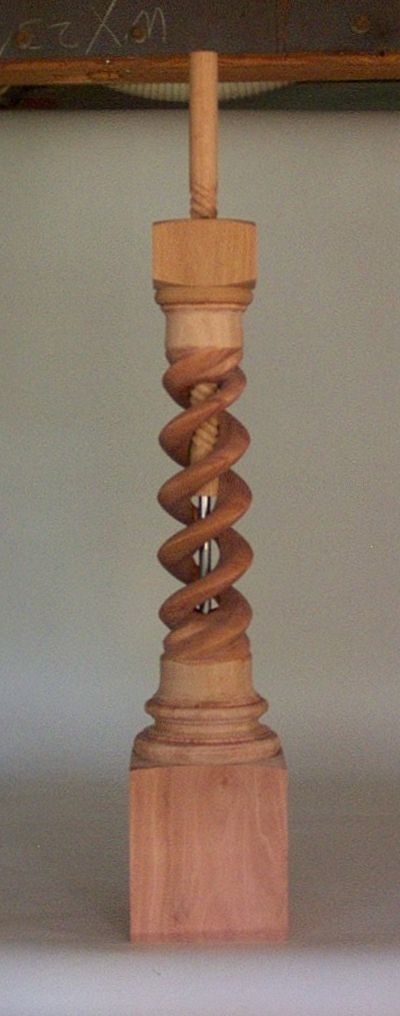
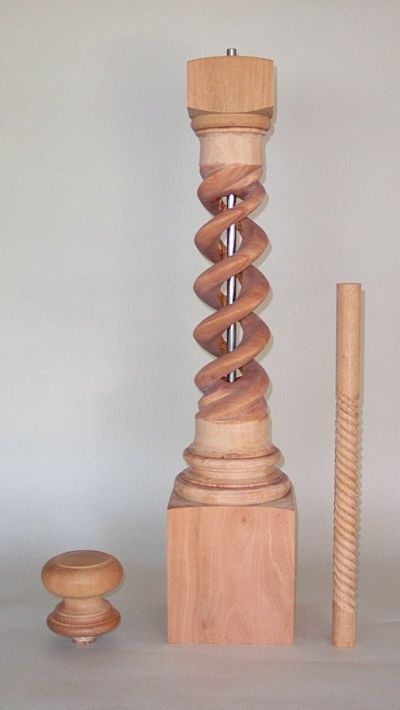
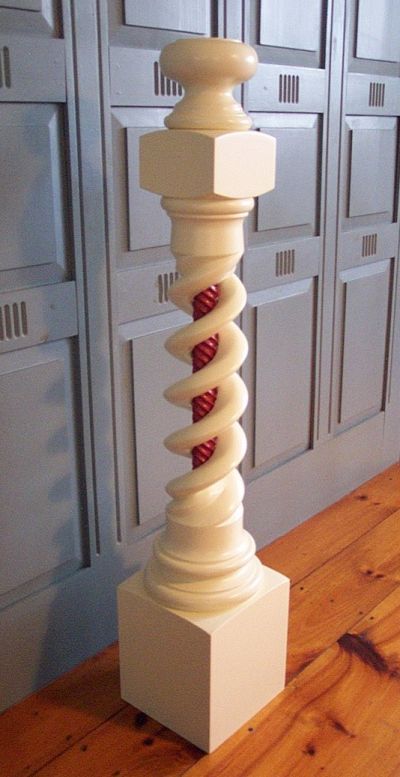
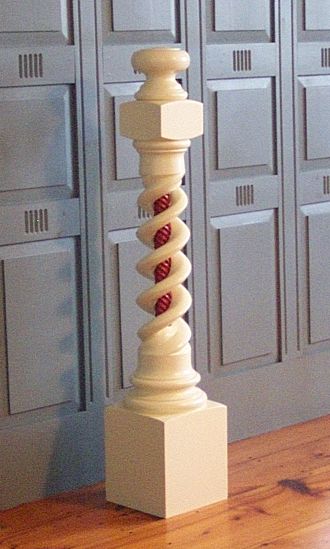
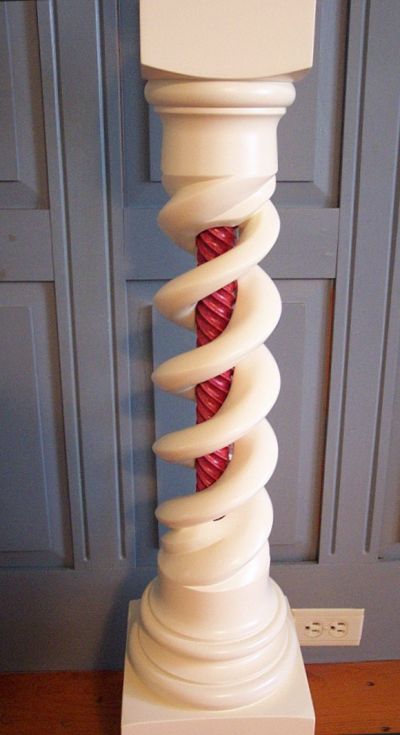
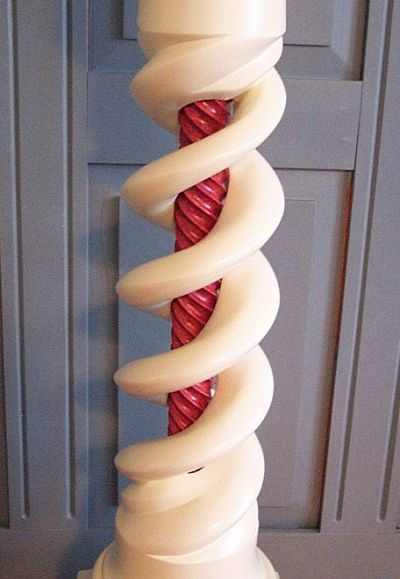
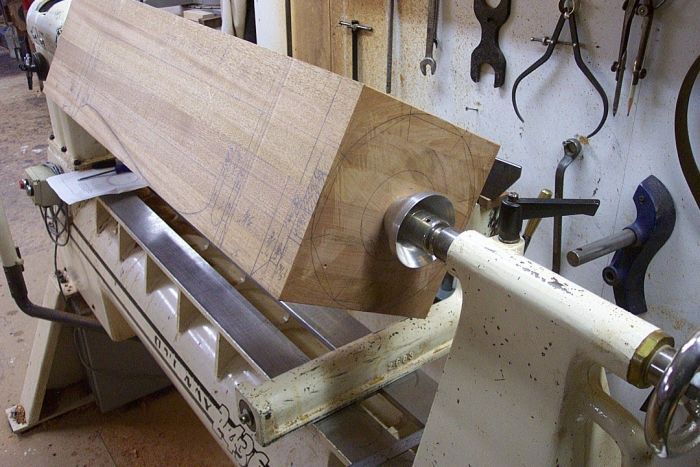
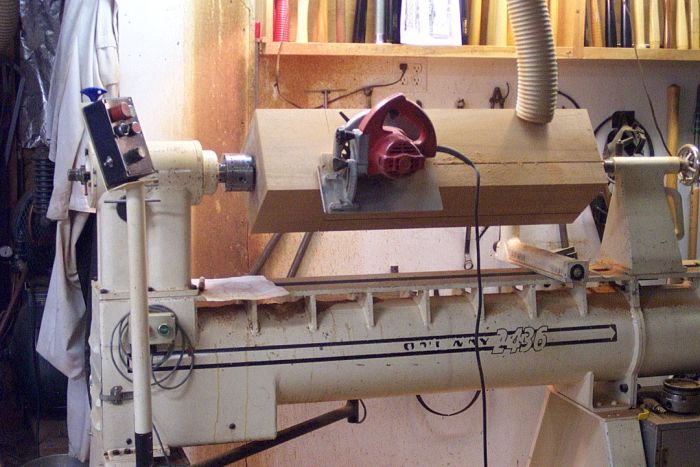
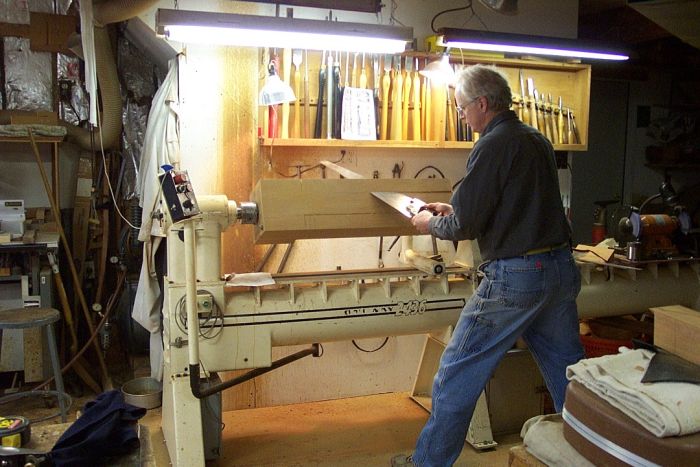
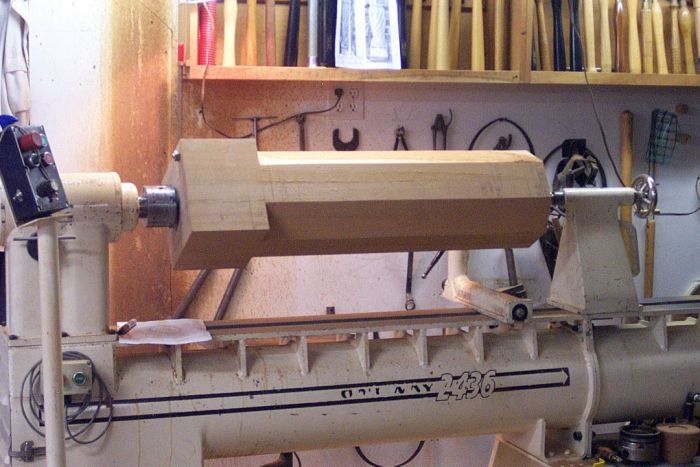
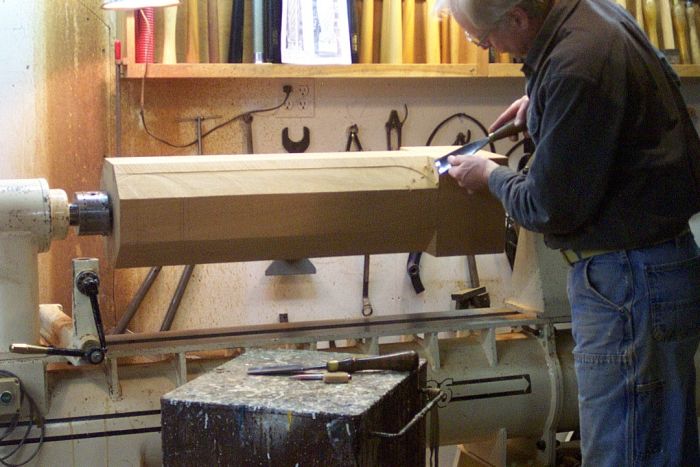
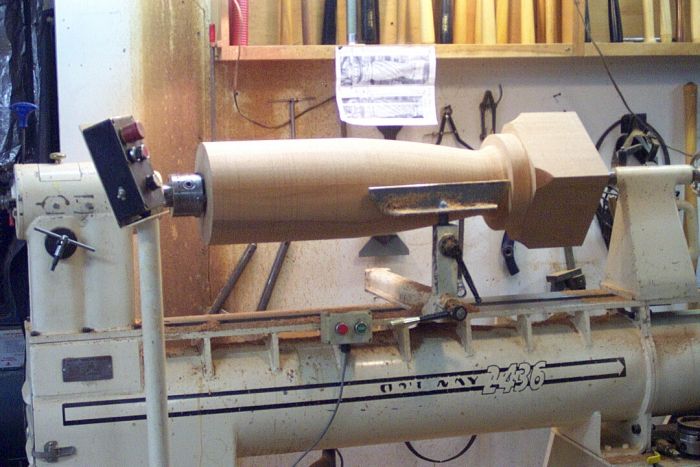
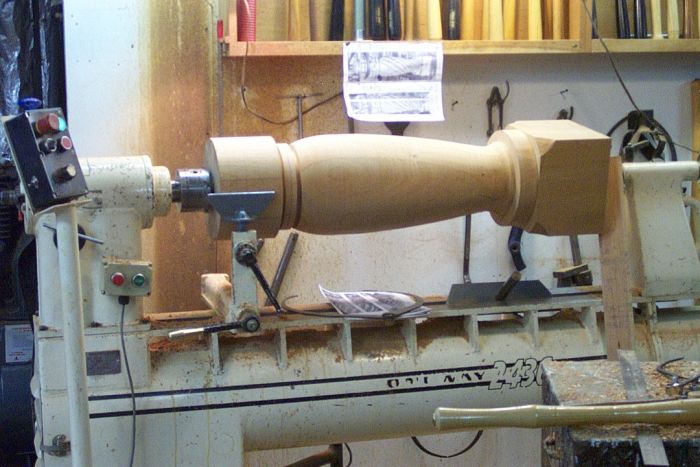
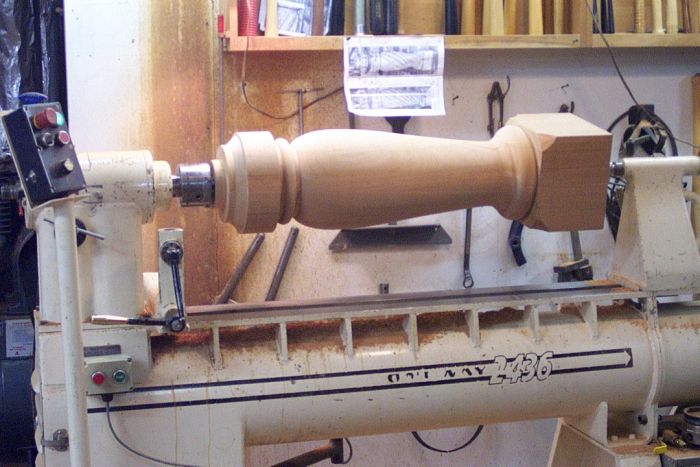
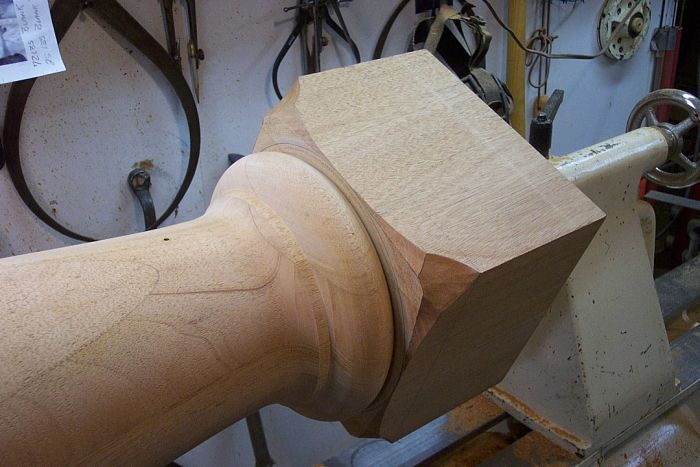
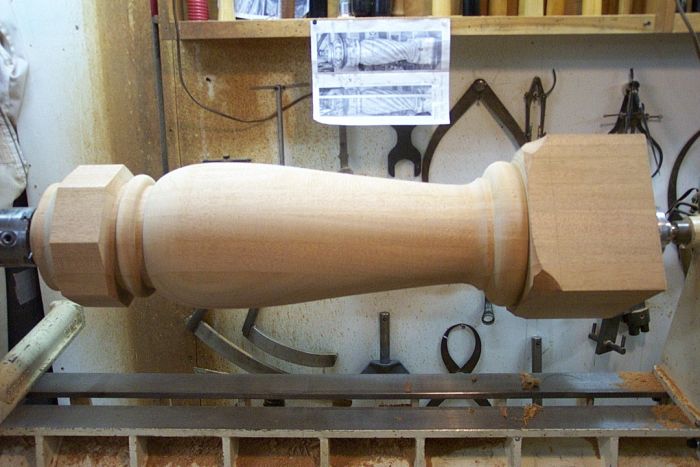
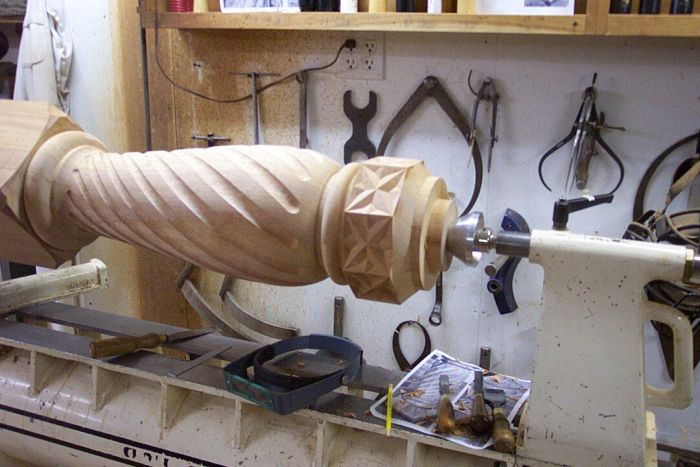
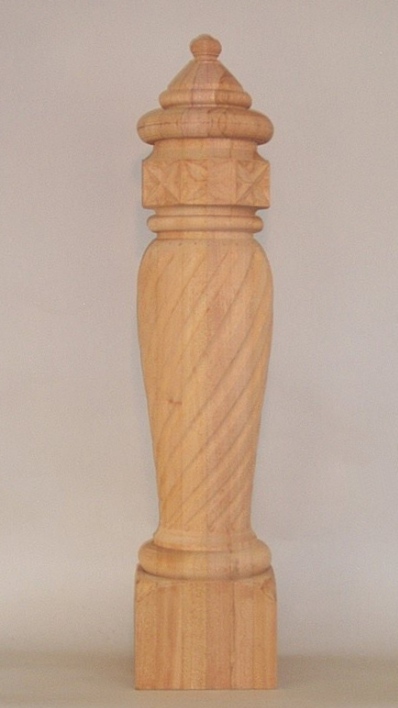
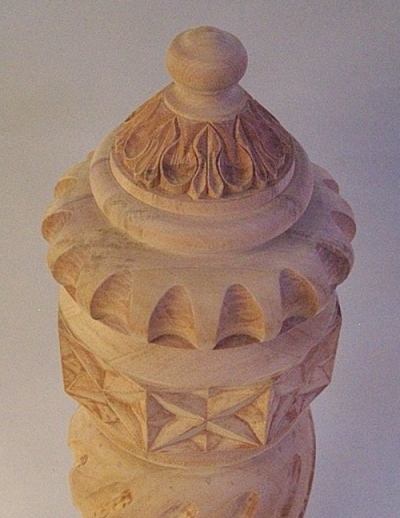
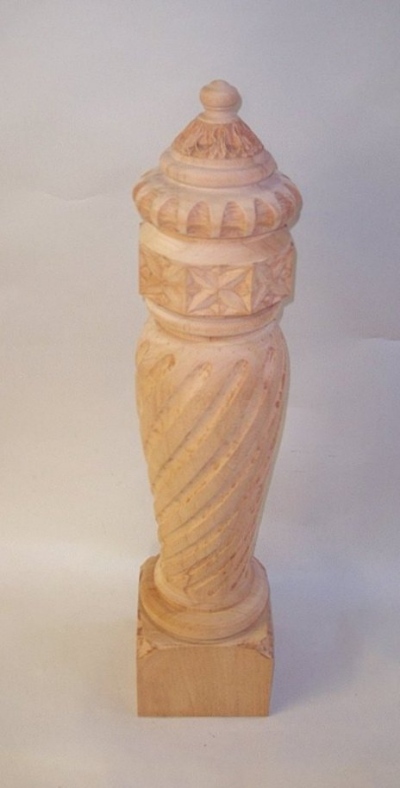
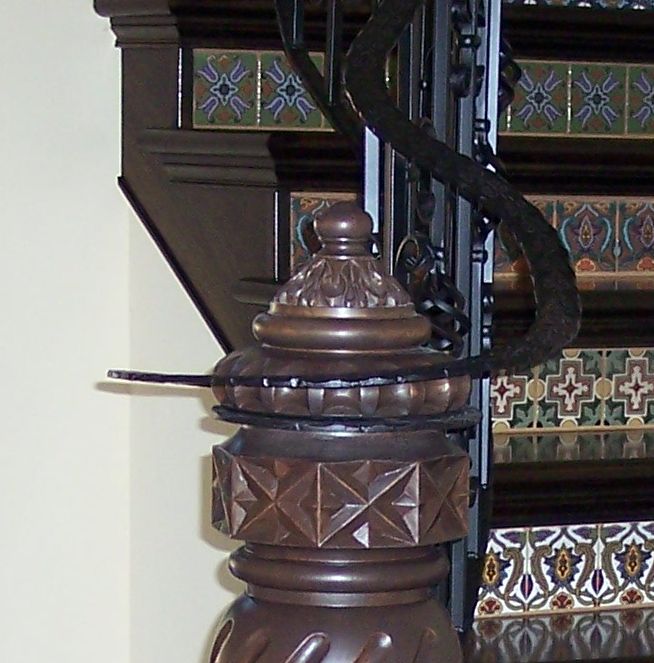
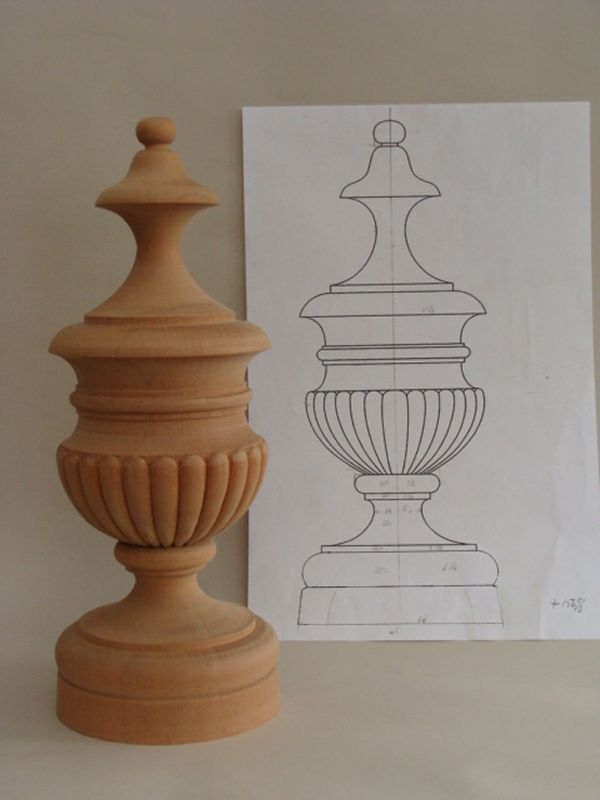
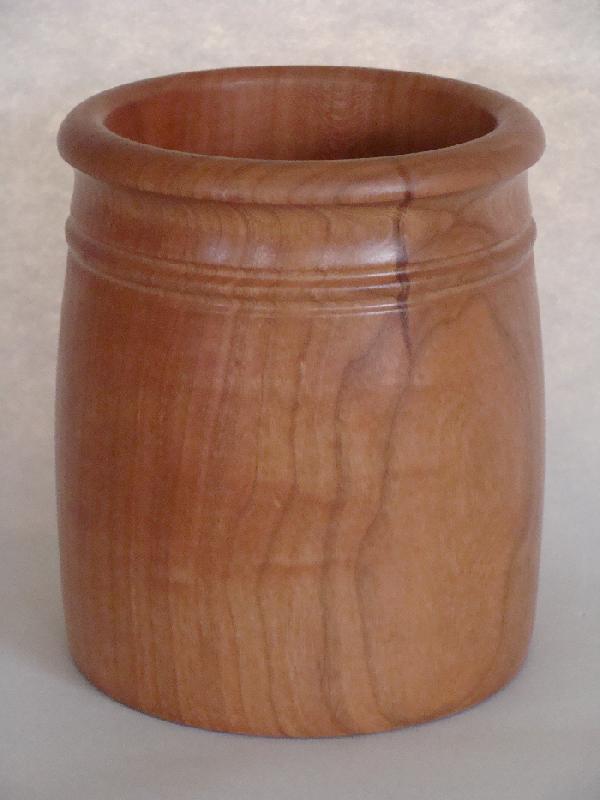
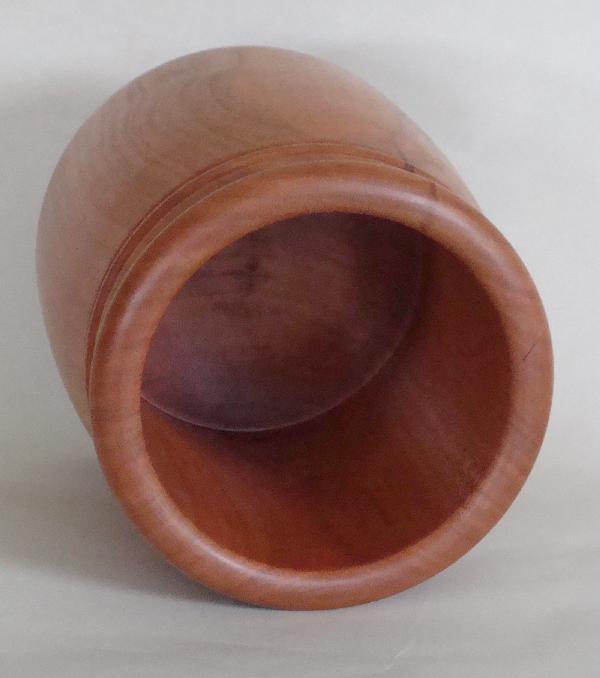
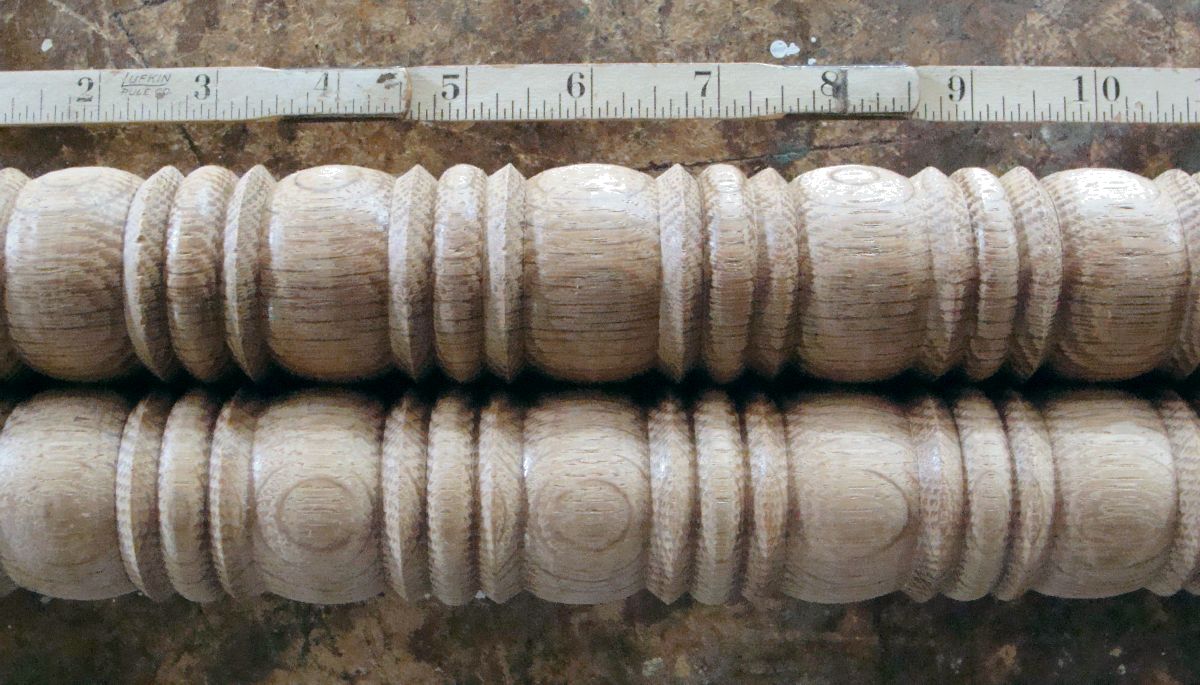
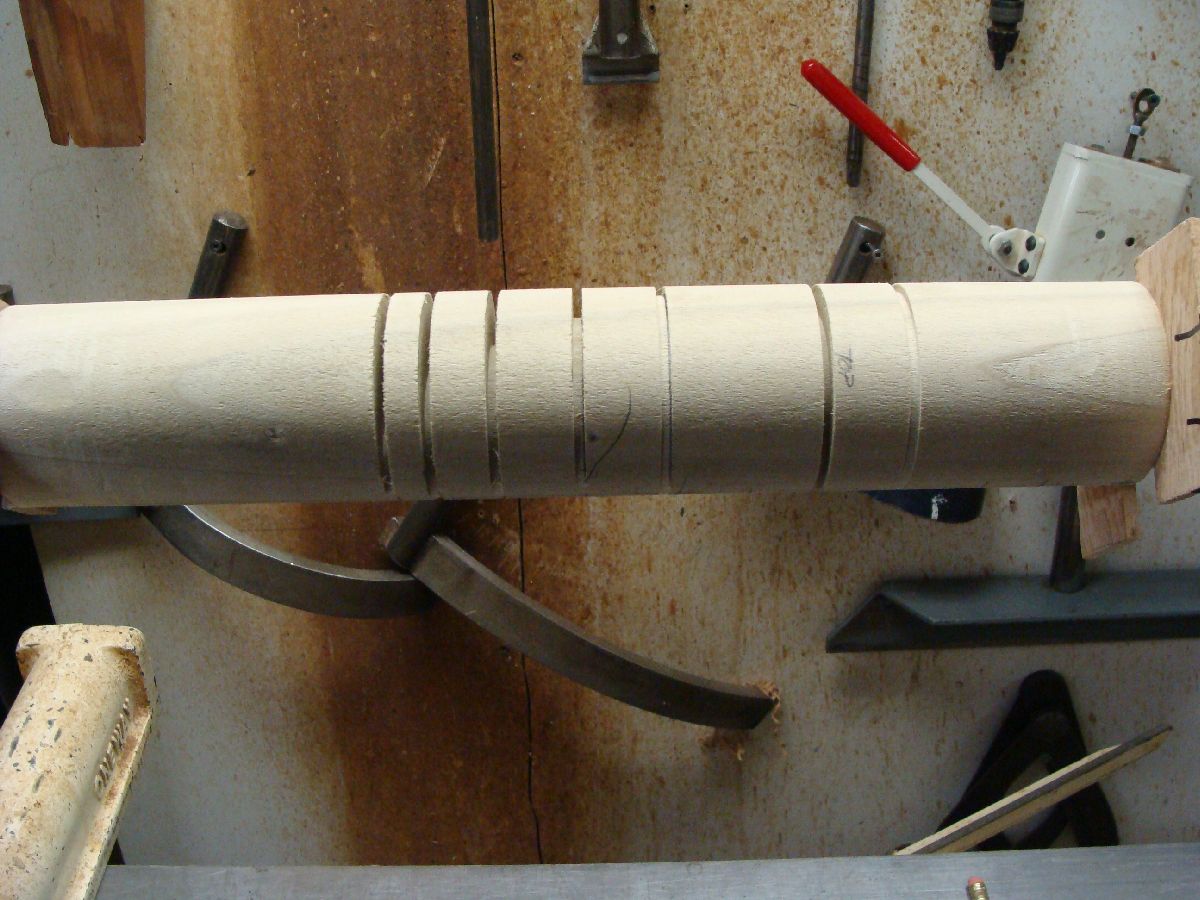
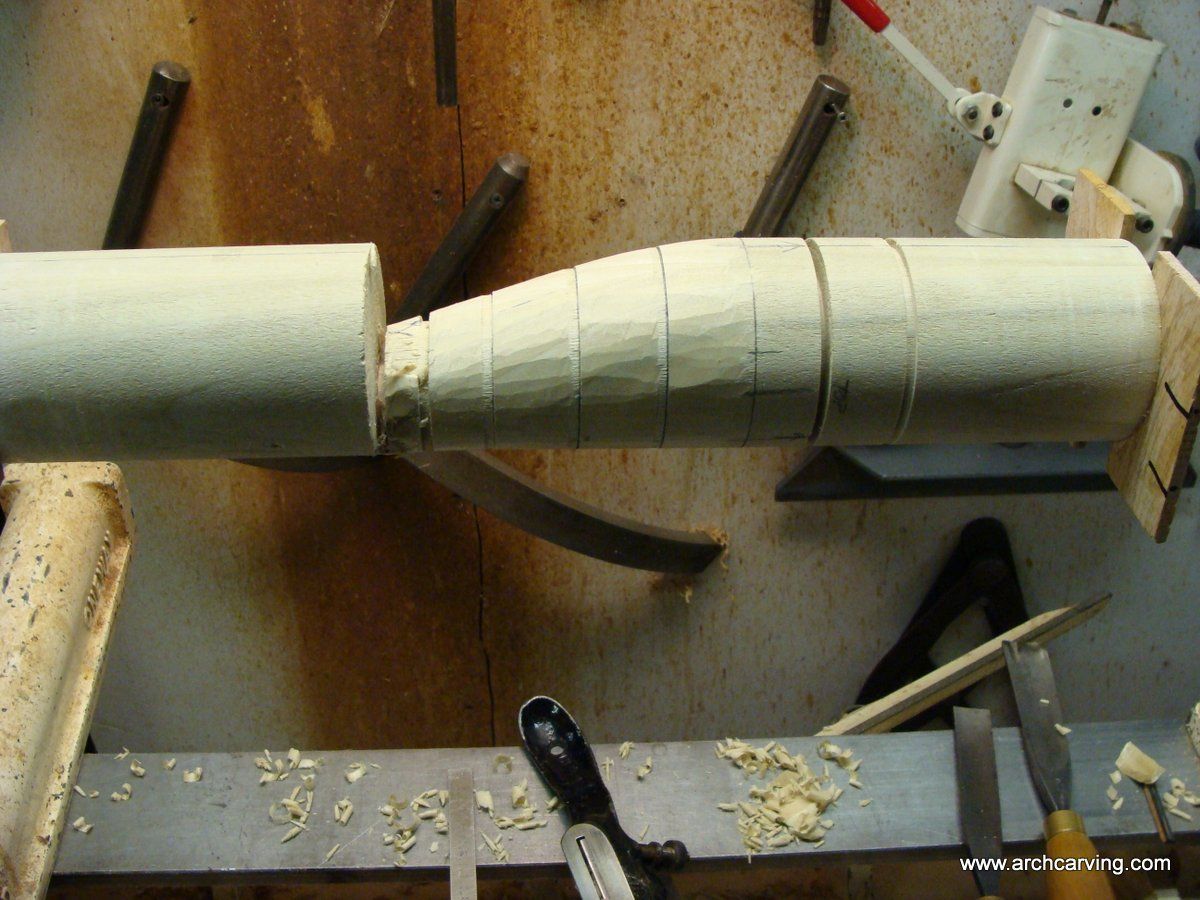
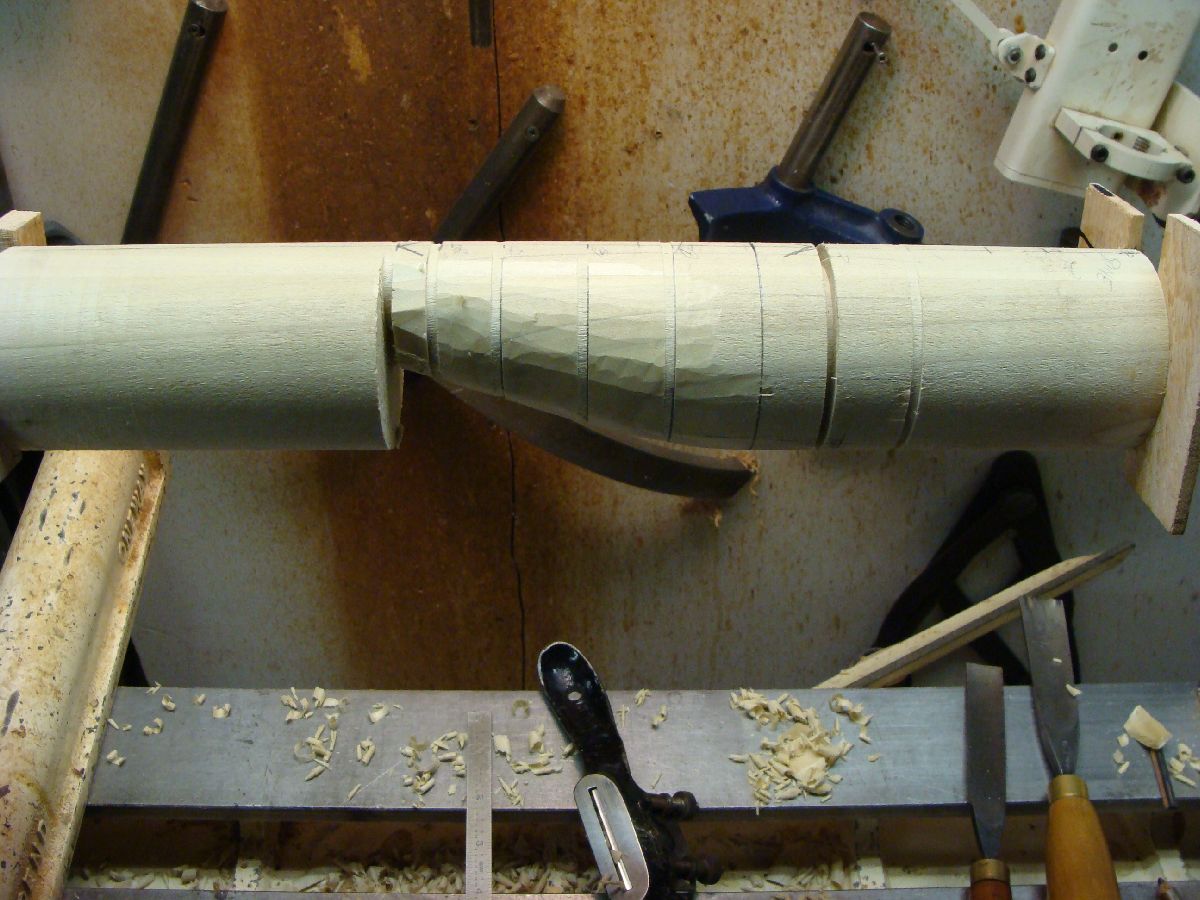
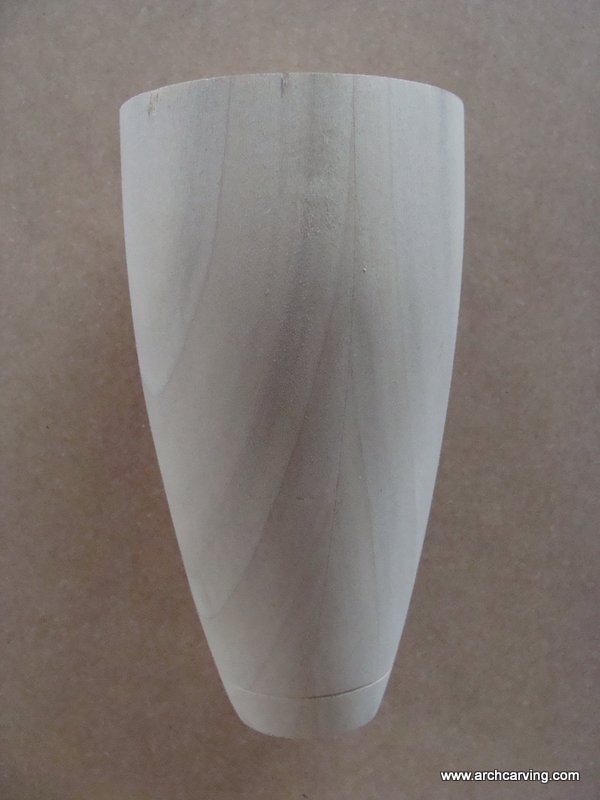
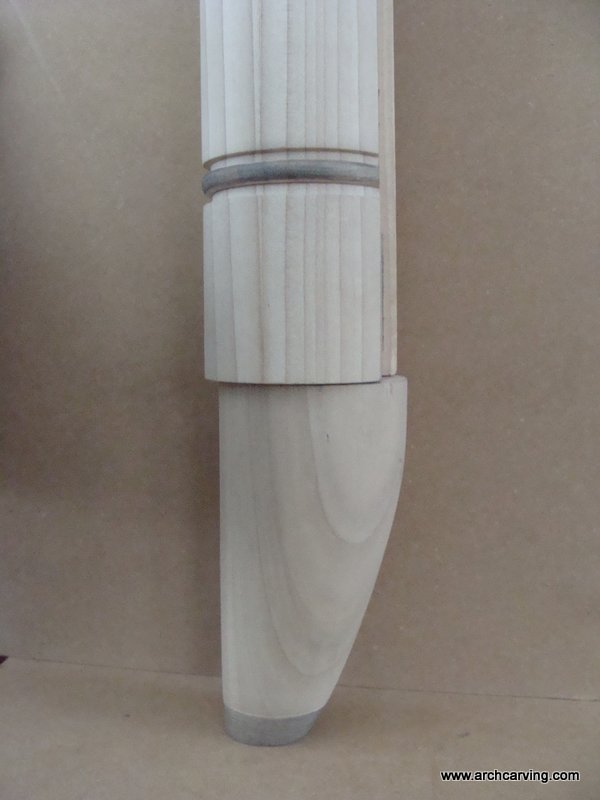
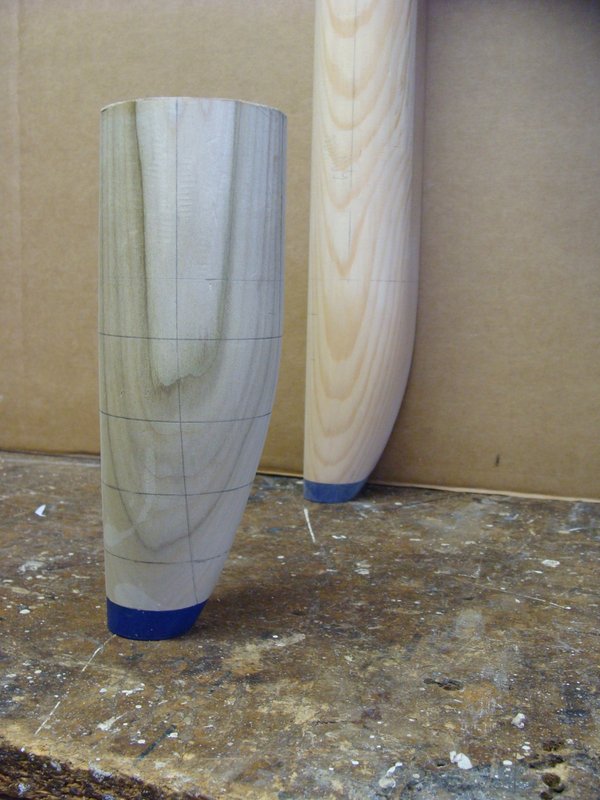
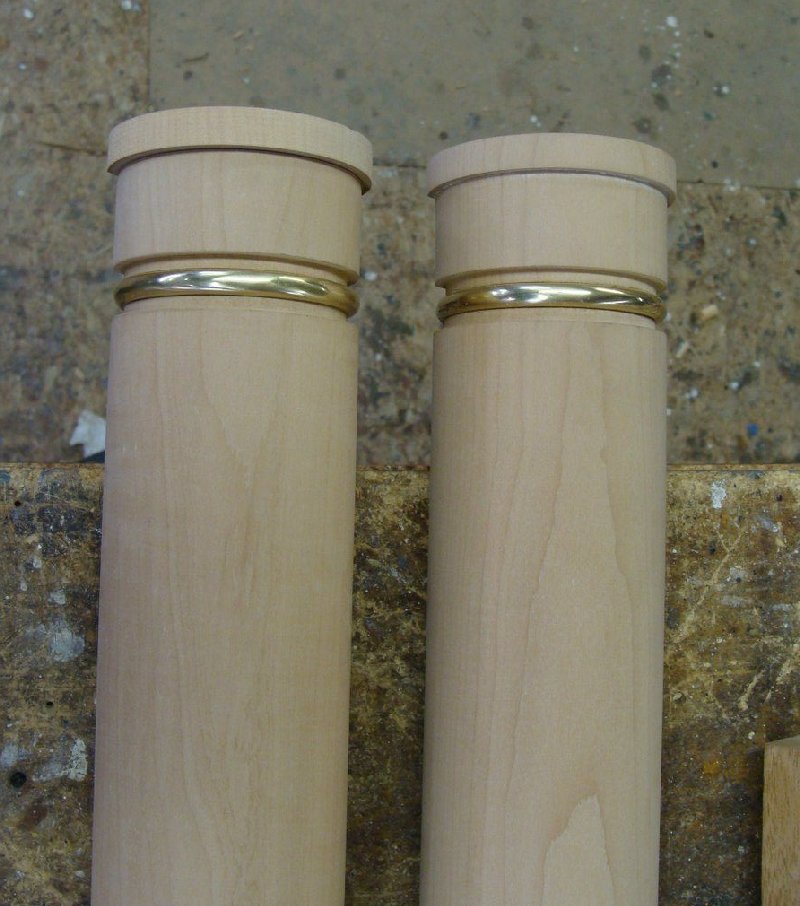
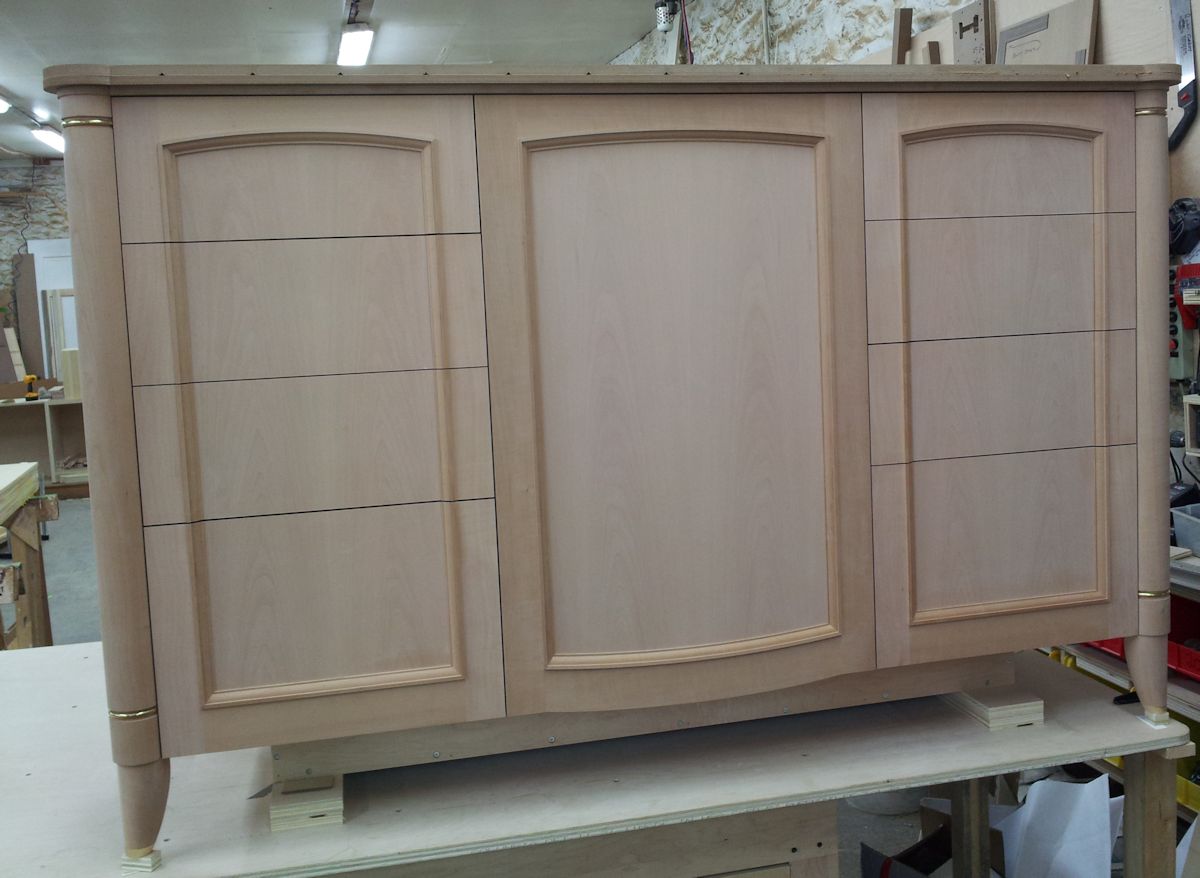
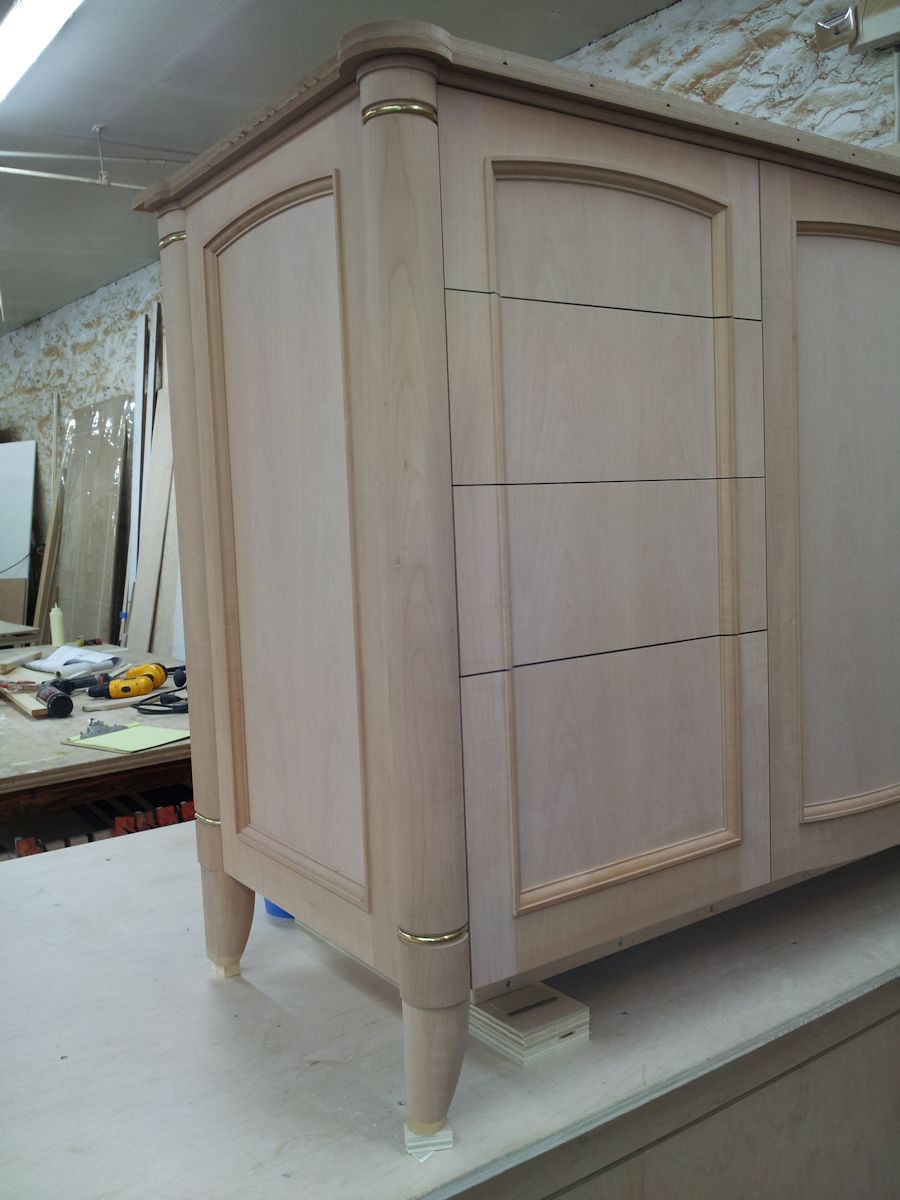
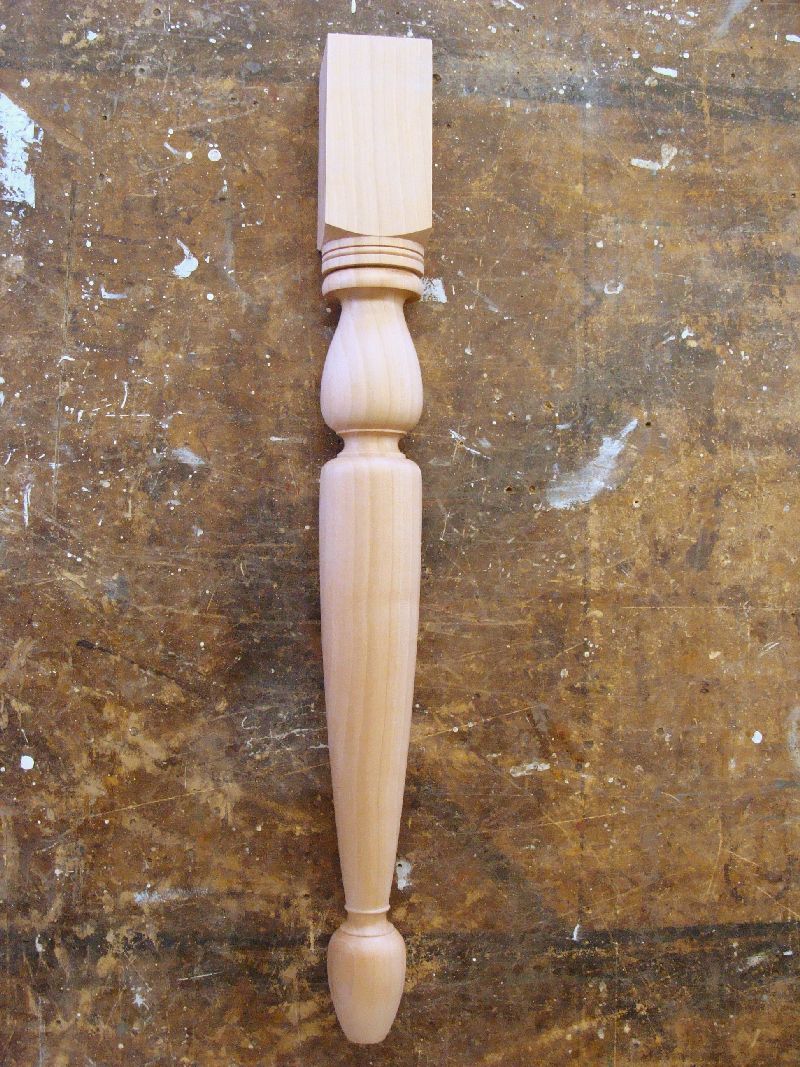
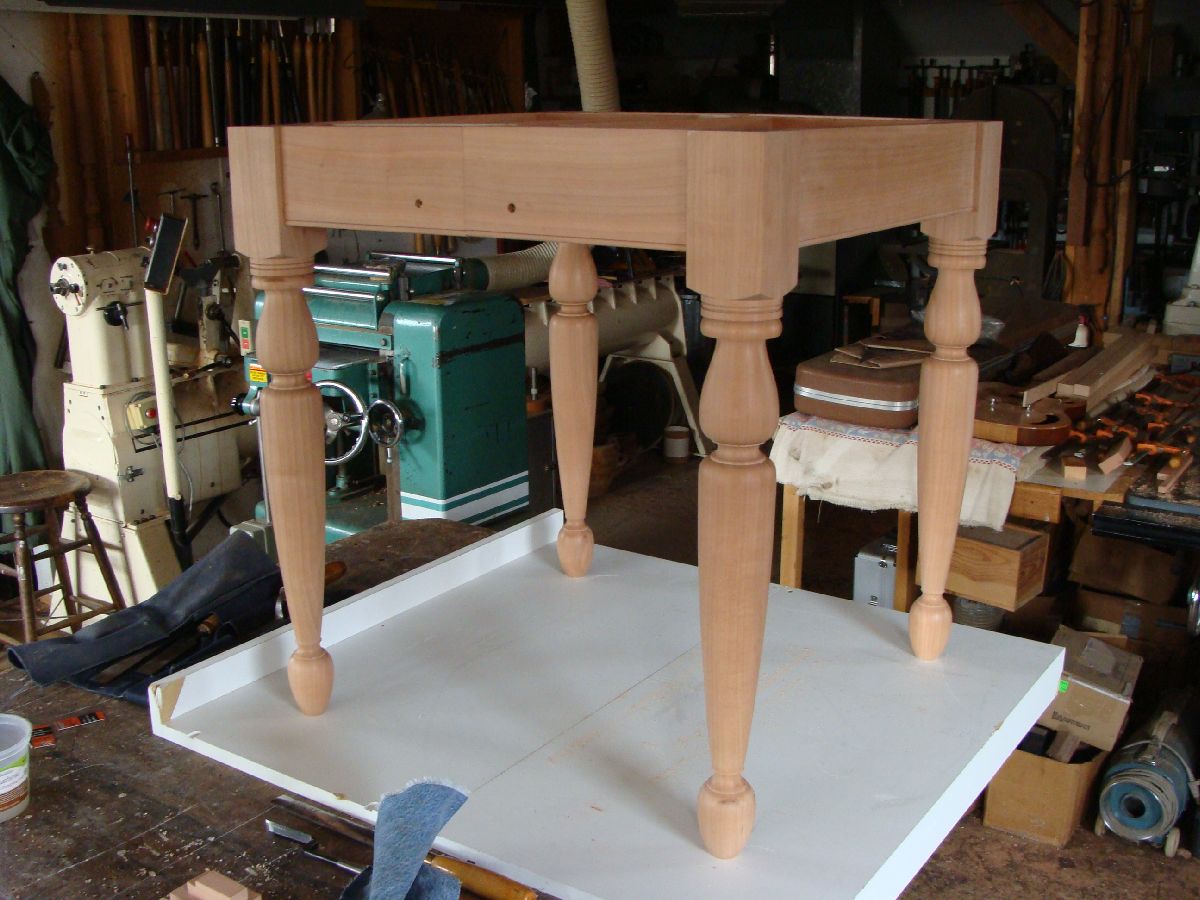
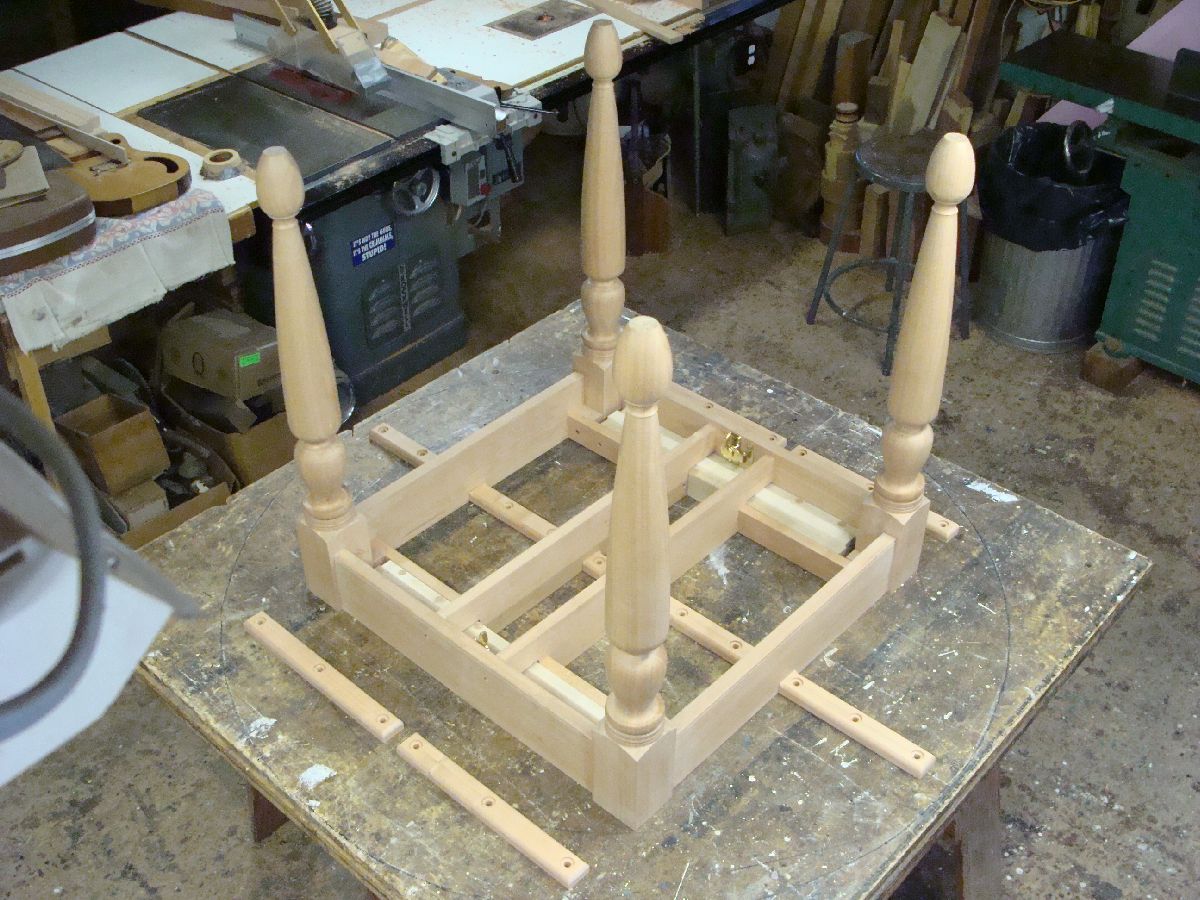
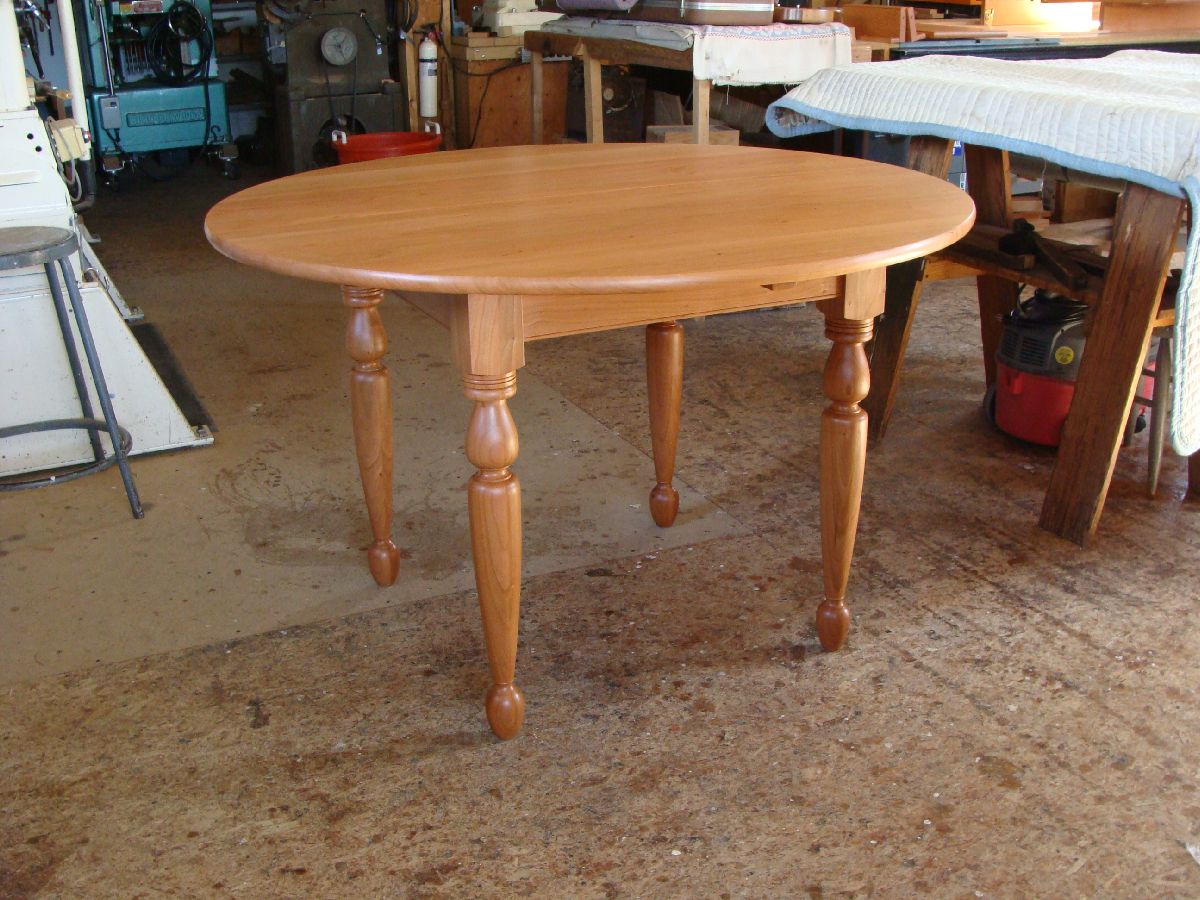
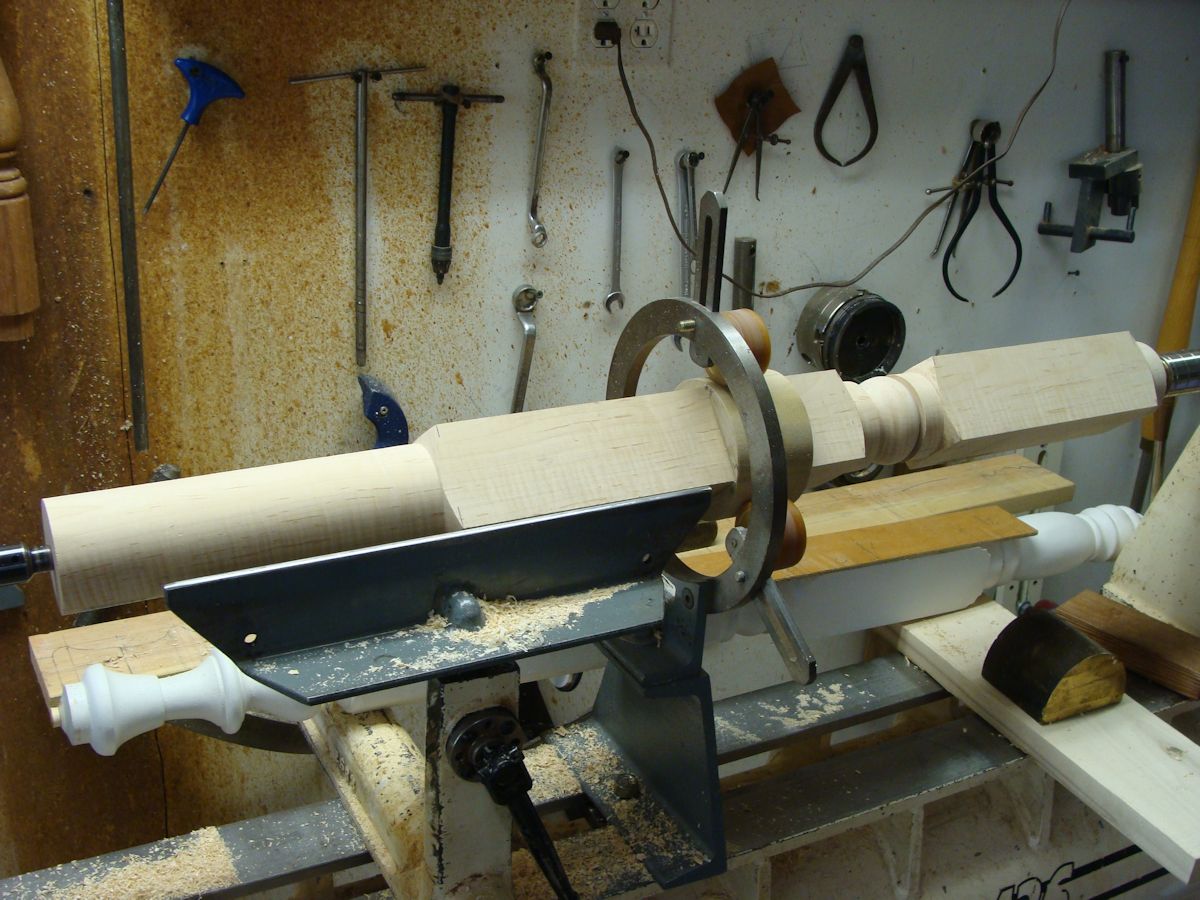
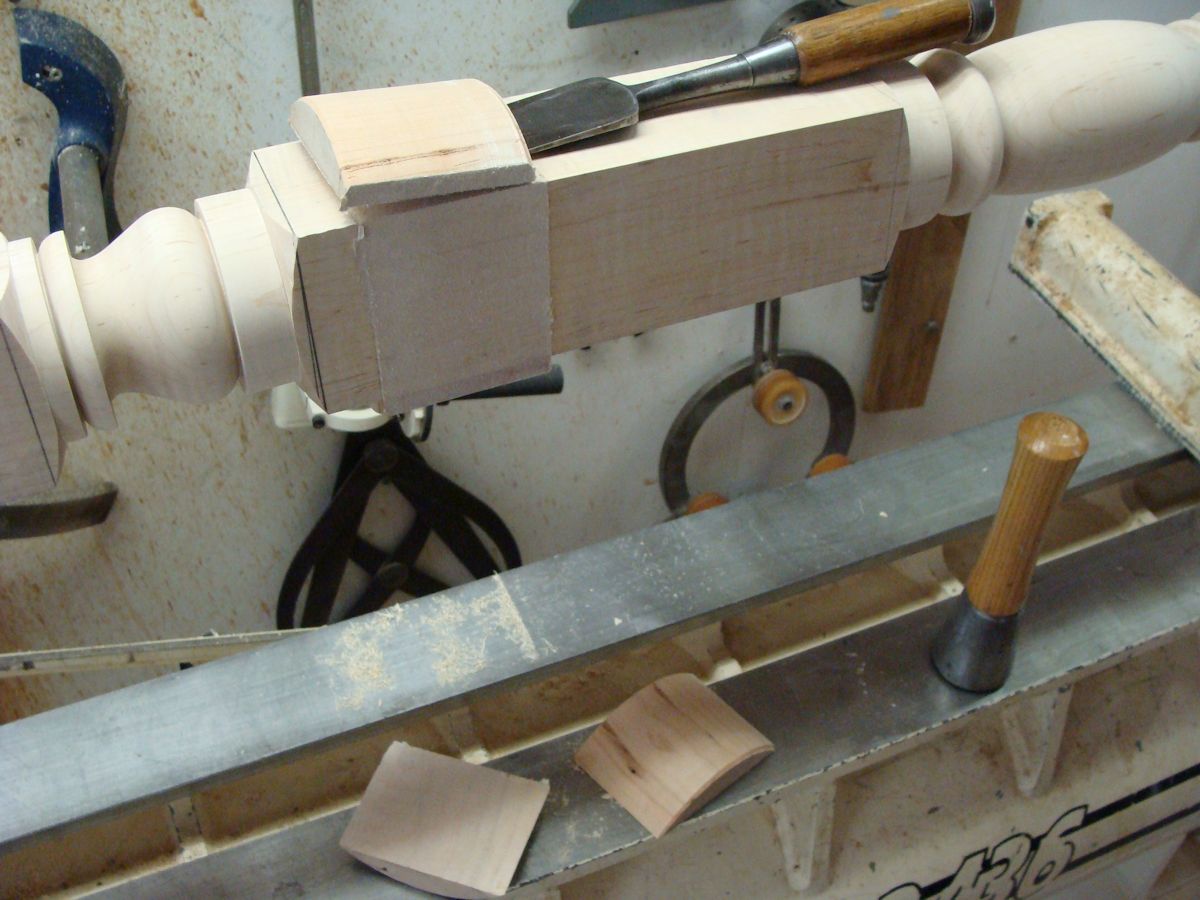
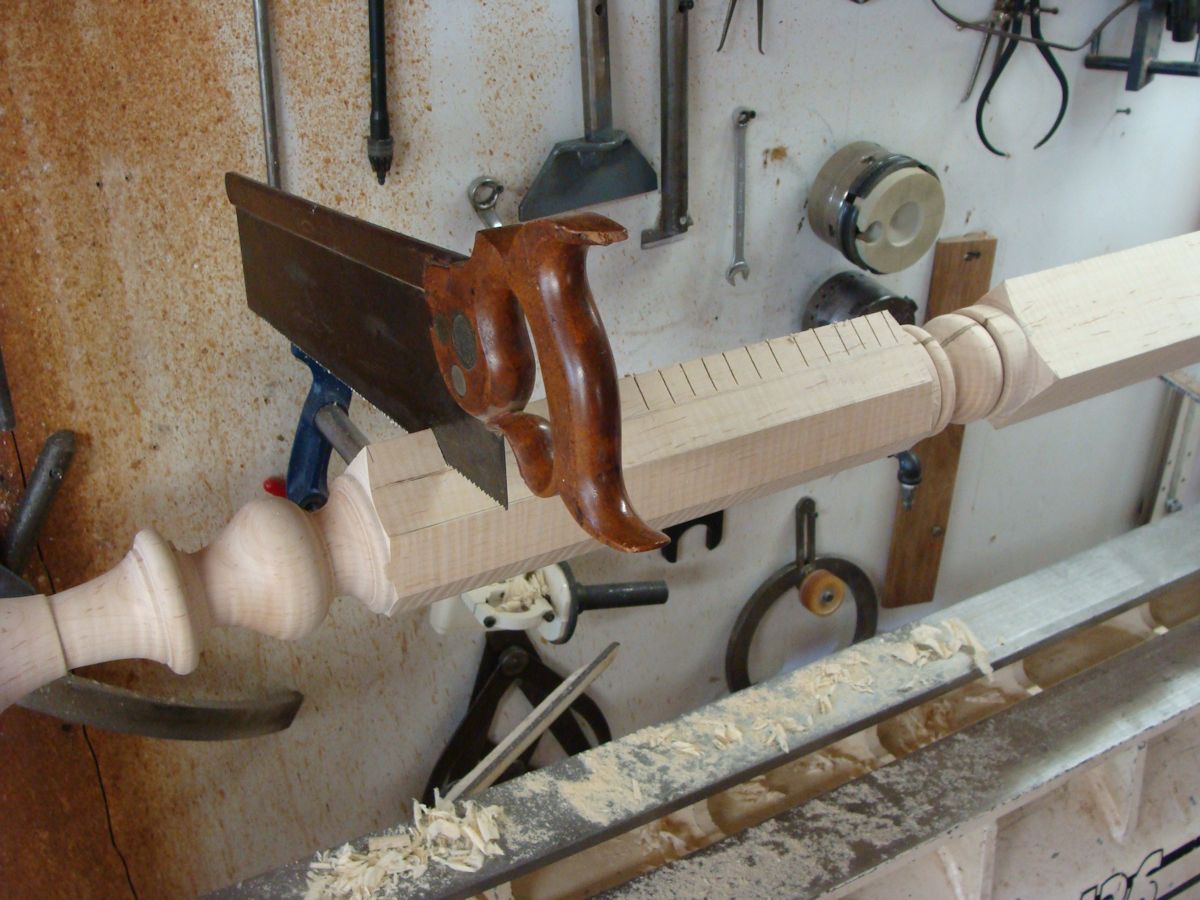
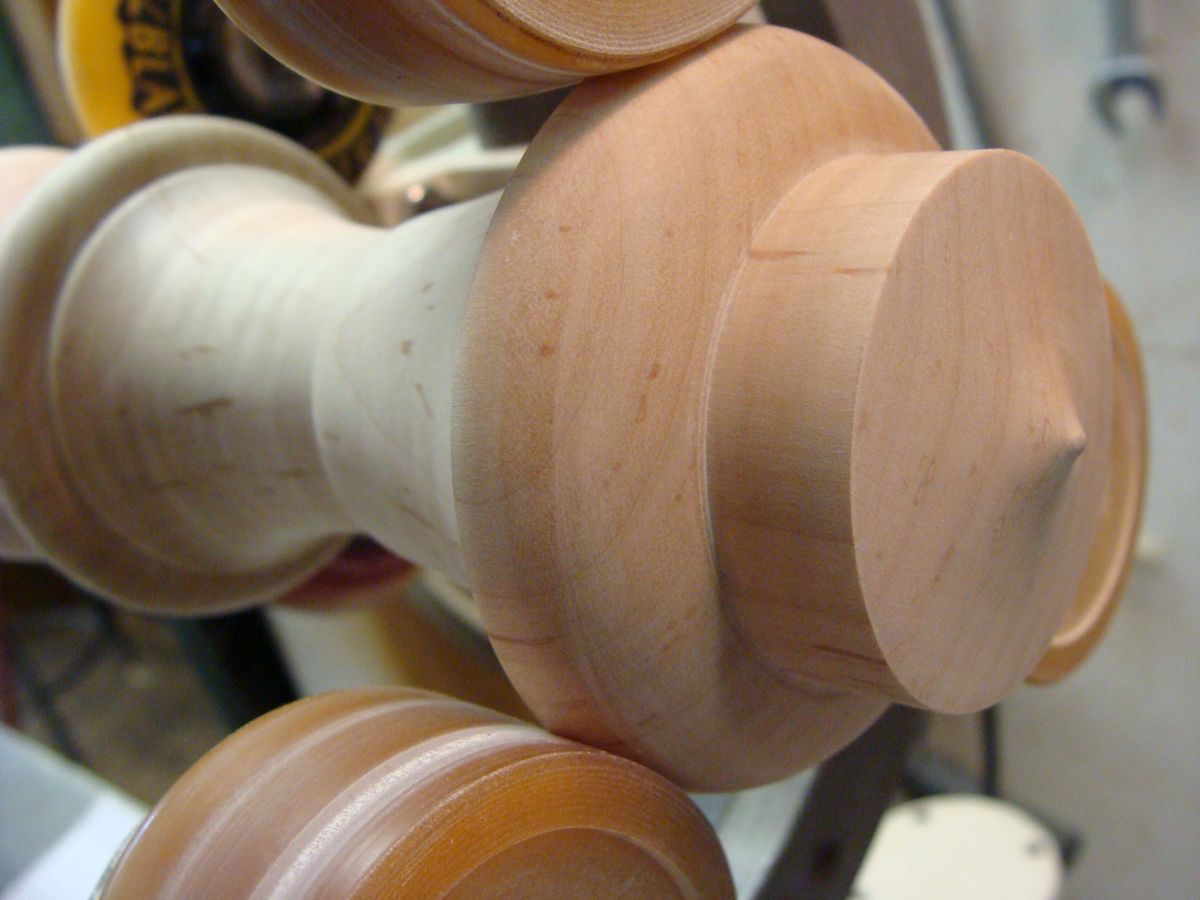
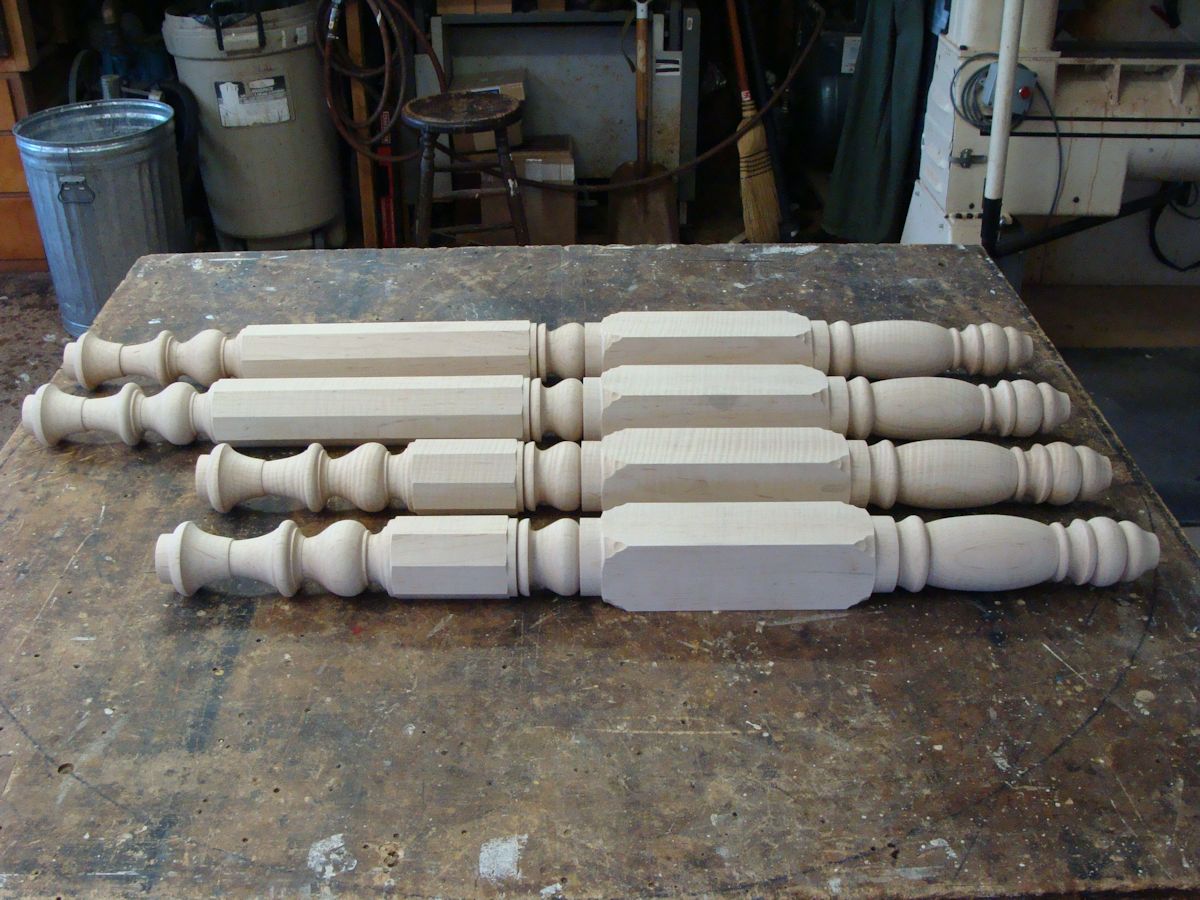
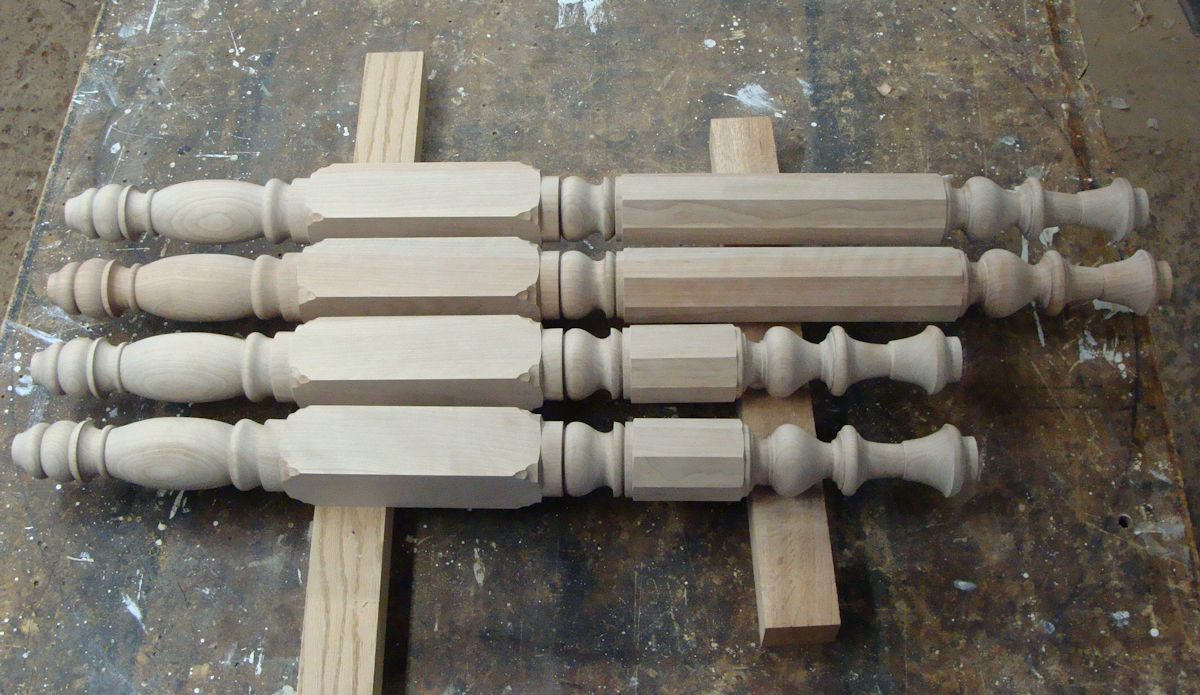
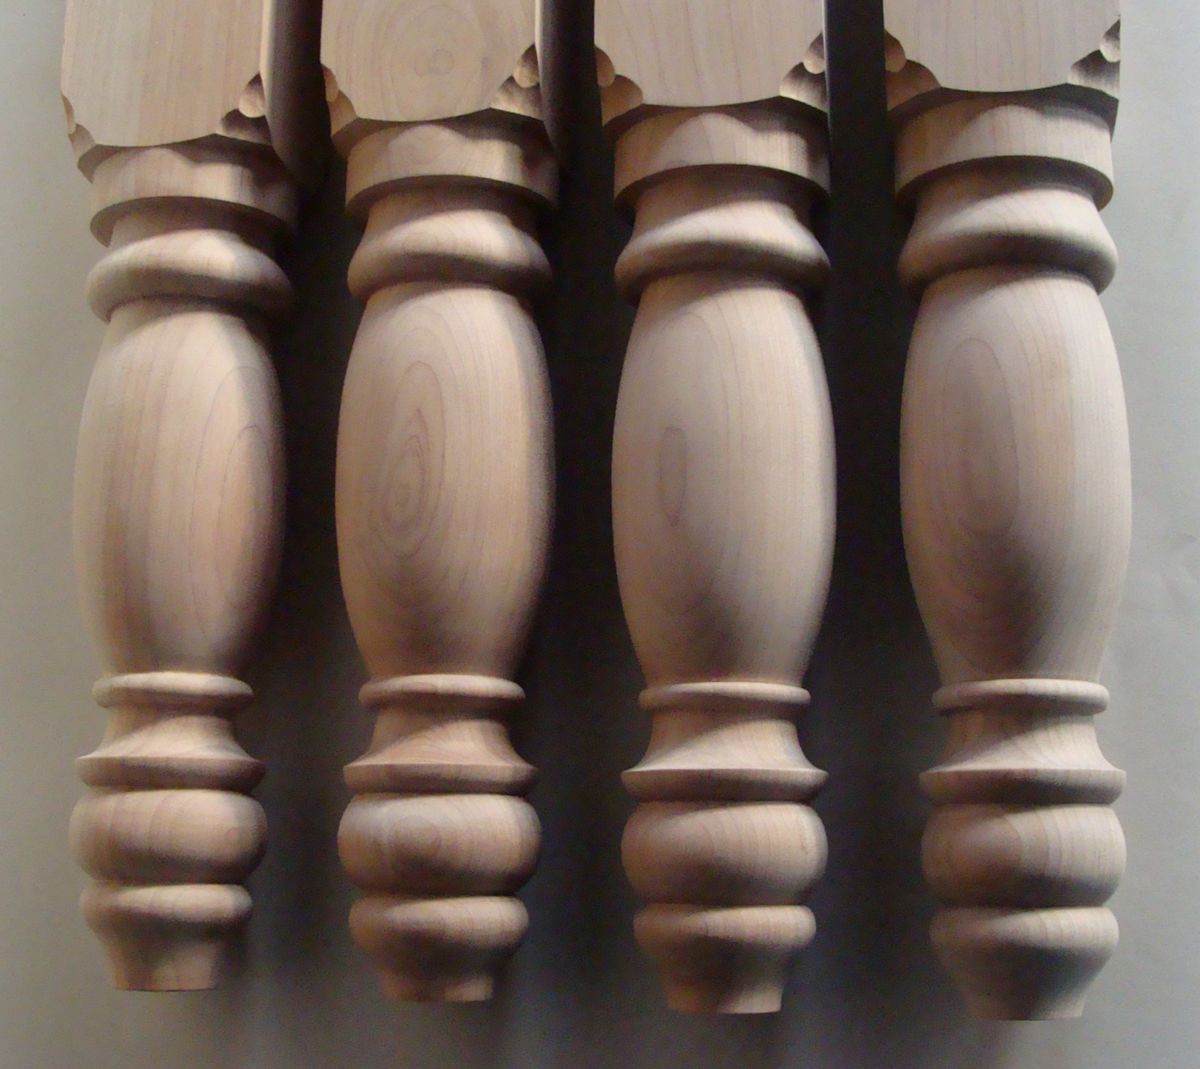
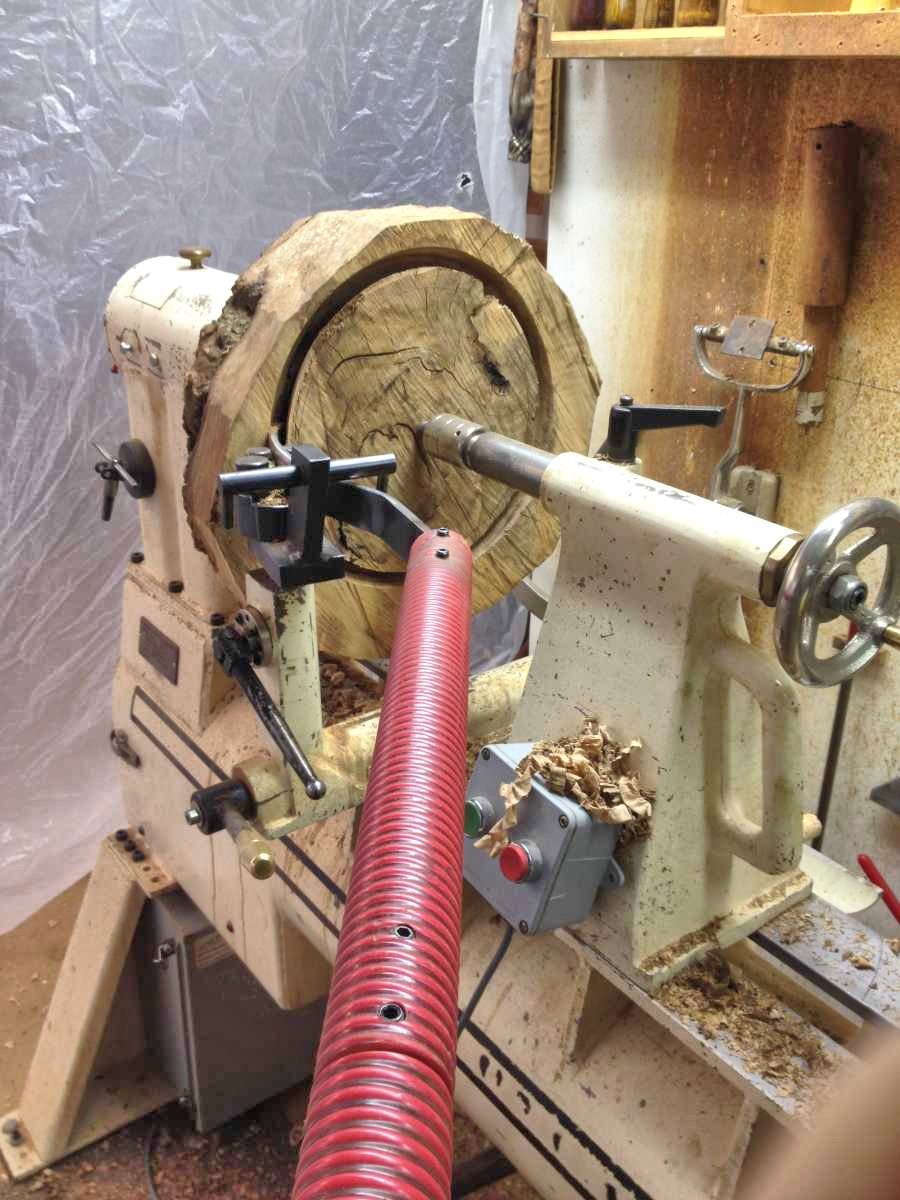
I  have a great deal of experience with intricate woodturning where very close tolerances are required. Some of those intricate projects can be seen on the BAGPIPE & BELLOWS page while others are shown below.  I also have a much larger lathe capable of turning 95" lengths inboard and 48"diameters outboard.    


Corners1.jpg (160783 bytes) Corners2.jpg (112153 bytes) Corners4.jpg (193967 bytes) Corners5.jpg (178507 bytes) Corners6.jpg (159596 bytes)


Glue up of 8/4 poplar. 
Look closely. Top two pieces and two bottom pieces were glued up separately. Once dry, each was ripped down the middle, run over a joiner and glued back together with paper bag paper between them. Those two assemblies were run over the joiner and glued together with more paper between them. So, the 12 o'clock - 6 o'clock center line has paper in the middle as does the 9 o'clock - 3 o'clock center line.
Assembly turned round and parted every 1 1/2" or so to just a bit over 6" in diameter. 
Turned close to the lines.
Right down so the lines all but disappear.


Corners8.jpg (123021 bytes) Corners9.jpg (167324 bytes) Corners10.jpg (135242 bytes) Corners11.jpg (131218 bytes) Corners12.jpg (182341 bytes)


Turned close to the 6" diameters on the ends.
Sanded and done.
Split in half.
Split into quarters. 
4 quarter rounds with a near perfect 3" radius X 43" long. 42" was the intended end length. These are paint grade, custom cabinet corners. 7-2014


Knob1.jpg (108982 bytes) Knob2.jpg (121539 bytes) Knob3.jpg (131492 bytes) Knob4.jpg (115174 bytes)
 
16 of 68 hand turned, quartersawn white oak knobs 2 5/16" in diameter X 1 3/4" thick. 6-2014


Hinckley knobs.jpg (36796 bytes) Drawer knobs.jpg (29555 bytes) Drawer knobs 2.jpg (31925 bytes) WhaleBoneFinials.JPG (101606 bytes)
 
2 inch tall teak and holly control knobs for a company that uses them on boats.
Last 2: Way too many drawer knobs (about 125)  that I will never do again.   
These three little finials were turned for a man who restores antiques.  To replicate the original, they are made from ancient whale bone.  


Bowl - pine.jpg (33663 bytes) Bowls - pine.jpg (27422 bytes) Fountain Top on lathe 2.jpg (41642 bytes) Fountain Top on lathe 3.jpg (36221 bytes) Fountain Top on lathe 4.jpg (43303 bytes) Fountain_top_1.jpg (36693 bytes) Fountain_top_2.jpg (38511 bytes) Tall_mahogany_finial.jpg (5000 bytes) Tall mahogany finial, application.jpg (43589 bytes)
 
First 2:  A pair of 10 inch diameter pine bowls with lids.  Each bowl is made from one solid piece of wood. 
18 inch diameter turned and carved mahogany pattern for mold for the top of a 3 tier, 7 foot diameter, cast stone fountain. 
Last 2: 36 inch spire and application.
Pedestal build jpg.jpg (40922 bytes) Pedestal on lathe jpg.jpg (41859 bytes) Pedestal turned jpg.jpg (43465 bytes) Pedestal rabbet jpg.jpg (37846 bytes) Pedestal bearing jpg.jpg (39432 bytes) Pedestal with top jpg.jpg (40097 bytes) Pedestal black finish jpg.jpg (38832 bytes) Pedistal and Pan.jpg (41198 bytes)
 
This mahogany form was glued up from 9 segments that were 2 1/2" thick and 28 1/2" long with a 20 degree angle milled along each edge.  These pictures show how this wooden form was made into a 30" tall pedestal with a rotating top that is now being used to display a cast bronze sculpture.   
The form is shown hoisted up on the big lathe, ready to be turned.
After a lot of shavings are on the floor, the finished shape finally appears.
Before leaving the lathe, 2 coats of epoxy were applied, with plenty of sanding before and after, to fill the pores and seal up the wood.  The inside was coated as well.  Note the inside rabbet.
Plywood was cut and fastened to the rabbet so that the pedestal wall could move a bit should it need to. A "lazy Susan" type of bearing was then fastened to the plywood.
A 2" thick top turned from 2 laminated pieces of medium density fiberboard was then attached to the bearing.
A couple of coats of black lacquer followed by two clear coats finished the project.
Finished pedestal displaying its Pan.


Four white oak finials.jpg (14005 bytes)

Finial detail.jpg (13252 bytes) Finial with dime for scale.jpg (21608 bytes)

Four finial detail.jpg (12211 bytes)

 
Four turned and carved white oak finials for a four post bed. The dime in the third picture is for scale. 


Big cherry bowl 1.jpg (30721 bytes) Big cherry bowl 2.jpg (27905 bytes) Big cherry bowl 2a.jpg (31389 bytes) Big cherry bowl 6.jpg (14981 bytes) Big cherry bowl 4.jpg (14217 bytes)

Big cherry bowl 5.jpg (27263 bytes)

 
The first picture is a composite of two separate pictures and all are of the same bowl blank mounted on my big Oneway lathe. This is a beautiful piece of clear, heartwood cherry that came from a 31" diameter log and the composite shows it with the outside turned and the inside still solid. 
The second pictures shows the bottom of the bowl.
The third picture shows the same piece about 30 minutes later with the inside "cored" out. This is done with a very large and long parting tool that has a curve along its length.
The last three show the finished bowl. 21" diameter, 7 1/2" high, 7/16" thick at the rim. 


Makore finials.jpg (32397 bytes)

Makore finials, 12 complete.jpg (19374 bytes) Makore finials being idexed.jpg (26352 bytes) Makore artichoke finials.jpg (29603 bytes) Makore artichoke finial bottom.jpg (21005 bytes) Makore artichoke finial side.jpg (17334 bytes)

Makore artichoke finial top.jpg (25340 bytes)

 
Makore finials. The finished finials will have a carved leaf pattern. First picture shows the rough turned blank on the left and the nearly finished finial on the right.
12 makore finials, turning complete, ready for index lines.
Using the indexing head on my Oneway lathe, carving lines were put on each finial. 
Two out of 12 artichoke finials carved out of makore.
Finial from the bottom.
Finial from the side.
Finial from the top.


Pinecarvedbowl1.jpg (50515 bytes)

Pinecarvedbowl2.jpg (42077 bytes)

Pinecarvedbowl4.jpg (39809 bytes)

Pinecarvedbowl5.jpg (39616 bytes) Pinecarvedbowl6.jpg (88738 bytes) PineFluteBowl5.JPG (146958 bytes) Pineflutedbowl3.jpg (37340 bytes)

Pineflutedbowl1.jpg (81498 bytes)

 
The first five pictures are of a 16" turned, white pine bowl with hand carved reeds and billets. It was finished with raw tung oil after the outside was flap sanded. Flap sanding removes more of the softer and lighter colored "early wood" and leaves the harder "late wood." So, the texture you see is the texture you feel.    
Last 3 pictures - 16" turned, white pine bowl with hand carved flutes.


Pineegoldbowl1.jpg (24070 bytes)

PineGoldBowl2.jpg (22180 bytes) PineGoldBowl3.jpg (30212 bytes) PineGoldBowl4.jpg (24114 bytes)

PineGoldBowl5.jpg (23047 bytes)

 
15" white Pine bowl,  glossy finish with 23K gold leaf inside and hand carved cherry burl rosette. I started this bowl in 2002 and screwed up the top edge after the gold leaf was applied. In the first picture you can see the repairs. I was so irritated at myself that I put it aside. This year (2005) I dug it out, re-guilt the inside, carved the cherry burl rosette, mounted it on the side to cover a large knot that had an ugly repair. Gold leaf comes in squares and you can just make out their faint outline in the second picture.  The bowl is  6 1/4" tall  and the rosette is 2" in diameter.   


Pineglossybowl1.jpg (17544 bytes)

Pineglossybowl2.jpg (17260 bytes) Pineglossybowl3.jpg (13791 bytes) Pineglossybowl4.jpg (13619 bytes)
 
15" turned white pine, glossy finish bowl.


CremationUrn1.jpg (53805 bytes)

CremationUrn2.jpg (68601 bytes) CremationUrn3.jpg (60348 bytes) CremationUrn4.jpg (84558 bytes) CremationUrn5.jpg (41243 bytes)

CremationUrn6.jpg (35478 bytes)

 
Six views of a cremation urn that I turned for my friend Lou Ulm. Walnut, birds eye maple with an African blackwood finial.  Being asked to make something as personal as this for a fellow woodworker is a rare honor and privilege. 


NewelPost.jpg (38570 bytes) NewelInside9-26-06.jpg (46676 bytes) NewellExploded9-26-06.jpg (24642 bytes) NewelTop9-26-06.jpg (55179 bytes) NewelFinial9-26-06.jpg (41434 bytes)
 
It is always great to be asked to build something different. Newel posts like this were found in some of the more beautiful, Federal style, New England homes. 
With the finial off and the center counter-rotating spiral pulled half way out, we see one of the secret to it's stability.  How the old stair makers did it is a mystery so I found my own solution - a 5/8" diameter steel rod. 
In the third picture the center spiral has been taken out.   
The top (less finial) looking down into the 1 1/2" center spiral hole with the steel coming up through an 11/16" hole in the central spiral's shaft. 
The bottom of the finial showing how it locks onto the rest of the post, the hole for the steel shaft and the method of achieving a tight fit for the cylindrical tenon.  


NewelPainted1.jpg (66830 bytes) NewelPainted2.jpg (65715 bytes)


Here are two pictures of the painted newel without the center, counter rotating spiral. The architectural detail really shows up much better when painted. I changed the light to show off different aspects of this interesting piece. Light is everything. 


NewelDone1.jpg (47583 bytes) NewelDone2.jpg (35503 bytes) NewelDone3.jpg (36116 bytes) NewelDone4.jpg (35633 bytes)


Four pictures of the completed newel post with the painted center installed.


NewelCal2.jpg (71647 bytes) NewelCal3.jpg (66574 bytes) NewelCal4.jpg (69320 bytes) NewelCal5.jpg (61664 bytes) NewelCal6.jpg (62355 bytes)


Another interesting newel post for a new house in California. After a 1 3/4" hole is drilled from one end to the other, it is mounted on the lathe and layout lines are added.
Second: The power saw makes quick work of the edge wood that is not needed.
Third: A sharp rip saw quickly finishes the cut. 
Fourth: Edge wood gone.
Last: Preliminary carving on the lamb's tongue.  


NewelCal7.jpg (63060 bytes) NewelCal8.jpg (64136 bytes) NewelCal9.jpg (61589 bytes) NewelCal10.jpg (61839 bytes) NewelCa11l.jpg (57055 bytes)


First two: Carving begins.
Third: All elements rough turned.
Fourth: Octagonal flats carved in.
Fifth: Lamb's tongues finished.   


NewelCal12.jpg (57393 bytes) NewelCal13.jpg (62150 bytes) NewelCal15.jpg (79665 bytes) NewelCal16.jpg (90883 bytes) NewelCal17.jpg (78822 bytes)


Ready for carving layout work to begin. 
I turned the post 180 degrees to make work a bit easier for this right-handed carver. Spiral carving laid out and done. Star carving on the octagonal flats has begun. 
Finial finished and fitted. 
Finial carved.
Completed newel.


AndreNewelInstillation.jpg (92102 bytes) AndreNewelInstillationClose.jpg (90015 bytes) AndreNewelInstillationCloser.jpg (72135 bytes) NewelUrn3-3-09-11.jpg (34415 bytes)


First three: Here are some great pictures sent to me by the gentleman who ordered this newel for his new home in California. He saw a post that he liked and took pictures with a tape measure beside the post. I worked out the rest. 
Last: A 16" tall urn that will be used as a newel post finial in a Texas house. 


Crock11-8-09-2.jpg (38069 bytes) Crock11-8-09-3.jpg (28103 bytes) Crock11-8-09-4.jpg (32093 bytes)

GRMFinials4-21-10.jpg (137242 bytes)

TurnedMolding10-17-2011.jpg (155375 bytes)


The first three pictures are of a cherry crock that is 6" outside diameter X 7" tall, X 4 1/2" inside diameter X 5 1/2" inside depth. The thing that makes this piece so unique is that it is made out of one solid piece of cherry. Rarely do you find a piece of solid cherry this size dry enough to do something.  I cut and dried this piece myself. 
Next picture is of four small finials out of mahogany. 50 cent piece for scale.
Last picture is of turned white oak, 1 3/4" in diameter. Each if the 16 pieces was 30" long and will be ripped into four pieces lengthwise to make quarter round molding. 


Foot1.JPG (158261 bytes) Foot2.JPG (168965 bytes) Foot3.JPG (156267 bytes) Foot4.JPG (59273 bytes) Foot5.JPG (62381 bytes) Foot6.JPG (54081 bytes)


First three pictures: This foot prototype was eccentrically turned to provide the stop cuts for carving. 
Next two pictures: Completed, 5" tall foot. 
Last picture: Foot as it appears on the leg. Set in 1/8" from the front and side. 


Foot7.JPG (99706 bytes) Foot8.JPG (114684 bytes) Vanity1.jpg (120451 bytes) Vanity2.jpg (119118 bytes) Vanity3.jpg (103145 bytes)


Front and rear foot prototypes. 
Top of both front leg showing 1/4" nosed brass which will be nickel plated. 
Last three pictured: Vanity assembled without finish and brass as yet to be plated.
Vanity made by:

Grace, Ryan & Magnus Millwork, LLC
17 North Bleeker Street
Mount Vernon , NY 10550

Tel: 914-925-9741


TableLeg.jpg (211774 bytes) TableFrame2.jpg (150652 bytes) TableFrame.jpg (204927 bytes) Table4'Top.jpg (188854 bytes) Table5'Top.jpg (173772 bytes) Table6'Top.jpg (177413 bytes)


I made this table for my wife over the 2011/2012 winter out of air dried cherry cut in York by Mike Lee from The Lee Tree company - a business he built by himself.  The butt logs were cut by a local band mill sawyer and stored for 7 years in a airy shed and 5 years in my shop. It is 4 feet in diameter expanding to 5 feet or 6 feet by the addition of two leaves. The leg and table design is my own. 


Bed Post1.jpg (170197 bytes) Bed Post2.jpg (132513 bytes) Bed Post3.jpg (154356 bytes) Bed Post4.jpg (95650 bytes)

Bed Post5.jpg (189332 bytes)


First: A set of 4 tulip top bed post made out of curly maple for a fellow woodworker. 2 3/4" square X 54" long for this head board post. Note the applied sacrificial poplar pieces used for the center steady.
Second: Turning done, the poplar semi-circumferences are cleaved off along the    paper glued between the them and the post with water soluble, white glue.
Third: A back saw is used to cut section lines run parallel to the edges of the square center section. These sections were quickly cut off with a flat chisel.
Fourth: A low bevel block plane finished the job.  No more than 15 minutes per corner to do the job.
Last: Leg is secured to the head stock with a small face plate with a centered hanger bolt screwed into the plate and leg. I really like this picture of the leg with no visible means of support. 


Bed Post6.jpg (178940 bytes) Bed Post7.jpg (109526 bytes) Bed Post8.jpg (107085 bytes) Bed Post9.jpg (178513 bytes) BedPost10.jpg (155700 bytes)


First: Center steady and steady rest positioned for cutting the tulip top end.
Second: Last cut with a skew on this finial end grain. 
Third: Finial end hollowed with a spindle gouge.
Last: and last: Finished head and foot posts. 


Finished foot post.jpg (105664 bytes) Finished Head Post.JPG (105523 bytes) Finished Bed Posts.jpg (152345 bytes)


First: Finished foot posts.
Second: Finished foot post.
Last: Finished bed.


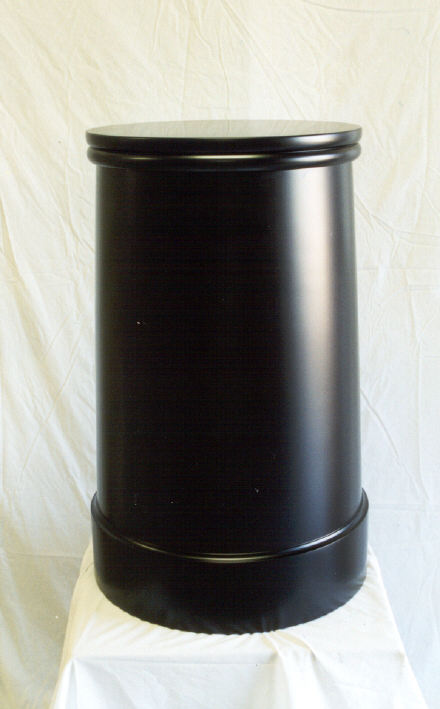
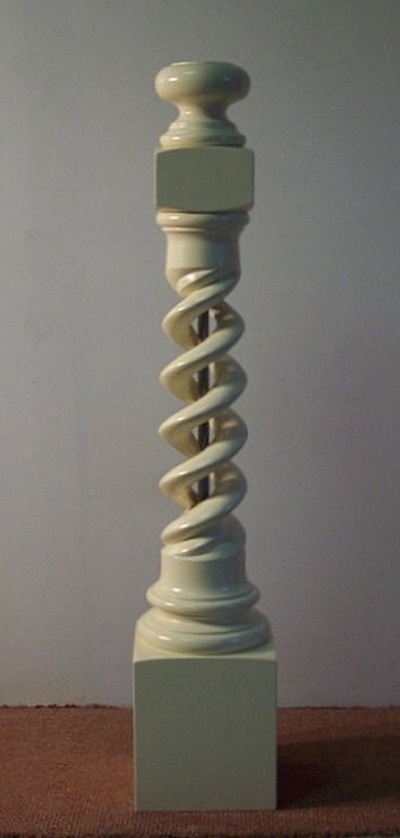
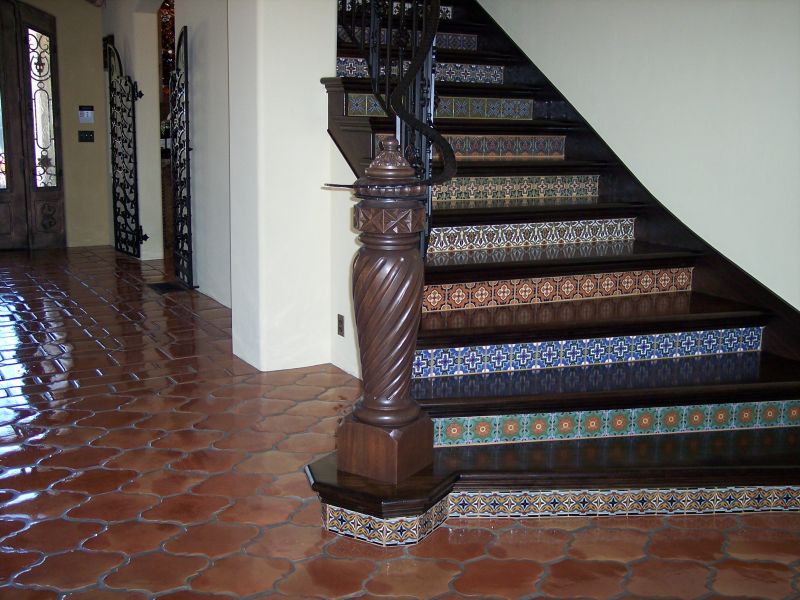
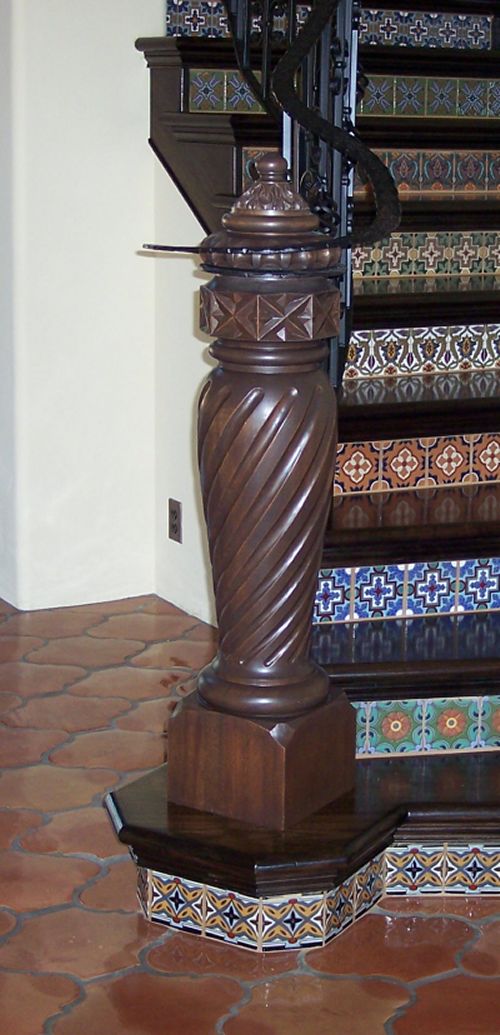
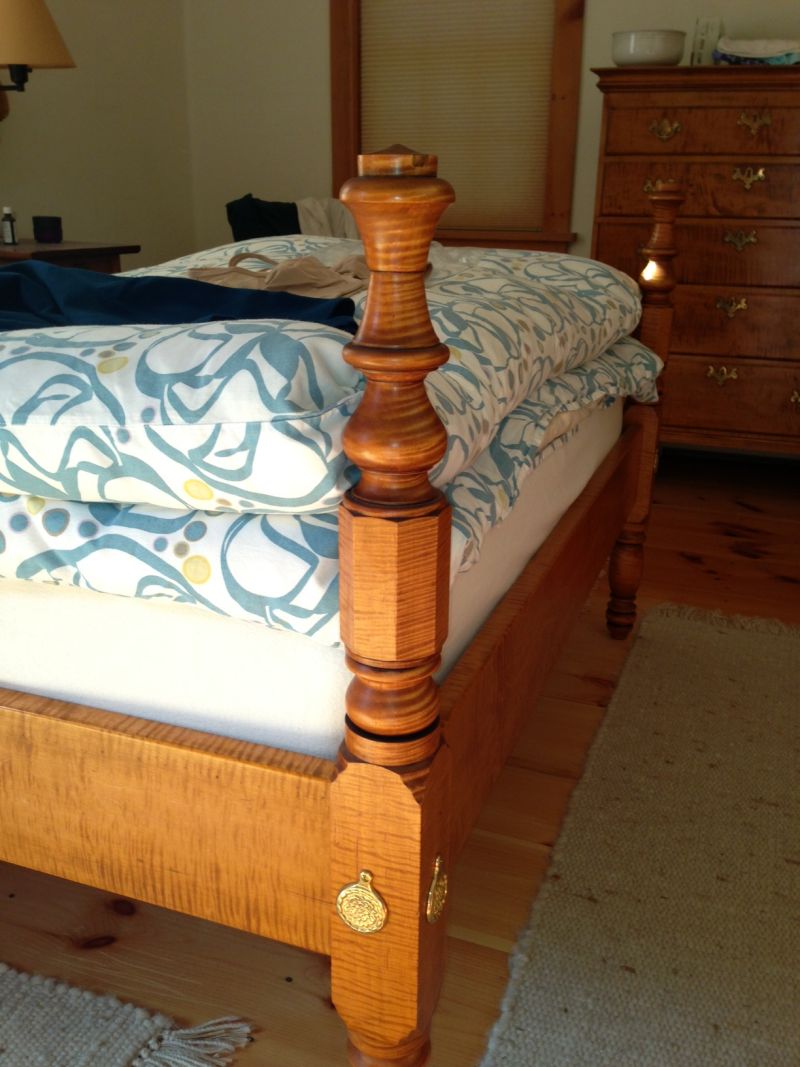
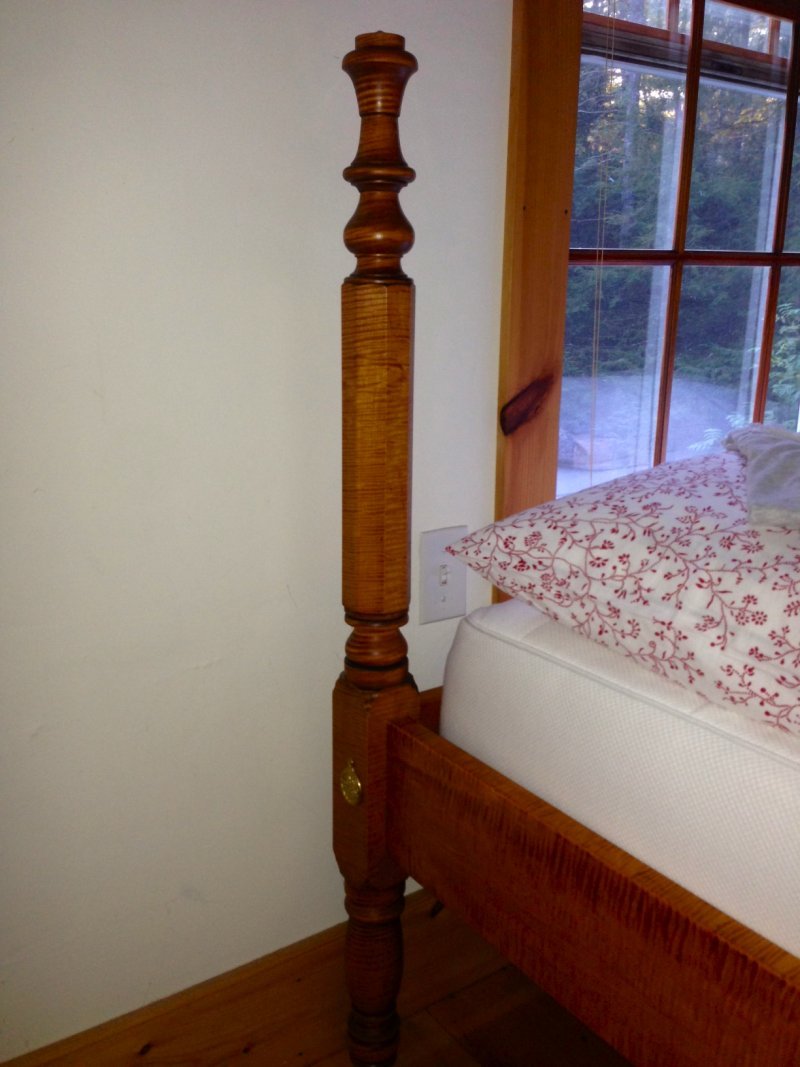
Color and finish work provided by:
GLL Restoration
45 Thurrell Road / Lamberts Lane
South Berwick ME 03908
207 651 5233


Same design for the same customer only this time in curly yellow birch.


CB9.jpg (149259 bytes) CB10.jpg (101017 bytes) CB11.jpg (92567 bytes) CB12.jpg (101248 bytes) CB13.jpg (126634 bytes)


CB14.jpg (131343 bytes) CB15.jpg (107190 bytes) CB16.jpg (106642 bytes) CB17.jpg (96639 bytes)


Below: Same design for the same customer only this time in curly cherry. All of these posts were taken out of 3" thick stock. The finished dimensions were 1 3/4" square with the head posts at  46" in height and the foot posts at 36" tall. 
Last picture shows the outstanding finish job GLL did on the curly cherry posts. 


Curly Cherry Bed1.jpg (114238 bytes) Curly Cherry Bed2.jpg (103456 bytes) Curly Cherry Bed3.jpg (106758 bytes) Curly Cherry Bed4.jpg (74971 bytes) Curly Cherry Bed5.jpg (73584 bytes) Curly Cherry Bed7.jpg (118275 bytes)


Curly Cherry Bed10.jpg (81679 bytes) Curly Cherry Bed11.jpg (70588 bytes) Curly Cherry Bed9.jpg (107387 bytes) Curly Cherry Bed12.jpg (90026 bytes)


Curly Cherry Foot post block 1.jpg (44524 bytes) Curley Cherry Foot post block 2.jpg (36574 bytes) Curley Cherry Foot post block 3.jpg (48450 bytes)


Curly Cherry Bed Post Finished.jpg (193761 bytes)


Beech Burl 1.jpg (273795 bytes) Beech Burl 2.jpg (213747 bytes) Beech Burl 3.jpg (180422 bytes) Beech Burl 4.jpg (225970 bytes) Beech Burl 5.jpg (180893 bytes) Beech Burl 6.jpg (156824 bytes) Beech Burl 7.jpg (140209 bytes)


Time to make a bowl out of this large beech burl I have had for a while. I use this process for all of my sculptured burl bowls.  
First you make a foot socket so you can gather it up in the big chuck. 
To begin with, I always take out the largest core I can. 
The last two pictures show the sculpting process well along. The actual turning part of the project is complete. The lathe is just holding the work and allowing me to turn and lock it into different positions so I can work on it. If you can hold the work you can do something with it. This rule applies to everything you make.
It has a hard oil finish. One soaking coat and another lighter coat after the first is cured. 


Beech Burl 9.jpg (119522 bytes) Beech Burl 10.jpg (133490 bytes) Beech Burl 11.jpg (65592 bytes) Beech Burl 12.jpg (156204 bytes) Beech Burl 13.jpg (172066 bytes) Beech Burl 14.jpg (177643 bytes) Beech Burl 15.jpg (170147 bytes)


Here are different views of the finished piece. I grew up and live near the ocean so shells are among my favorite study objects.                                      December 2017


Home ] Carving ] Signs ] Pattern Making ] [ Turning ] Restoration ] National Archives ] Bagpipes & Bellows ] Sculpture ] Bellamy Eagles ]


Top of Page